What was the most successful lesson you ever taught? Why was it so good? How do you measure its success?
I’ve recently been reading a classic on motivation: “Drive: The surprising truth about what motivates us” by Daniel Pink (2009). In part three Pink gets into the DNA of motivation; purpose. You can focus on intrinsic and dress up extrinsic all you want, but if your activity lacks a deep purpose, it will fall flat.
Last week I was interested in wrapping up a small unit on plural nouns. How could I close it out? There is the old-school paper method, where I plop a worksheet in front of them with a list of singular nouns the students must make plural. I could make a Google form full of questions. That would only substitute the paper. What was something I could have students do that would be more purposeful.
BloxelsEDU is an app that is free to download and use. You have to purchase an account

to build games. But, with one account, I can make many games that can be published to an online “Arcade” for my students to use. I have been taking a course through PD Campus, created and taught by Ken Ehrmann, where I have learned how to use this creative tool to engage my students in meaningful critical thinking.
To assess proficiency in making nouns plural in a super fun way, I decided to make a video game. I was interested in building into the game an element of reteaching. Additionally, the video game could show students some new elements of gaming design. (We have been working on crafting our own personal video games in class; I got accounts for all of my students through my PD Campus course–I highly recommend this professional development/grad-level class.)

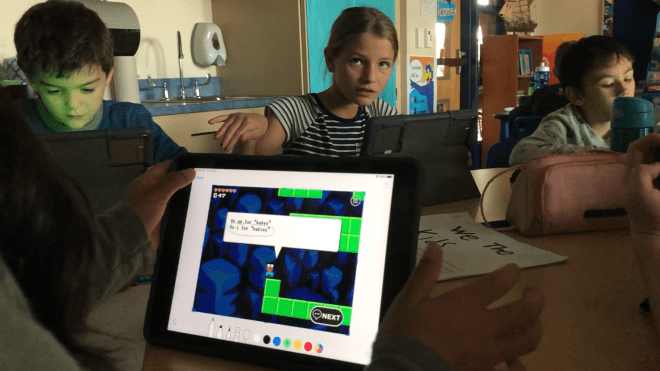
The game would be a maze. The students’ purpose was to get to the end. What do you get when you get to the end of a maze? A feeling of accomplishment; I don’t have to tell you that this feeling is way better than completing and turning in a worksheet or filling in a Google form!
Here’s how I made it. I created a template frame within BloxelsEDU game builder platform that provided a few options of changing directions, so that students would be presented with having to make decisions on what way to continue traveling. I made sure that there were openings on the sides, top, and bottom that lined up with opposite sides, etc. Then I copied and pasted the template, over and over, making a huge waffle of terrain for video game characters to hop and run through. Next, I used coin blocks to select the direction that I would have the character travel. I replaced terrain blocks with yellow coin blocks in one direction choice at each stop throughout some of my maze waffle. From time to time I stopped and played the game, because some of the decision rewards came dangerously close to others. I wanted to be sure that the weaving back and forth would work and not cause a player to backtrack.


After deciding on a place to end the maze, I went back and put red hazard blocks and purple, moving enemy blocks in the paths that would NOT be the correct decision. In other words, a student would be presented with a question that had 3 choices, one of which would immediately reward them with coins, and two that would harm the character, taking away hearts. At this point in the game development I could still view all of the different colors.
 Before disguising the blocks, I first created all of the questions and answers that would guide students through the maze. I varied the nouns and the way they were presented. Some questions had fill in the blanks, while others presented a singular noun, but asked what the plural version would be. After planting all of the questions and directions, I played the game, to make sure that the player would not have any hangups. This showed me places where I ought to spread out the path of the maze. There were places where it folded too close to itself. I didn’t want players to accidentally skip questions by stumbling into the correct channel through a mishap.
Once the path was complete, it was time to dress up the game. I made a fake green block in the “Art Builder” of BloxelsEDU. This block was brought into my Plural Noun Maze to disguise all of the yellow coins, red hazzards, and purple enemies. I also hid some life-giving hearts with the fake green blocks. Another block that I made in Art Builder was a “transparent” block. I saved a square of nothing; containing no color at all. This I used to disguise the word blocks. I didn’t want students to see future word blocks while they were playing the game. They would assume the correct path of the maze. Additionally, I hid some hearts, enemies, and hazards with the transparent block. Come to find out, when I made them invisible, it took their power away. A player can walk right through a transparent hazard, and an invisible enemy really is a ghost. A player would never know it was there! Lastly, I wanted the end of the maze to be on a floating, invisible terrain, but when I turned the green blocks invisible, they may as well truly disappear. The player cannot stand on the transparent terrain. Oh well.
New @BloxelsEDU game: #Arcade no. 26523370#ThePolitePirates #PluralNouns
It’s a #Maze.
Ss must decide correct #spelling of #Nouns to find correct path.
Incorrect answers are #Hazzards and #Enemies, in order to #SelfCorrect.#EastPennPROUD #3rdGrade #Grammar@KenEhrmann pic.twitter.com/qDy4zp9CMo— Matt Weimann (@MrWeimann) October 25, 2019
Now that my maze was complete, it was ready to administer. Before having students play it however, I devised an ingenious plan for monitoring their work. Students would read each question, then take a screenshot of the answers. While the screenshot was still

available, they would “mark it” up by circling what they thought was the correct spelling of the plural noun. Then they would save the screenshot and travel in the appropriate direction. They would then find out whether they were right or wrong by immediately receiving coins or encountering hazards. I put these instructions in a visible word block at the beginning of the game, along with one that warned students that the maze’s directions were hidden inside invisible blocks.
Students enjoyed playing the game. They couldn’t help but show me their progress. Many felt the need to point out hidden things that they found, as if I didn’t know they had been placed in the maze! Ha ha.


Finally, when everyone was done, I posted a generic, simple Google slideshow to our Google classroom, making a copy for each student. They populated their individual slideshows with all of their screenshots of the game. I was able to go into Google classroom and access each student’s slideshow to see exactly what they had circled as their answers for spelling plural nouns. I gave kids scores of 1-4 depending on how successful they were on their initial guess. It was funny, because I could see in the screen shot areas where students had accidentally or otherwise already found the coins in the correct direction! The screenshots also betrayed loss of hearts, indicating that students had checked to see where hazards may be. But, I was totally okay with this. The whole idea of the game was for it to be self-correcting. If they figured out what direction they ought to go before looking at the answers and circled the corresponding answer, more power to them. You got it right, one way or another! That’s life!
The lesson, the maze, the assessment… it was all totally awesome, but there is more. Because I shared the game to my BloxelsEDU classroom, in addition to publishing it to the “Arcade”, my students now had access to the game as something that they could alter. They opened it up as a “Remix” and were able to see all of the different tricks to the trade that I had developed. They could learn how to make their own games/mazes, but also simply change mine and put in different questions, totally change the path of the maze… The BloxelEDU world was the limit! And, now you can too! Enjoy.
Pink, D. H. (2009). Drive: The surprising truth about what motivates us. New York, NY: Riverhead Books.

 My dad and sister visited over the July 4th weekend. When I was at the grocery store picking up supplies for grilling, I was meandering through the toy aisle searching out things to keep people occupied. We have a pool, and everyone will want to hangout by it, but as great as water is, it gets boring, eventually. My eye was caught by some outdoorsy games; GIANT dice, checkers, and… dominoes. I brought home one of the giant wooden domino sets. There was only 28 pieces in the set, but maybe we could figure out the game, together.


 I was going to title this blog “The Building Blocks of Math Construction” because I liked the play on building/constructing learning from material things. Really, though, I think the most important thing about this lesson was plain old ACTION. Yes, it was creative and fun, but rather than teachers reproducing the exact lesson, I want to share the philosophy behind it. It is a difference between building a beautiful, popular burger joint that everyone in a region admires and franchising the concept all over the world.
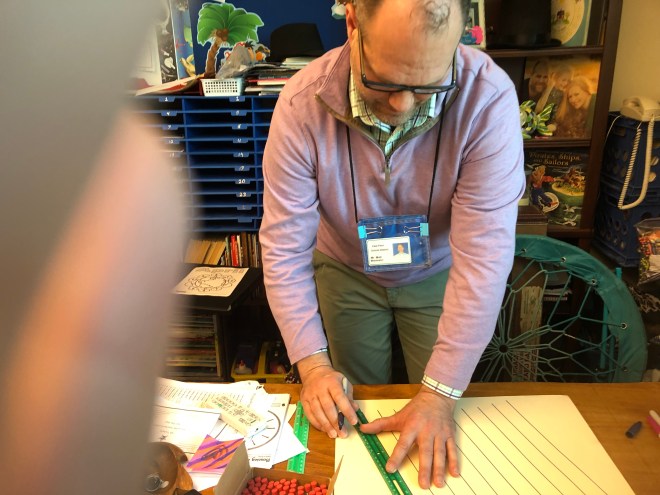
  This is what I did. In thinking about teaching money, I was imagining setting up some kind of store in the classroom. In stead, I brought my daughter’s old school, wooden building blocks into the classroom. I thought I would have the students compete to construct the tallest structure while using the least amount of supply: They would stack blocks of value to create vertical towers and add up what it cost them.
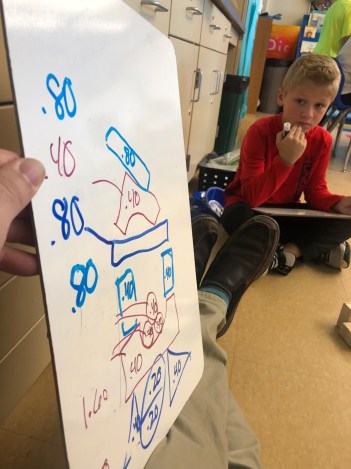


 After this experience I realized that the rest of the groups would probably need some guidance with this project. I decided to use math time to teach how to evaluate constructions. While students did some online work, I brought groups over to the construction corner of the room. I went over the prices of each of the four styles of block. We analyzed similar blocks and categorized them according to cost. Then I built a simple structure with one of each price. Students used dry erase boards to add up the cost. I also had manipulatives (plastic coins) there to help. It took a few tries, and as students showed success, I let them build a four block building. They had to add up the cost before moving on. With each success, they were able to build more.


 The class is broken up into two equal groups. I’ve done girls versus boys, odd student numbers versus even student numbers, and broken the class up according to desk arrangements; Doesn’t matter how you do it. The NFL teams that are entering the playoffs are listed on the board. Kids get the lunch/recess time to decide on their group’s team. Then the players are passed out. I usually project a few pictures of each team’s jerseys on the wall for kids to model the coloring of their figure after.
  I got this idea from John Burger, my mentor in 2010 at Willow Lane. It was his last year, and we were teaching second grade. I wouldn’t be surprised if he got the idea from someone else. That’s how teaching works. If you like the idea, use it, go for it. Good luck!
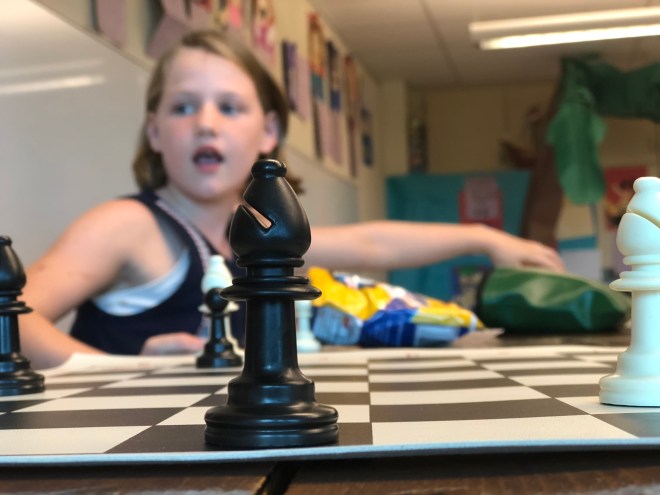
 I was glancing around my classroom before I unplugged the Christmas lights and took off, yesterday, and I saw this: A chess board had been “put away” by being placed on the Red Bin. The Red Bin is the place where notes, money, messages, etc. for the office are placed first thing in the morning. They then get sent down to the office with our lunch count in the green envelope seen under the chess set.
  We are just beginning our school chess club, this year. I accepted too many members, and don’t have enough of the nice big vinyl boards with 3 inch plastic pieces for everyone. (Christmas idea;) So, we have been using a mishmash of different sets. The one in the picture is magnetized, that’s why the pieces can stay in place.


 I couldn’t possibly be more excited to be starting a chess club at Willow Lane Elementary! This Tuesday is our first meeting. I had tossed around the idea of starting this club when I began teaching at Willow, 8 years ago. Instead, I began an after school club that published a school newspaper: