We all know that selective word-choice can enrich writing (Academy, 2021). It will lend clarity to a story, deepen emotional attachment to a character, and broaden the understanding of a topic. Contrastingly, misused vocabulary can harm the message of a text. And, weak words will water down its substance. Therefore, building a thorough understanding of a wide array of words will prepare students for increasingly effective communication. As it turns out, I have a game that will make your learners crave vocabulary-building.
Would you like your students to beg you to learn new robust vocabulary? Try Balderdash.
I call the game “Balderdash.” (There is a board game version, but I’ve never used it. From the description, it seems to contain the gist of what I present here.) The name is unique enough to spark interest and be memorable. It also lends itself to the core of the game; Playing with unknown words.
I’ve used Balderdash to introduce vocabulary, deepen background knowledge, and explore literature concepts for years.
This is how I introduce the game to my students. I start off by explaining that this is a game of definitions.
“How many times have you been reading an entertaining story, and really enjoying yourself; Then you come across a word that trips you up? All of a sudden, you don’t know what is happening. Why are the characters acting so weird? What did you miss? They aren’t always big words, but misinterpreting the meaning of a word can turn a heretofore simple tale on its head (irony in italics;).
“In this game, you will be presented with a word that you probably don’t know. That is okay. You aren’t supposed to know what the word means. If you DO know what it means, or if you think you know what it means, that is okay, too. But, don’t tell anyone. You can earn points by writing down a definition that is really close to accurate.”
Here’s how it works
Sometimes, the game originates organically. In the middle of conversation with my students, I might use a word that they don’t know. Rather than simply telling the Polite Pirates what it means, we break out Balderdash to have fun learning its definition.
Have a list of your students handy.
Hand out index cards or sticky notes. Tell students to keep the papers UNFOLDED. Also, do not write on the cards until instructed. (They must look the same.)
Have your students write their names on the top. Everyone should use pencil, and don’t do anything to your card to make it appear unique. (You will understand why in a minute.)
Next, come up with a word that students will not know. You could begin with “balderdash.” This would make the game that much more memorable! You could use a vocabulary word from a list of words you want the class to learn. You could even flip through the dictionary, looking for tough words.
Write the word on the board, so that everyone spells it correctly. You may want to write down some phonetic tips. I will sometimes explain what part of speech it is; perhaps even a hint. (i.e. This is a noun; and although this game might be named “Balderdash,” that isn’t what it means.)
Tell the students to make up a definition for the word. Explain to them that their peers are going to vote on which definition sounds most likely to be true or accurate.
While the students are writing their definitions, you look up the true definition of the word. (I don’t recommend relying on your own interpretation. Even if you do understand the word, it is best to deliver the scholarly definition first.) You will need to put the definition into kid-friendly language. Your definition will need to match the ones that students hand in.
Walk around and collect everyone’s index card. I recommend using a bucket or top hat for this.
Read through the definitions to yourself, making sure that you understand what they say and are able to read them fluidly. You don’t want to supply any “tells” that one is NOT the accurate definition. If there are any that are similar to the actual definition, provide that student a point and remove the definition from the pile. (Reading 2 of the same definitions would let them know they are the true definition.)
Next, place them back into the hat or bucket. Pull one at a time and read it. Do this once through without any voting.
Then, repeat the process, but after each reading, have students raise their hands if they think it is the correct definition. You can only vote once, and you can’t vote for your own definition.
Give the pupil who produced the phony definition a point for each vote. Whoever votes for the true definition also gets a point.
After each round, share who earned the most points and the real definition.
In the same way a serious athlete might take creatine supplements to boost muscle-building ability in the body during intense exercise (Creatine, 2021), using games to increase enthusiasm for definition development can motivate kids to grow their vocabularies. Rather than get fatigued when faced with unknown words in texts, your students will view these as opportunities for growth.
An athlete takes creatine supplements to prepare their body for doing a little bit extra in each exercise, making the workout that much more beneficial. Balderdash is a reason for collecting large, complex, unfamiliar words, and tucking their meanings into memory banks for future use. Plus, it’s a lot of fun! game
Yesterday was the first day of school, and a common phenomenon happened. Students would put away their folders and notebooks when we weren’t quite done using them.
It was frustrating to wait for students to get their tools back out of their desks, so I thought of a way to help them understand why they ought to wait to be told, “We are NOW done. You may put away your ___.” I made up a word picture; a story.
A family’s getting ready to have dinner. The kids are given plates and silverware. They sit down at the table. Mom brings over some rolls and butter. Dad checks on the casserole in the oven.
The kids butter their rolls, eat them, and get up from the table. When they bring their dirty plates and silverware over to the sink to clean them up, Dad asks, “What are you doing? The casserole is just about done.”
“We are cleaning up our plates. We’re finished,” the kids announce.
Incredulous, the dad explains that rolls are not the meal and that they should wait at the table. “It wouldn’t make any sense to clean your plates before eating the delicious casserole!”
“Your notebooks are the plates from this story,” I told my class. Their eyes lit up with understanding.
(I had been telling the same kids to get their folders back out of their desks many times. I could see that the class was sensing my frustration. Rather than repeating what was turning into an ignorable mantra, I invented this word picture.)
“When you place your folders back in your desk, it is like those kids washing up their plates when all they ate was a roll! You should wait until I tell you that we are done with our notebooks, before you close and store them away,” I explained.
How many times are we too busy or rushed to take the time to make motions meaningful? How often do you tell students to do tasks or complete assignments with the expectation that they will just do it because you told them to? In addition to having clearly defined reasons available for your students, I challenge you to invent narratives that not only explain your motives, but deepen students’ understanding.
My quick short story instantly did what lots of complaining couldn’t touch. A couple of times I saw students preparing to close their notebooks before we were finished with a task after I had shared my story. All I had to do was jokingly ask them, “You want desert; Don’t you? You shouldn’t put your plates in the sink until the dinner is decidedly over.” They knew exactly what I was saying, even though I didn’t use the word, “notebook.”
How have you used symbols, nonverbal communication, storytelling, or other tricks of the trade to clearly communicate classroom procedures and pedagogy? Was there an instance that worked particularly well? Please share.
“Sometimes I turn the air conditioner on to lower the humidity, even more than the temperature.”
What do you do to “condition” the climate of your classroom?
I live in the North Eastern part of America, a land full of extremely different climates. When my daughter complains that it is raining, I tell her about places right in our country where it hardly ever rains. The people who live there cannot plant the gardens that we can. They don’t enjoy frequenting forest hikes, because woods are too far to visit regularly. With a couple more examples Scarlet was convinced that foregoing a pool day for some rain might be worth it.
As wet as it is around here, we are blessed with relatively high humidity. I lived in Florida for a year, so I know what humidity is. In Pennsylvania, it comes and goes, thankfully. But, there are days when you walk outside, and it feels like you are swimming to your car!
It’s my opinion that high levels of humidity are uncomfortable. I don’t enjoy feeling sticky. It can even cause objects to deteriorate faster.
The humidity makes the air feel even hotter than it actually is, too. This is because our natural air conditioning won’t work when the air is too humid. Our bodies produce sweat in order to cool off. The cooling sensation comes from the sweat from our skin evaporating. When there is already too much moisture in the air, the sweat doesn’t have anywhere to go! (Krueger, 2016)
My wife visited Big Bend National Park in Texas a few years ago. She was conducting research there, in the summer! It was well over 100 degrees, but “You don’t feel it,” she explained. “It’s a dry heat.” I have never had the privilege of experiencing “dry heat.” The dryness of the air in desert climates or areas that receive very little rain (<30% humidity) feel cooler than the actual temperature because of how quickly the sweat evaporates from your skin (LaNore, 2021). In the same way that you don’t even notice sweating because of how fast it disappears, you won’t realize just how hot the air is.
One thing that I like about living in Pennsylvania is the variety of weather. Unlike Florida, we get breaks from the humidity. But, this means that we don’t acclimate to a constant feeling of stickiness. When the humidity hits, it is extremely noticeable.
The good news is that you can “condition” the air to be less humid. I was telling a friend just the other day that there are times I’ll turn on the air conditioner and set the temperature at only a couple of degrees cooler than the actual temperature. Why would I do this? Using an air conditioner can dry up the air (Anderson, 2017).
You may be interested in “deep-diving” the science behind air conditioning, first invented by Willis Carrier in 1902 (How do air conditioners work?). Basically, air is sucked into a machine through a “compressor” that uses a cooling agent to lower the temperature of the air.
The gas then moves through an “evaporator” (central air) or over an “evaporating coil” (window units). This is when the chilled air loses its moisture. The heavy water particles are left behind, as the cool dry air exits the unit. You can actually see the water vapor leave window units on the outside of buildings. There is usually a hole where water drips out.
Okay, so now that you have journeyed with me through the annoyance of temporary high humidity levels and how to feel comfortable, it is time to readdress the initial question: What do you do to “condition” the climate within your classroom?
Have you ever walked into a space where the tension is so present that you feel it in the air? Have you ever felt your own blood boil to the point that you are heating up the room? People, including us teachers, blow their cool. We all get upset.
I don’t know about you, but I’ve witnessed student after student experiencing frustrations (technology can sometimes stimulate this;) where one kid’s attitude begins to affect another’s, until the whole room is boiling over with irritation. I’ll usually catch the mood before it gets out of control, and I’ll have everyone practice a mindfulness technique. We have to reset our soles.
There are times we have to literally, physically leave the educational space. I’ll bring everyone outside. I’ve even taken my class for a walk around the school, just to return to our room and work. They chuckle incredulously when they realize we did nothing more than roam the halls. It works, though. The “humidity” exits the room with us, and it “evaporates” off of our persons, out of our minds, when we move our feet.
When frustration is mild, or if I can anticipate potential irritation; maybe we are about to do an assessment or practice something the students don’t enjoy; I will have the class do Tai Chi. This is a very pleasant way for the kids to get out of their seats, move their bodies slowly, and practice mindful breathing. It is a great way to lower the tension (humidity) before the “temperature” rises.
How do you condition your classroom environment? How do you know when you ought to?
One year ago I got in my head that I would share with my daughter Scarlet the theme of my classroom: “Be Classy.” Although, at 7 years old, she is increasingly similar to the students I teach in my third grade classroom, speaking to only one child is surprisingly different from talking to all 25 kids at the same time.
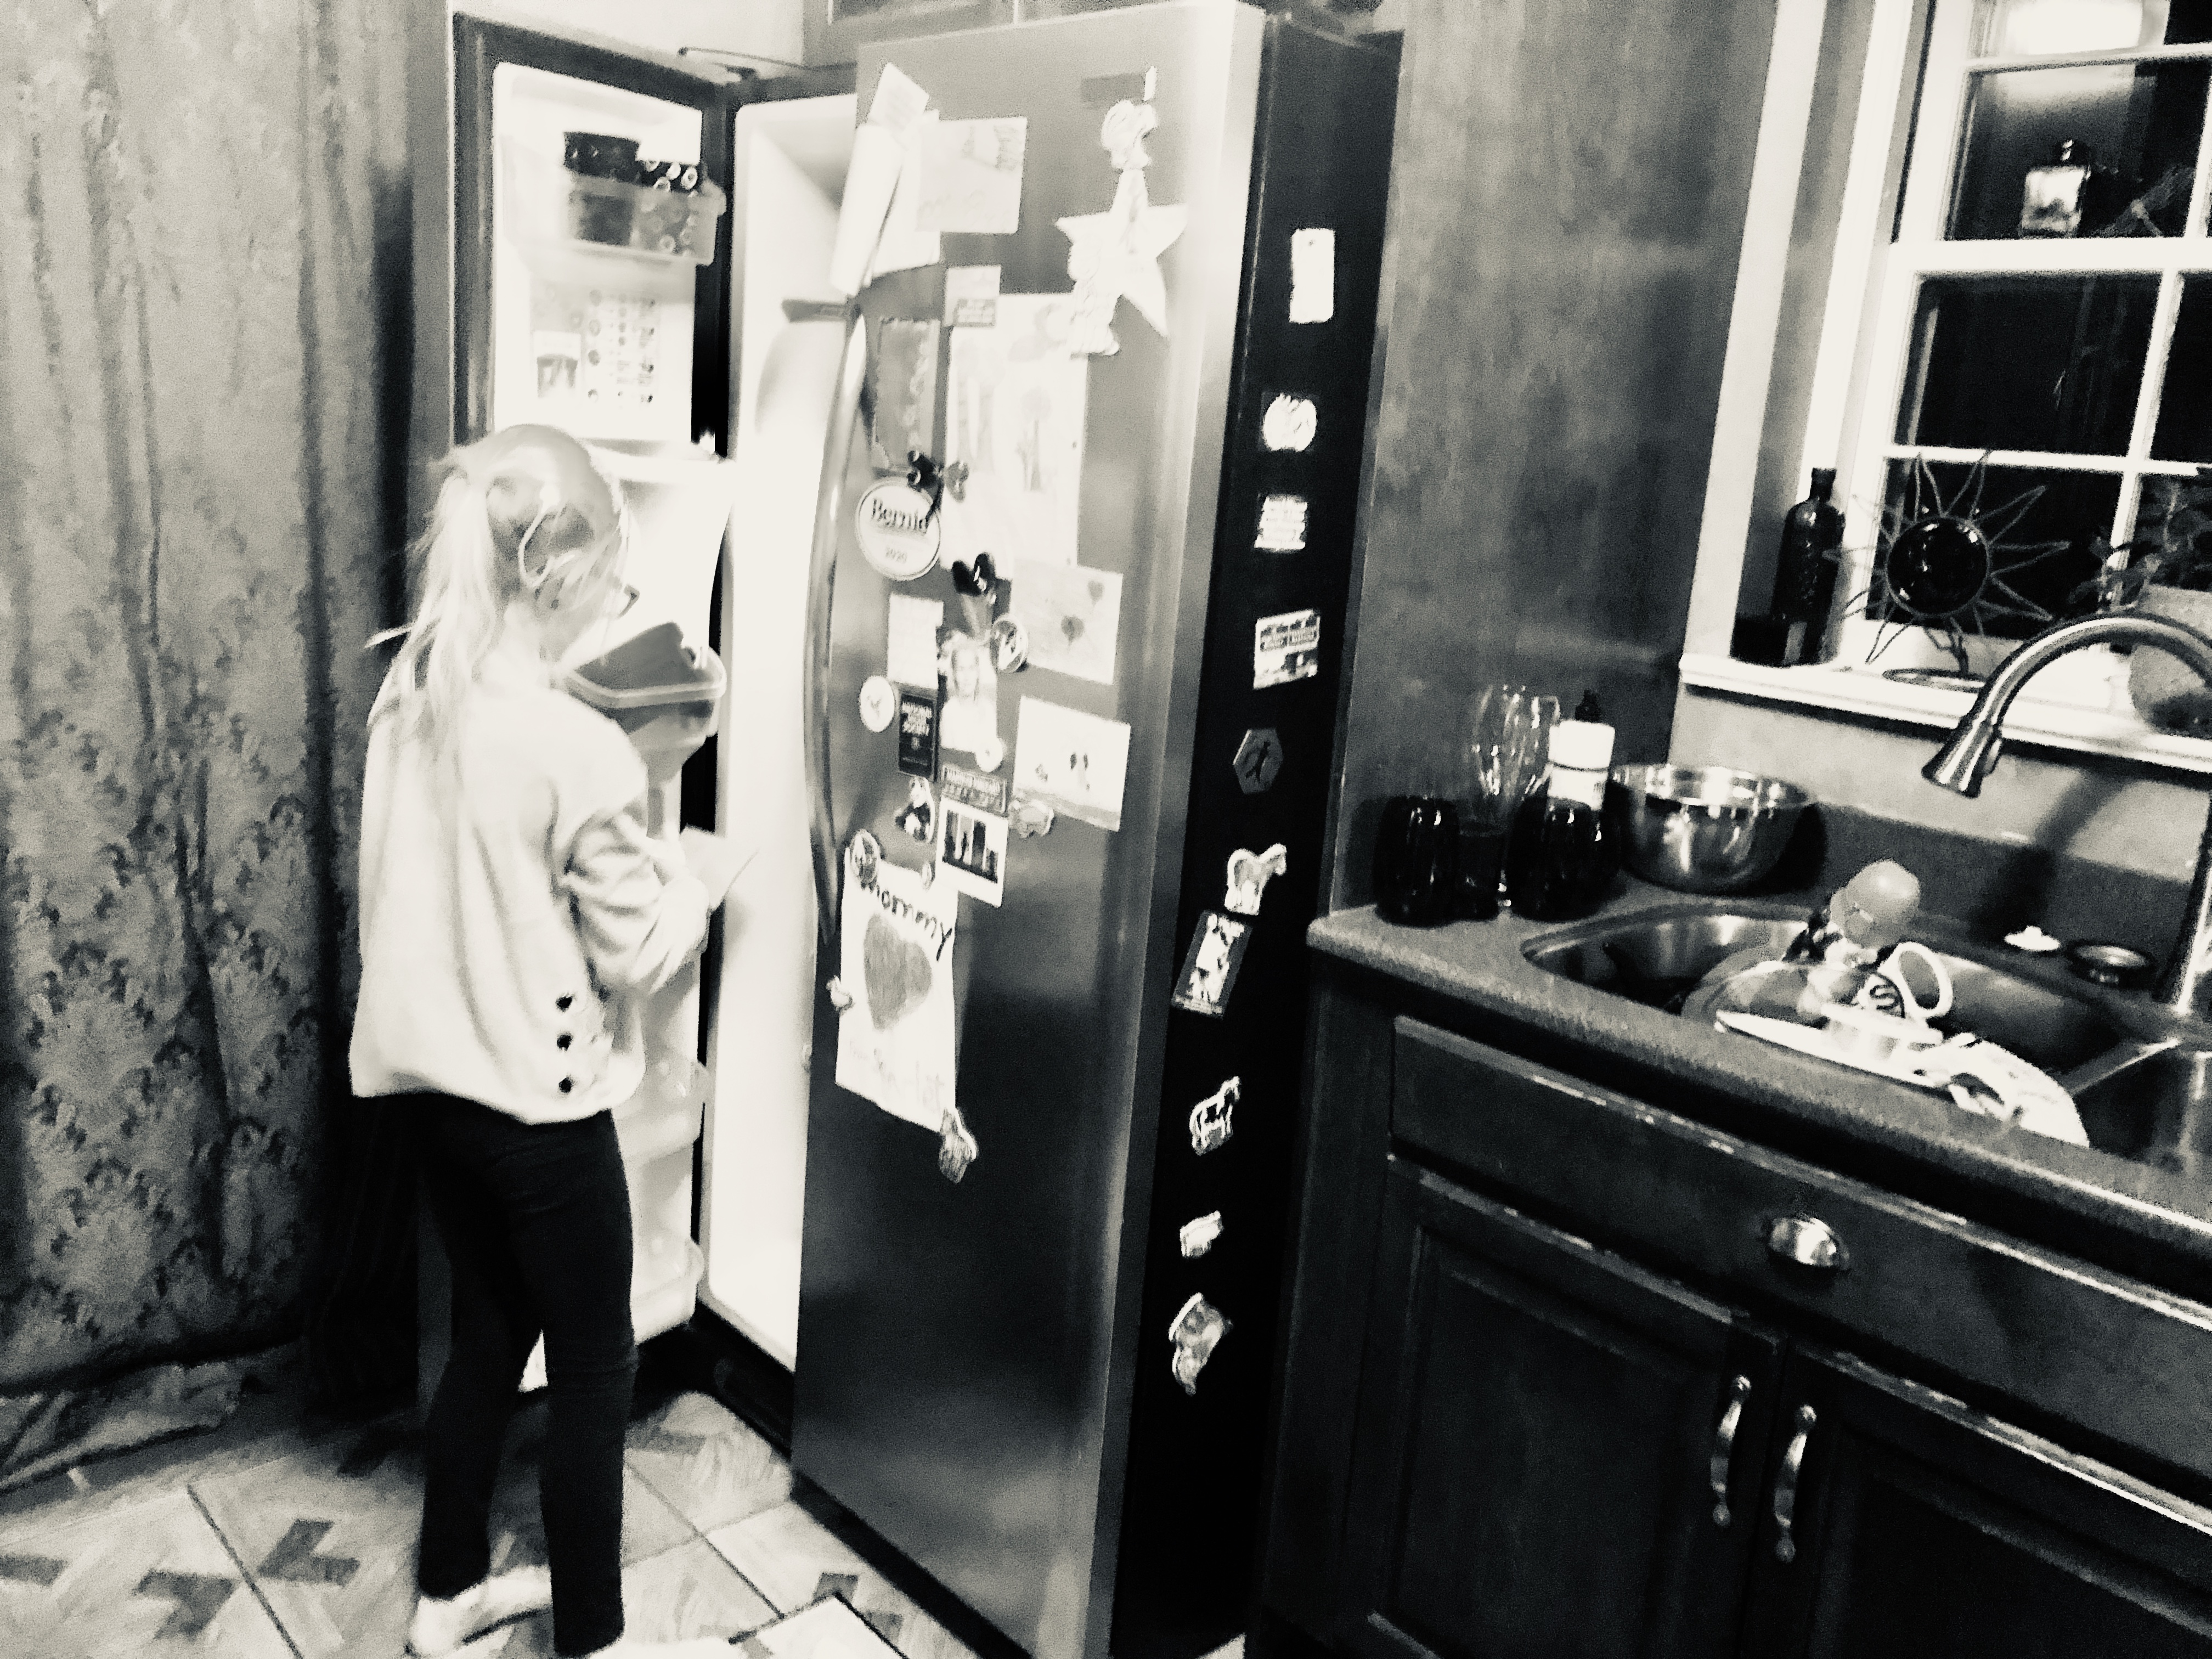
Scarlet takes care of her lunch box.
When I call students to the carpet, they naturally model for one another; First, one begins making his way to the carpet and sits down. His friends follow, one by one succumbing to the pressure of conformity, until we are waiting for one or two stragglers.
Scarlet is an only child, and when I ask her to do something, there generally isn’t a model beyond myself. Luckily for everyone involved, I am skilled at explaining the “why” of most things.
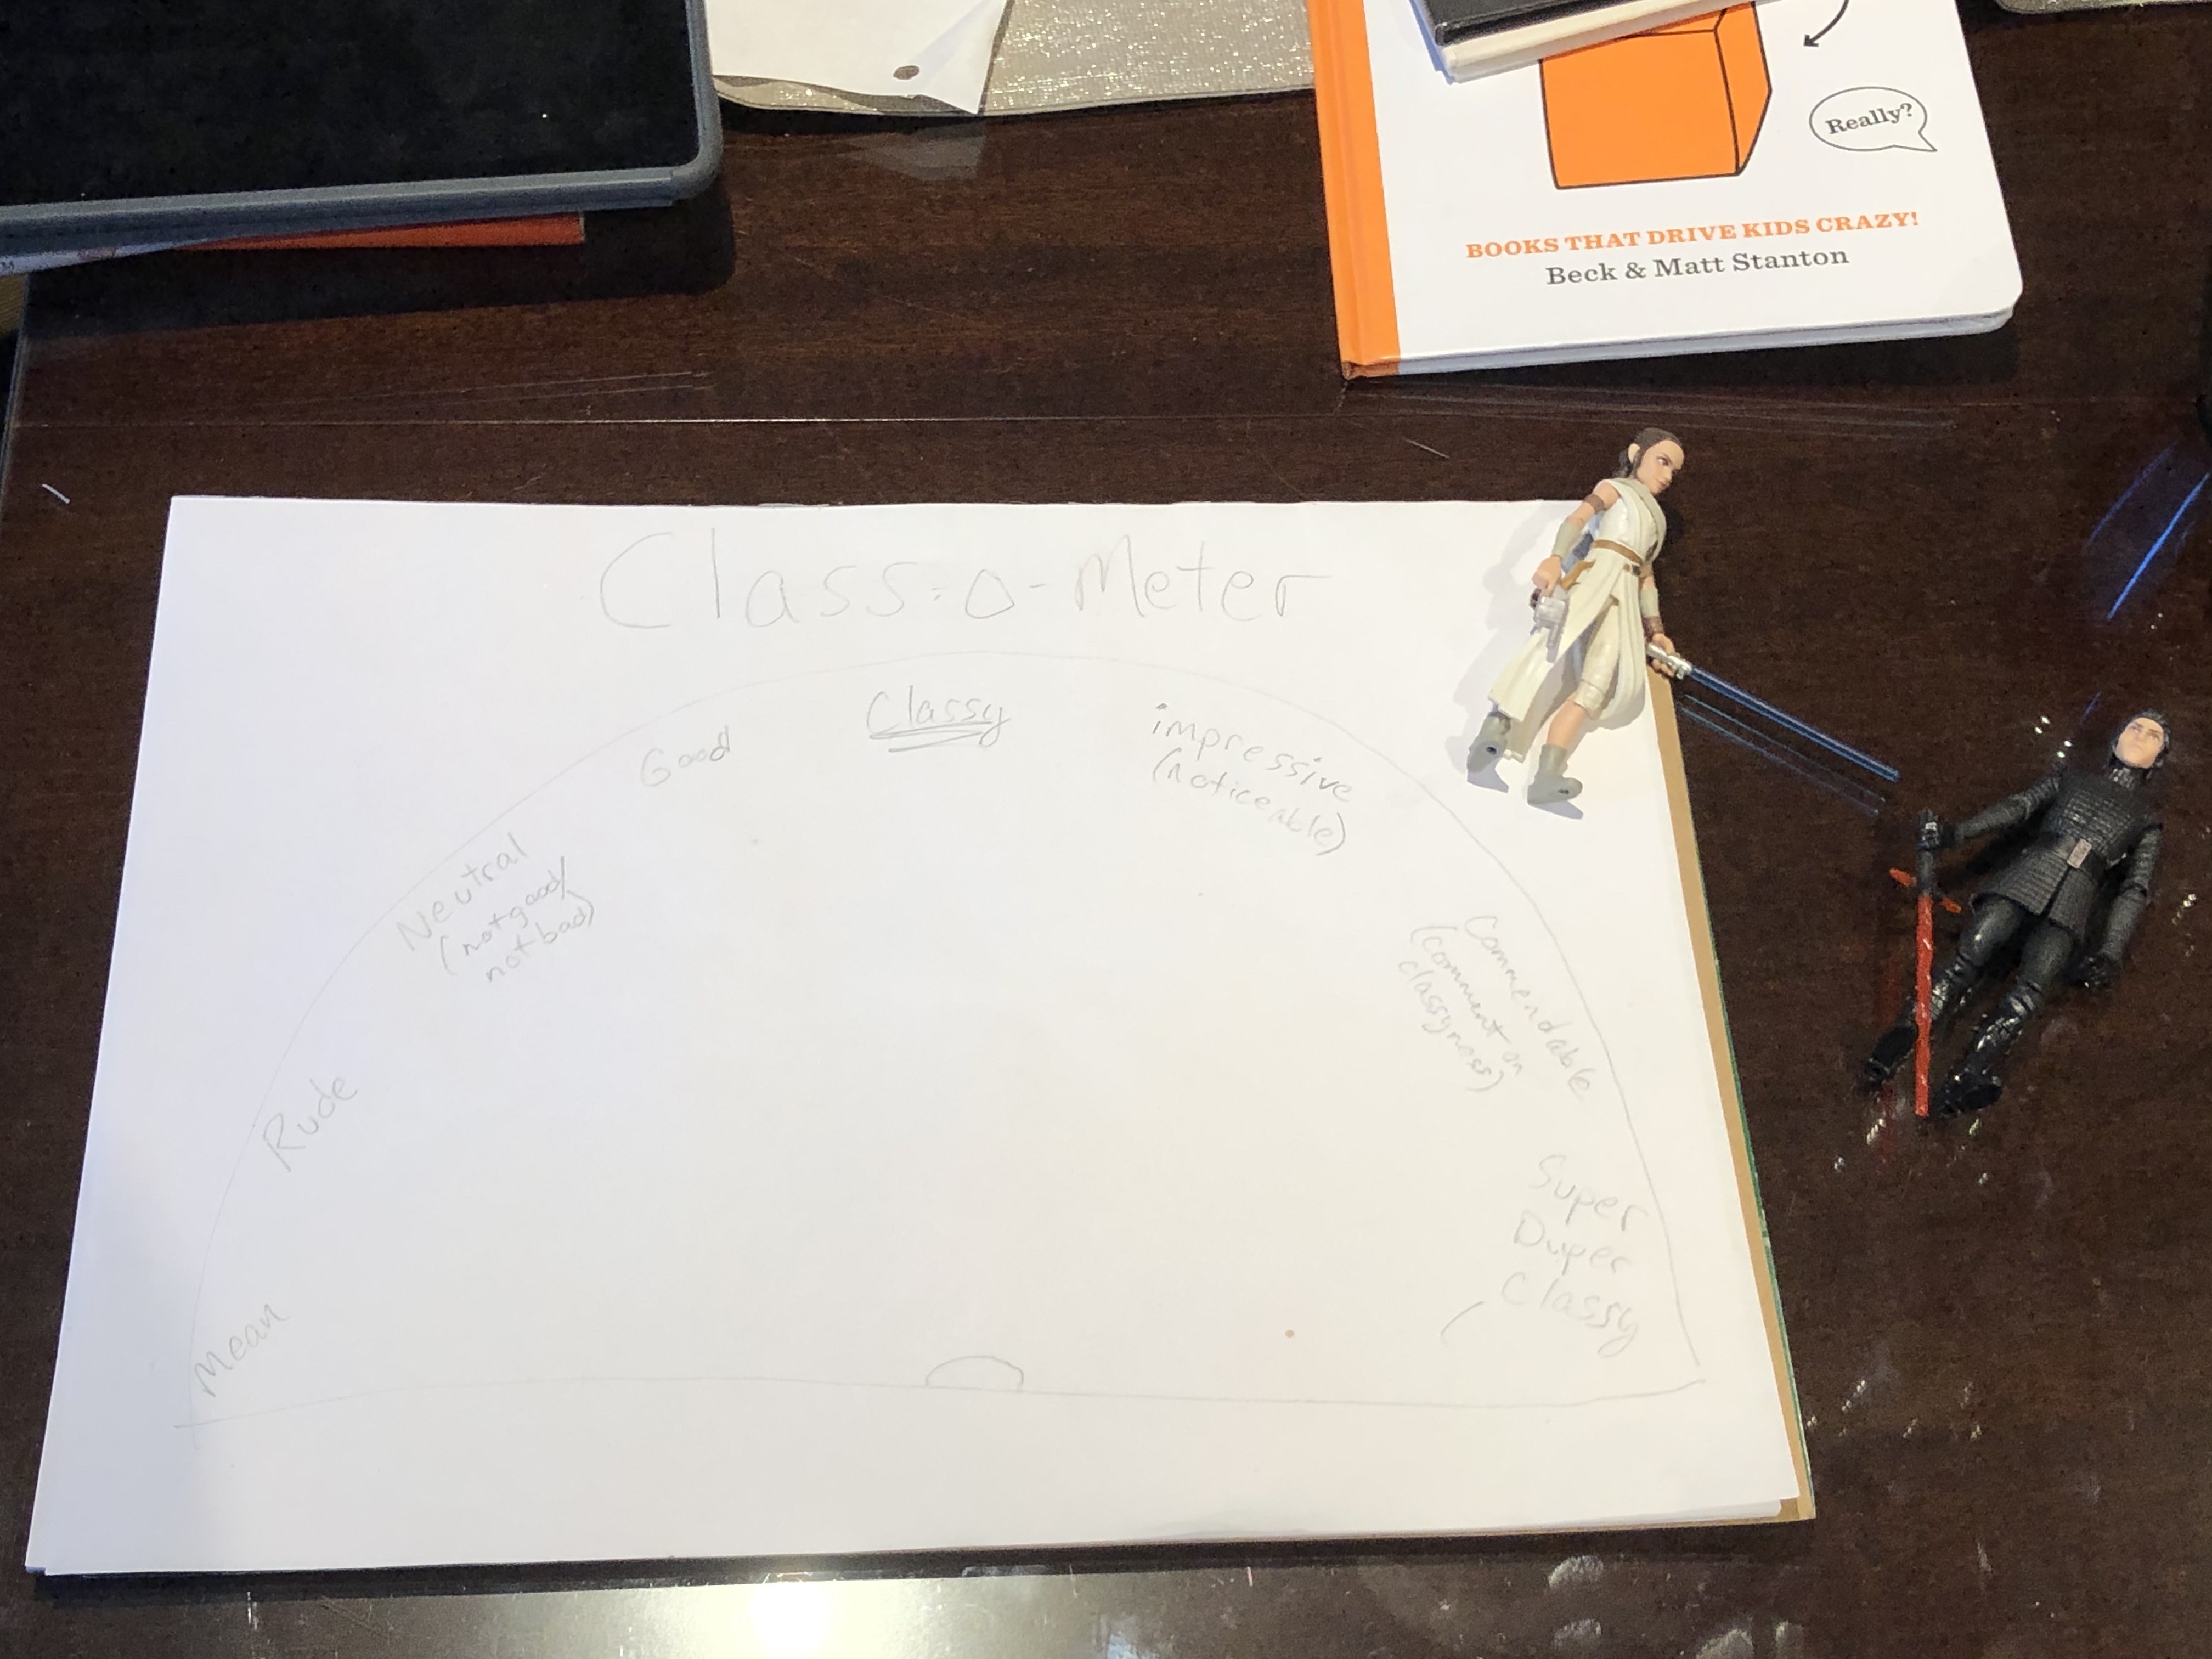
When it comes to describing what it means to be “classy”, however, I found myself searching for synonyms. It struck me that a classy attitude, and even actions, could be charted on a map or continuum. This is where the “Class-O-Meter” came from.
I grabbed some of Scarlet’s large drawing paper and sketched out a dial of sorts. Diagramming and categorizing levels of class made my thinking more clear, even to me!
Just found the original “Class-O-Meter”
The paper was left on the dining room table. We referenced it quite a lot at first. Scarlet and I talked about where certain actions would have measured with the Class-O-Meter. The idea was for it to get colored in and kept. In stead, it got “picked up” with everything else, during one of our house-cleaning sessions.
I was pleasantly surprised when it resurfaced yesterday. And, looking it over sparked new thoughts.
At the time of its conception, I liked the idea of having a go-to-goal of classy behavior being slightly beyond simply positive. As in, it isn’t good enough to “not be bad”. Strive for class. Don’t just clean the car. Wax it. Polish it. See your reflection in its finish.
Is it possible to be “Too Classy”?
Of course you can’t live your life at “award-winning” levels of class 100% of the time any more than you could constantly drive at 100 miles per hour! It would be dangerous to drive through town at that speed. Navigating sharp turns might mean slowing down to “good.” How might the people around you feel if every single thing you did was outstanding?
Continuing the metaphor, if you were to get stuck in traffic, it could very well be beneficial to put the classy vehicle in “neutral”.
Here’s a controversial thought: Is it ever appropriate to be rude or mean? Could it be that, while not classy, it is sometimes necessary? I’d love to hear thoughts about that!
Mommy and daddy are having Scarlet do more and more things for herself. Taking care of her lunch box at the end of the day is one of her new duties. Huffing and complaining, or requiring her parents to hound her to take care of this is far from classy. That is rude behavior. Needing a reminder, but taking care of the lunch box independently would be neutral, neither classy not “unclassy.” Doing the chore without any reminders, and doing it effectively and immediately would be good, which is moving closer to a classy attitude of taking care of school materials in general, working toward being a helpful contributor to a friendly family life. If you want to be really impressive, you could ask if there is anything that mommy or daddy need help putting away, take care of things other than just the lunch box, keep toys and supplies nice and neat, etc.
I’m pleased to announce that Scarlet has performed a commendable act recently, in that she has been asking to learn how to wash the dishes. There aren’t any awards for classy family life, but if there were, would you win one? How are you training your kids or students to behave in a way that would get them recognized for being classy?
There is lots of talk about how great failure is… in books, articles… all over the Twitterverse people are praising the merits of accepting failure. How great is it, really? When was the last time you experienced a real, core-shaking, devastating defeat? It’s pretty painful.
A couple of years ago it was popular to make compilations of videos of people “failing” at tasks that made them look silly. Guys with skateboards fumbling rail-slides down handrails; girls messing up gymnastics; trucks miscalculating the height of overpasses; and more. I fell into the trap of watching several of these. Is there something therapeutic in watching others fail? Laughter is definitely a healing salve, and these short clips will cause you to chuckle, for sure. But, many of these videos are bloopers of people attempting to do amazing feats. Where are the compilation videos of successes? Also, the seemingly therapeutic laughter is achieved at a cost, albeit difficult to measure, to the person whose failed feat will live on in infamy forever captured by video shared so that the public can laugh at his or her embarrassment. Make no mistake about it. We are laughing at others’ misfortune.
To be sure there is therapy in laughing at one’s own misfortune. Additionally, there is a trend spreading where embracing failure is being given value. TED (n.d.) has a collection of talks; over 17; on this topic. I have preached the positivity of negative results to science experiments for years. Failure breeds future discoveries and unforeseen understanding. While this very well may be noble, what about the person relying on results to bolster claims necessary for earning a grant to fund more failures? Companies and governments are probably going to be less likely to give money to projects that prove unsuccessful. Defeat can be incredibly disappointing.
Students found a caterpillar crawling around the room.
I experienced a deeply depressing defeat at the beginning of this school year. The fact that it has taken me several months to share it illustrates the emotional impact. I wasn’t sure how I wanted to frame it. The story is a little embarrassing and revealing. I had to throw away something that had taken me many hours to build. Money had been spent on constructing something that in the end needed to be thrown out. Were these hours and this experience wasted? Yes… and no.
I made these cubbies for my daughter’s nursery, 8 years ago.
Many teachers and parents (Hampton, 2015) experience a sort of nesting phase, similar to a woman about to give birth, prior to the school year. They buy more school supplies than they need, arrange, rearrange, and re-rearrange their rooms over and over, making everything just right, perfect for the new class. Maybe it is a guy thing, or perhaps it’s just “my” thing, but I like to build stuff to get ready for the school year.
The very first item that I ever made was a couple of bookshelves. I love books, and I wanted to have a room full of them. So, I made homes for them. An idea of what I wanted the shelves to look like, how I wanted them to function, and the ease of making them grew in my mind throughout the summer. In between Professional Development sessions and team planning meetings I was drawing, measuring, sawing, hammering, etc. my bookshelves. They came out great, functioned flawlessly, and are still being used… But, the middle shelf was accidentally placed the exact height of the outlet the construction was to hide. It was impossible to plug anything in with the shelves against the wall. This was easy enough to fix. I simply cut a notch out of the unit so plugs had a space to stick out of the wall. From planning to constructing to fixing this problem, the experience prepared as much my pedagogical psyche as it provided a home for my classroom library.
The shelves are still in use, today!
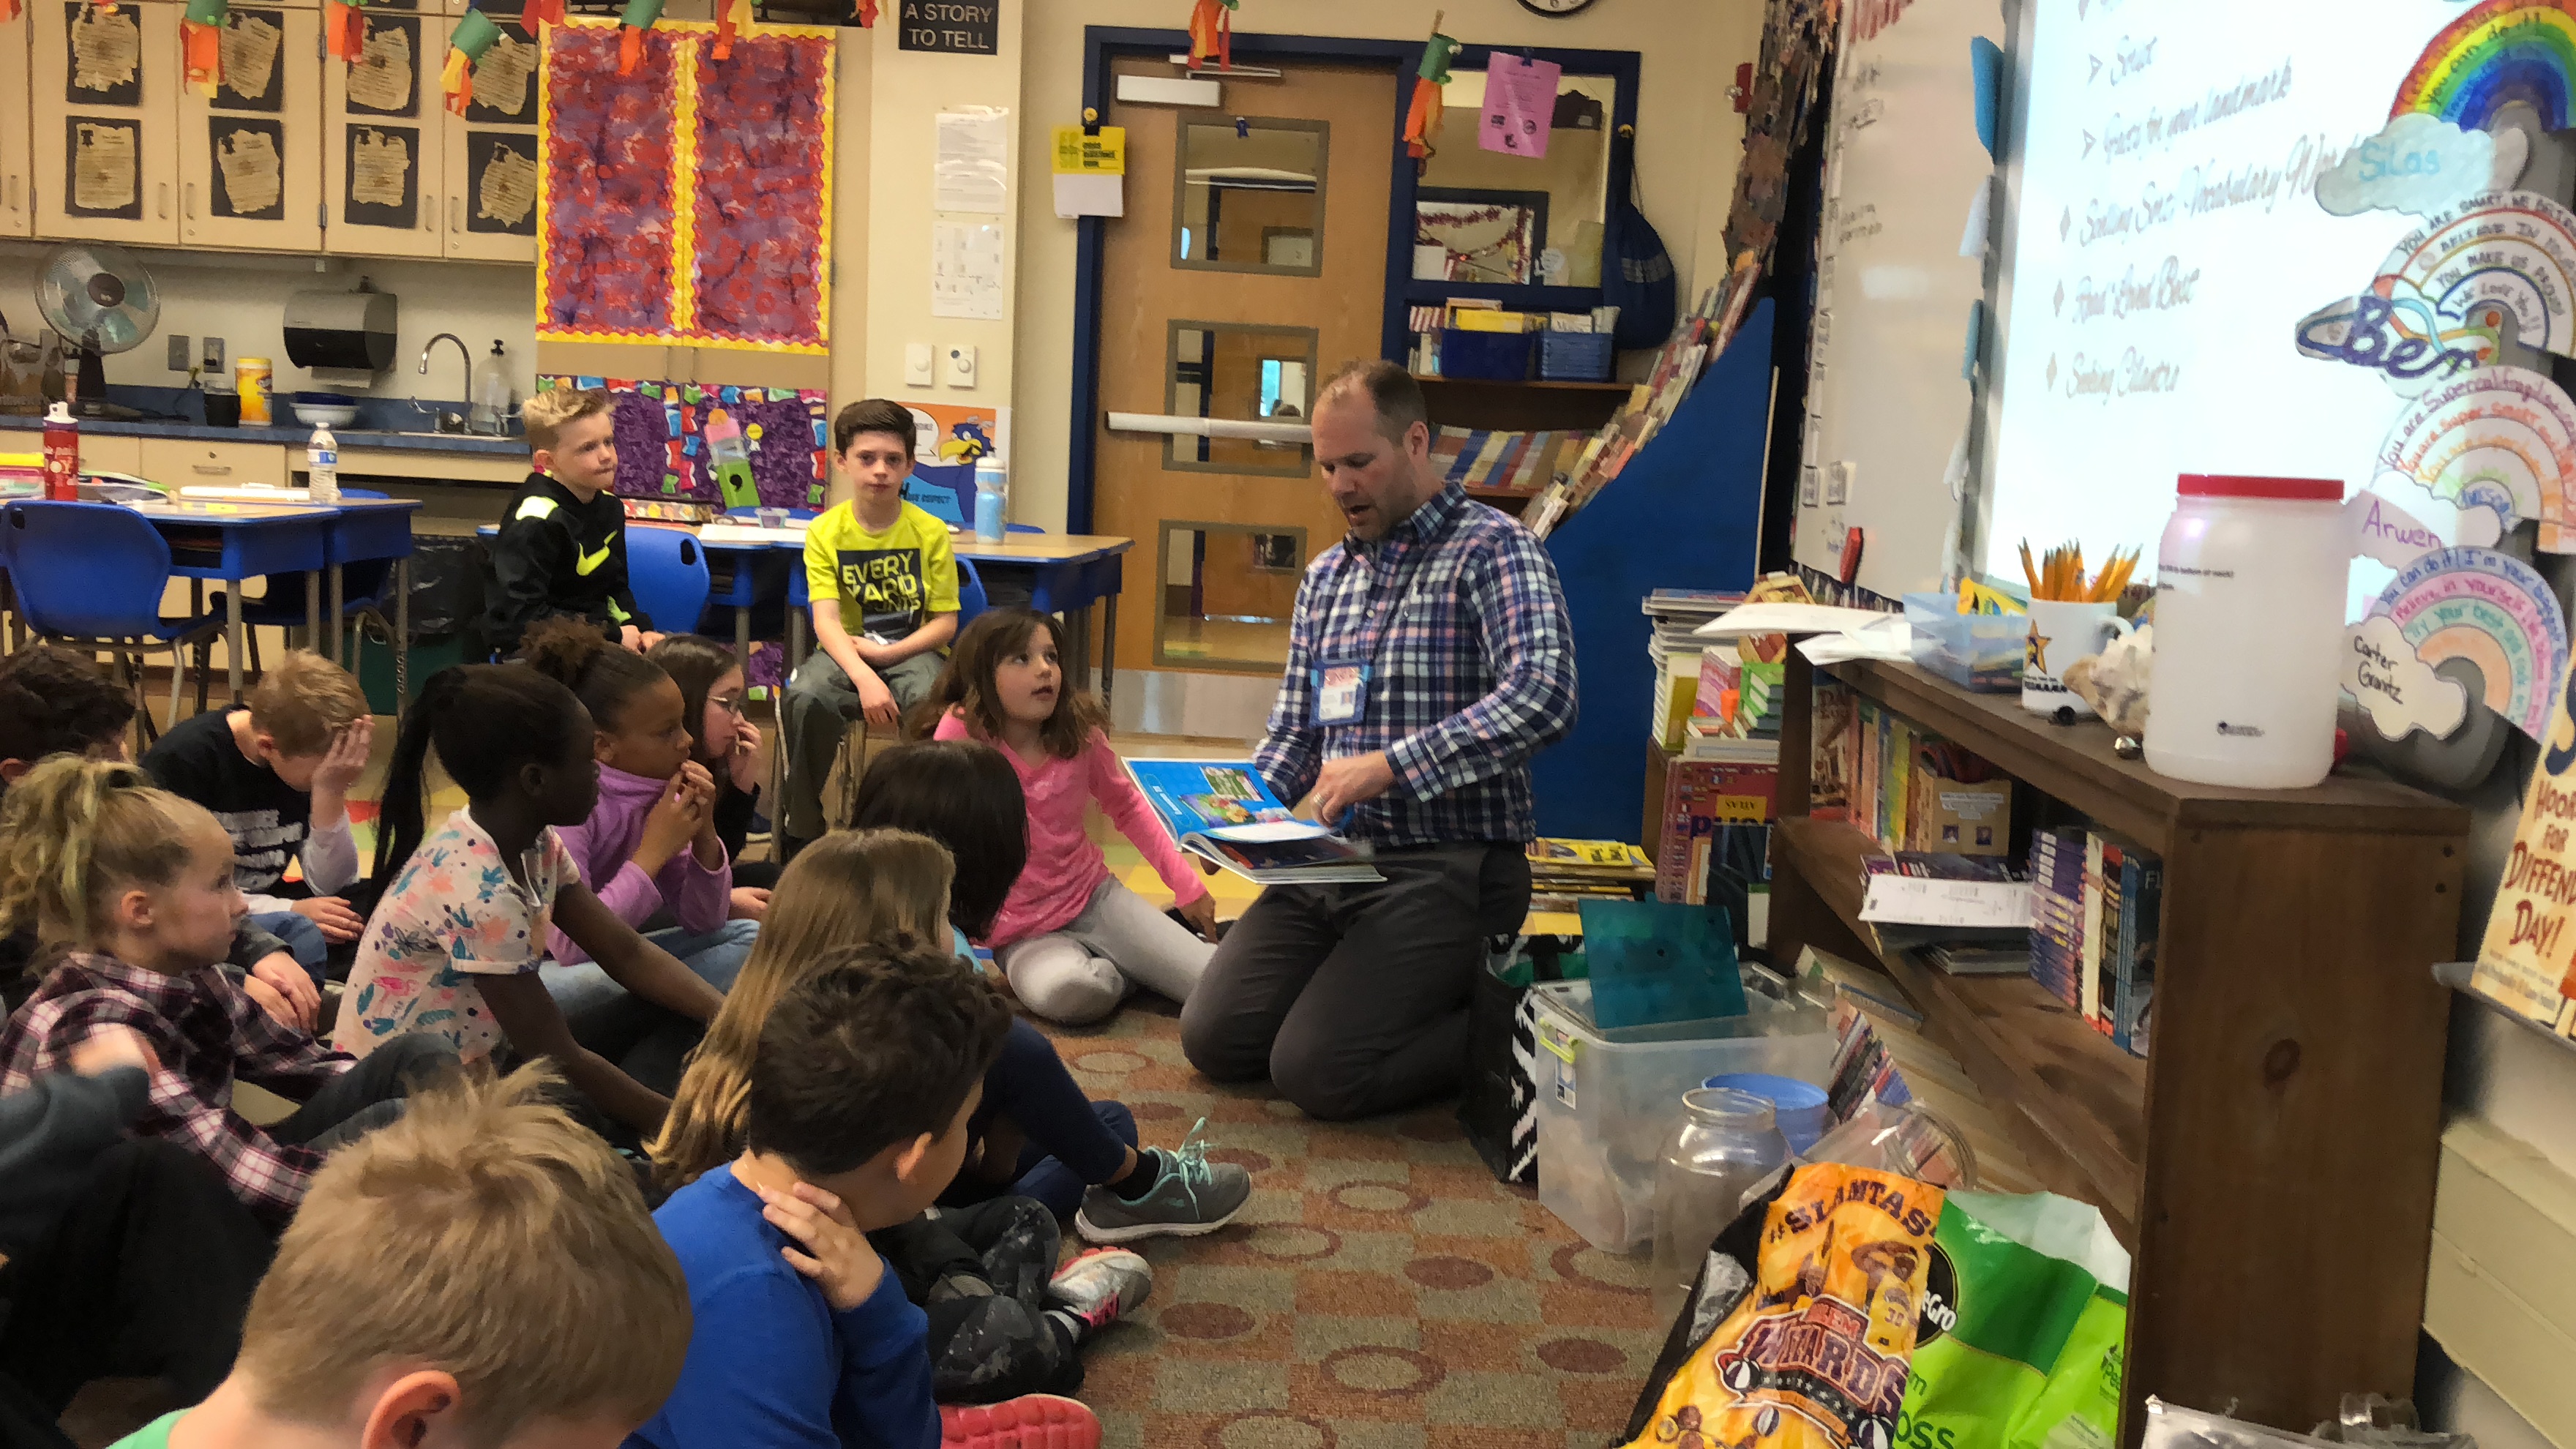
You can see the cut away of the shelf behind this crazy pirate guy.
In the next few years I built a classroom island, a castle, a workbench, fish tank stand/hood, and conference table, among other smaller projects. The classroom island was something I obsessed over the summer prior to making it. The cubbies that I purchased for housing the plunder of books I had been pillaging from second hand bookstores were unattractive and sat flush with the floor. My island has a platform that raises the cubbies off of the ground. I made a countertop that covers the ugly cubby roofs and extends backward to allow students to sit under it. With stools it functions just like the kitchen islands that most students have in their homes.
The castle deserves its own blog.
My workbench was really neat. I didn’t like the way the teacher desk quarantined me behind it, cutting me off from the action of learning. One year I took it all apart and lined it up. The parts included the desk that a teacher’s chair can pull under, a similar table/desk with space under it, and two giant filing cabinets. I placed one of the filing cabinets under the table to hold it up; It had been attached to the teacher desk for support. The other filing cabinet was placed at the end of the twelve foot long line of equipment. Similarly to the classroom island, I built a frame of two by fours to attach one by eights, hanging the creation over one of the long sides and the end so that kids could pull up to it like a gigantic table. Because it was slightly higher than their little student desks, most kids stood to work at it. In my pirate-themed room this came to be known affectionately as “The Plank”.
I learned something new each time I constructed something, and many of the lessons involved solving problems. Every creation proved to be incredibly useful, fun, and loved… Until…
This past summer I got an idea in my head that I could not shake off. It consumed my thoughts. I was picturing building a sunken pirate ship, using planks from the classroom workbench. The workbench had served its purpose, and I wanted to do something different with that space in the room. Plus, I needed lumber for this new obsession–Make no doubt about it–I thought about this project constantly June, July, and August of 2018. Each beginning of the year construction project has been a sort of puzzle. My mind bends ideas and works out how I can form structures quickly and use as little funds as possible. The structure is always something that you can’t simply buy, either. Lastly, it has to be both functional and cool looking. The sunken pirate ship was going to be my masterpiece.
First of all it would be almost completely constructed of wood that I already had, making it virtually free of funds. Second of all, what I pictured in my mind did not exist anywhere but the bottom of the ocean. Thirdly, and most importantly, this new project was going to be the most beautiful, complex, impossible to reproduce, no-one-else-could-possibly-make-this-creation the pedagogical world has ever known! And, it was.
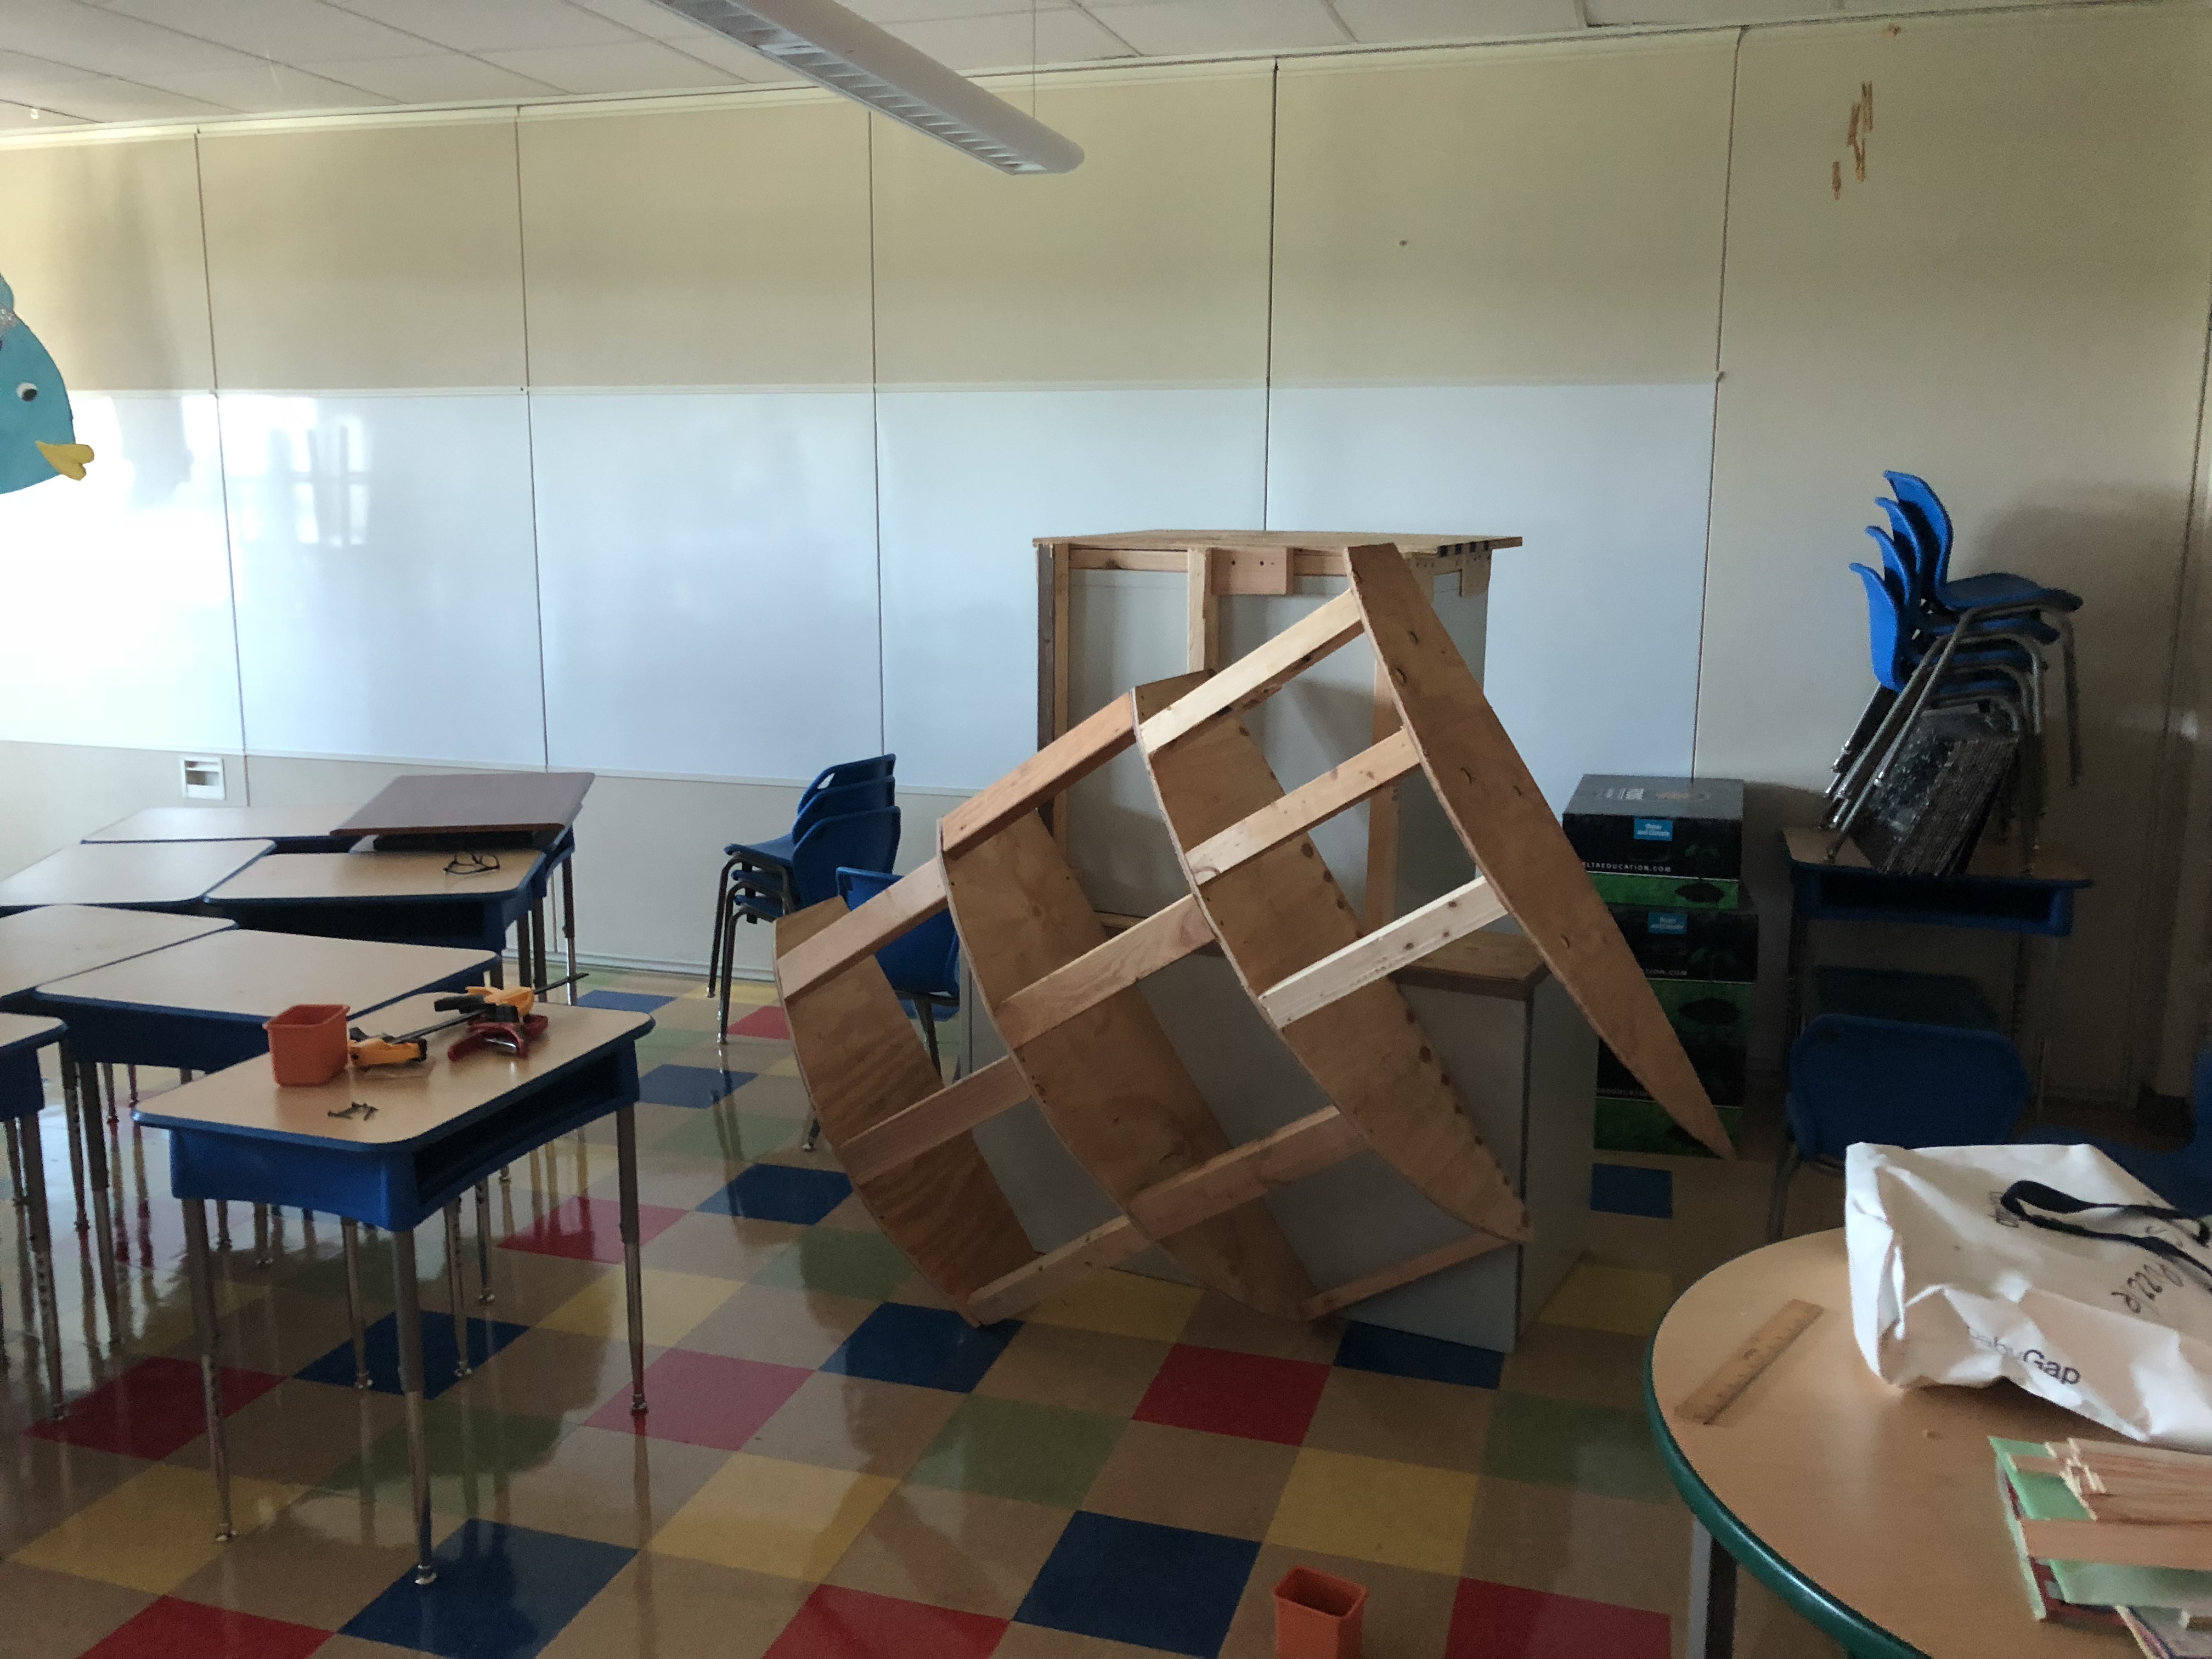
The frame was a puzzle in my mind.
I began by taking a part the beloved workbench and planing each edge of the one by eights so that the angle was 70ish degrees, rather than square. After doing this to all of my planks, I took four foot by four foot pieces of plywood that I brought from home, and I cut out a curve that would serve as the hull of the ship. This was one of the trickiest parts of the project. I brought the plywood up to my room and looked at it for a long time. I wanted the sunken ship to show the curved bottom of the boat, but also come up from the floor at an angle. This meant that I needed a few curved pieces, but different sizes. Additionally, I wanted the model to be the front of a ship, so I had to have the frame graduate from a large curve to a smaller and smaller one. It is almost as hard to write about this as it was to ponder it in my brain. This puzzle took me a long time to solve. Even after I had constructed a frame, it was tricky to figure out how to attach the planks. Should I build the whole thing outside, or piece it together right in my room?
The first plank
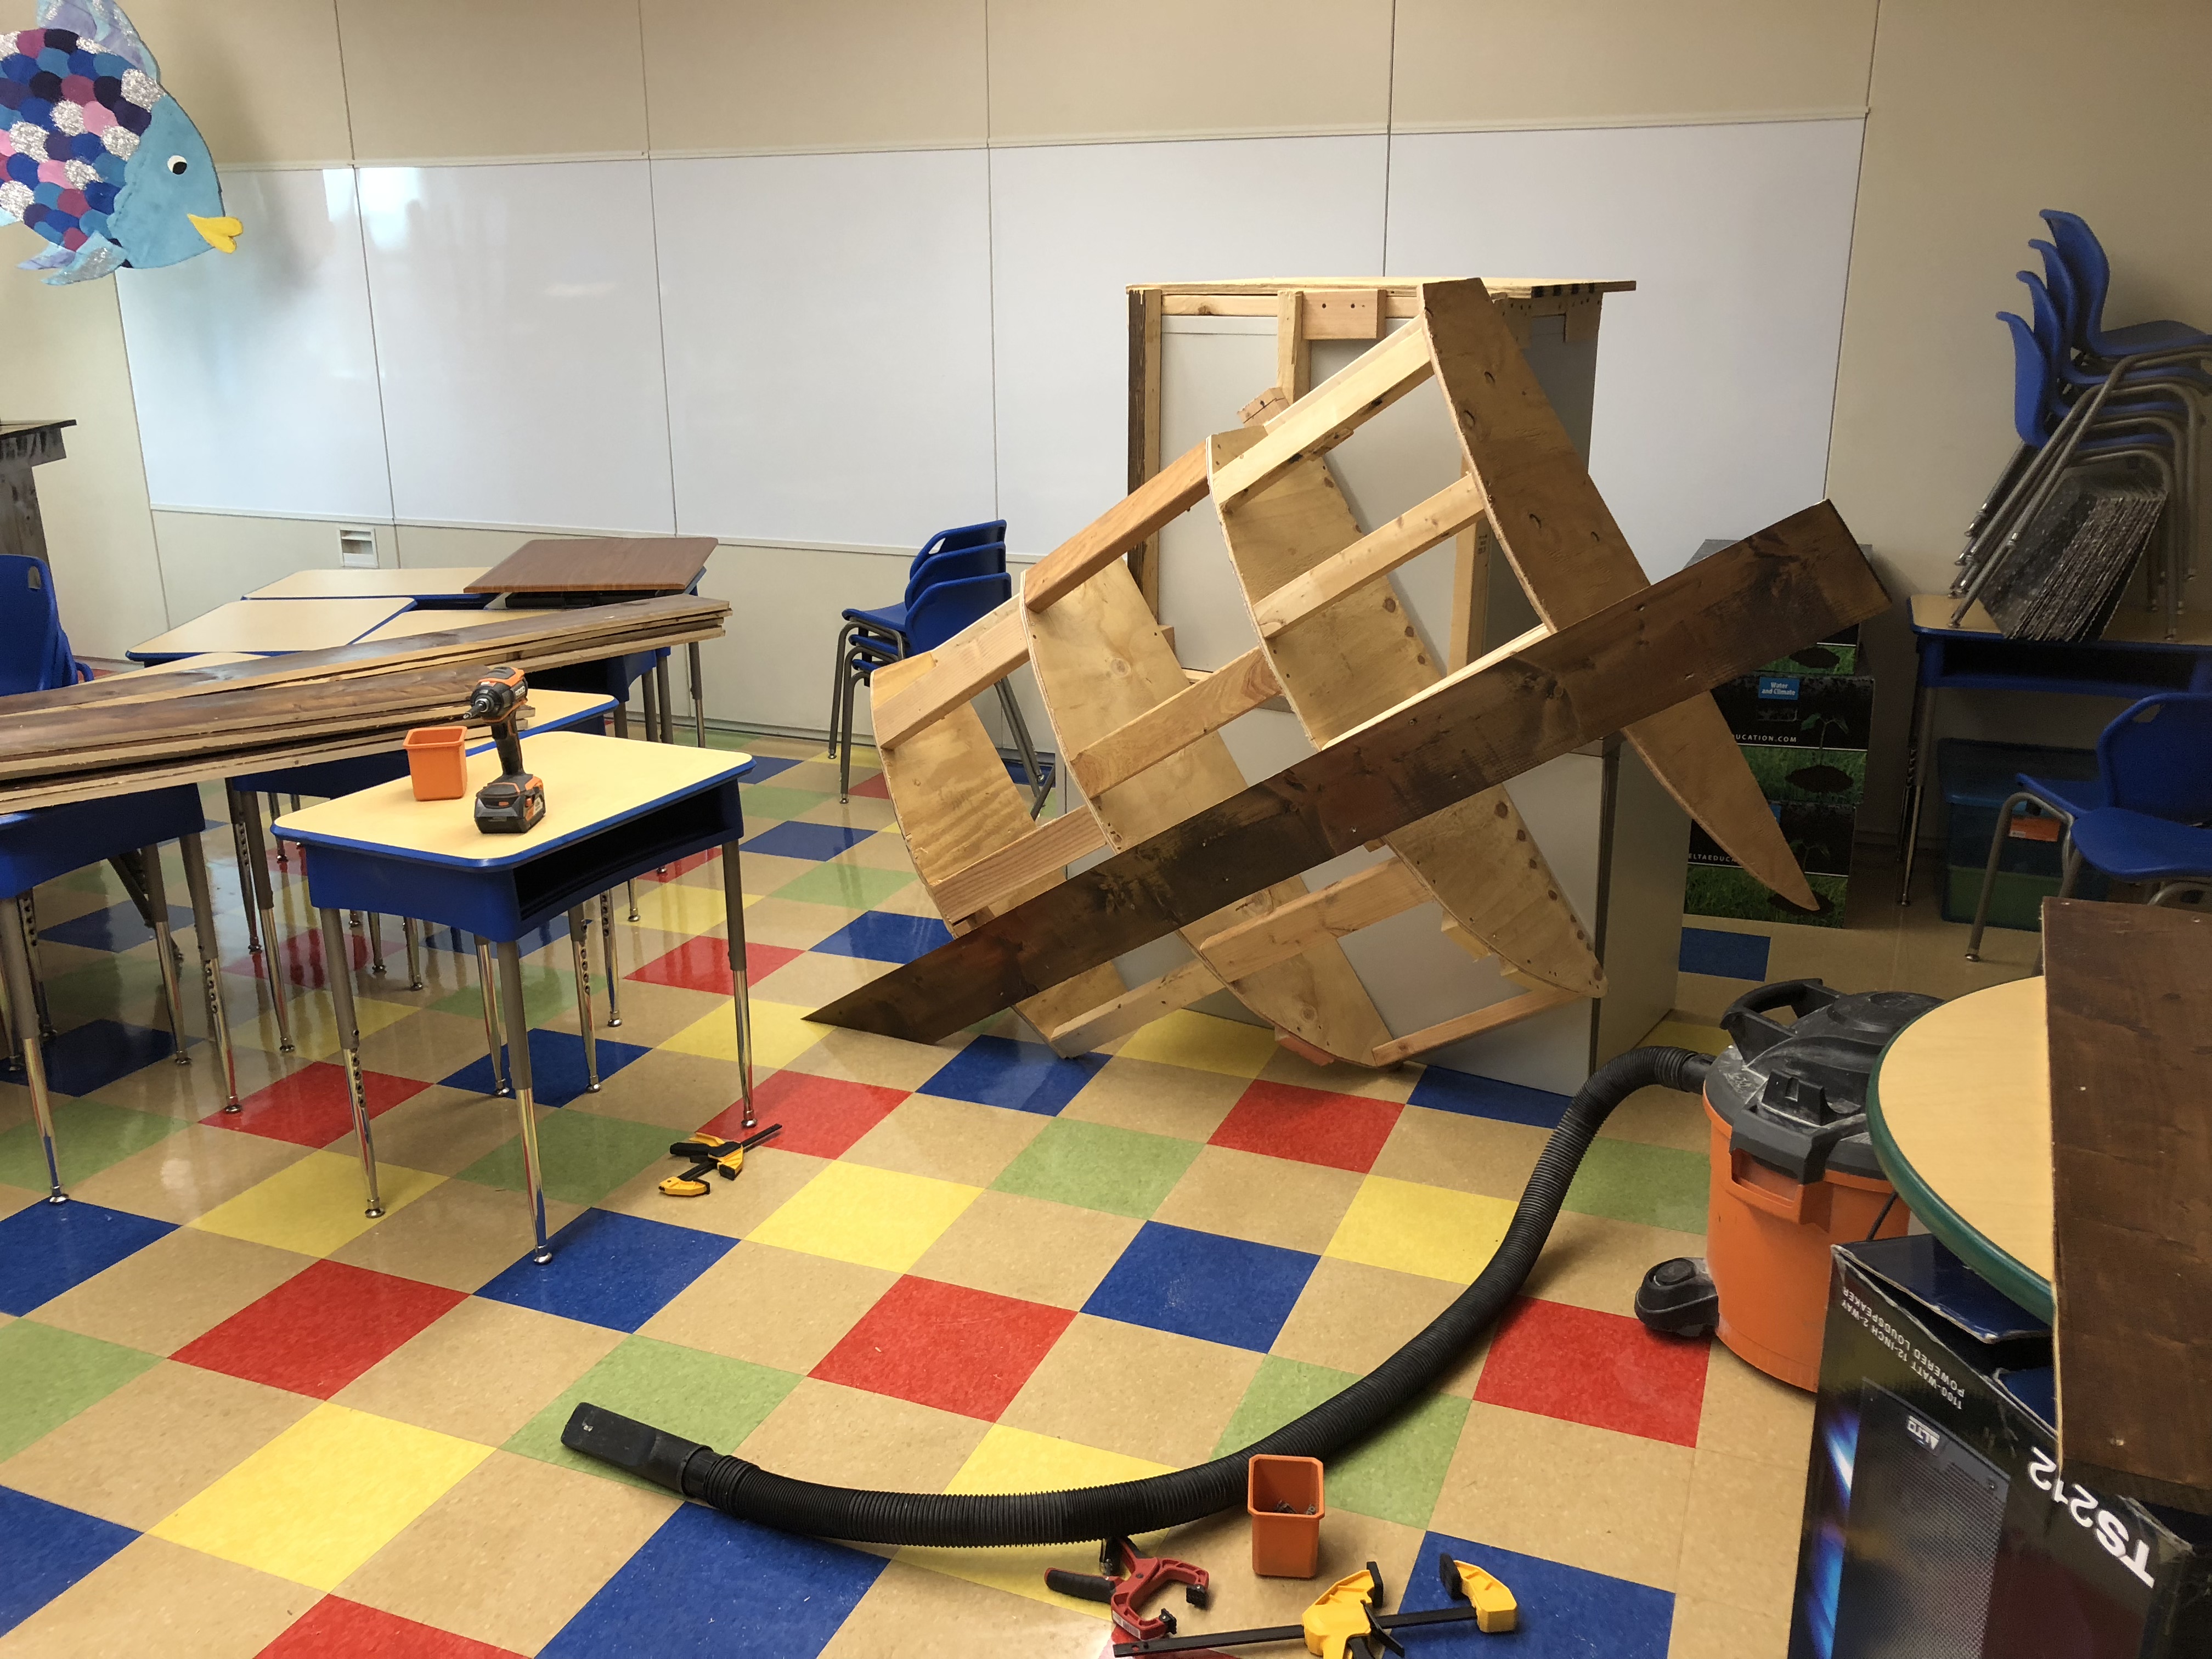
I decided to assemble the ship in my room, rather than run up and down the stairs over and over. I figured out what angle to cut the bottom of each plank, ending at the floor, and attached my first one. It was beautiful, already! Just the success of figuring out how it could work was exhilarating.
I kept adding planks, alternating lengths and looks. I wanted it to look like the front of a pirate ship that had broken in half, so I left some of the boards ending at varying lengths. The front would be cut in an arching round curve, or so I hoped. This was still a little fuzzy in my head.
The top part of the ship would be flat or vertical, having no curve, to show that this was more than just a rowboat. It had been a tall mast ship. I continued the framework and attached more planks.
As you can see, from these images, the ship was a work in progress. Much like a sculpture, I was cutting, shaping, adding, removing, and attaching pieces to adjust the art as it evolved. (Through constant formative assessment I made adjustments.)
Some of the shape of the ship would be produced simply through optics. I would position it at such an angle as to make the front of the boat look like it not only curved up, but also came to a seam with the opposite side (which obviously did not exist). One final extremely difficult, mind-bending trick was figuring out what to do with the front of the ship. I wanted it to look like a beam running the spine of the hull. Luan is a very thin wood that comes in sheets and is used for subflooring. You use it to make an otherwise uneven or bumpy floor smooth before laying tile. Because it is so thin, it is very pliable. It was very difficult to bend, hold, mark, and cut, but I got a piece that curved with my boat’s bow pretty well. I tossed around having a spear like staff sticking off the front, also, but the monstrous beast was already nearly touching the ceiling! A broken off point seemed to fit the theme of disaster.
Little did I know the disaster that was about to befall my creation, next.
Fellow teachers from my building visited my room, having heard the commotion or news of my creation. They were increasingly impressed as the structure was developed and took on shape. I remember wanting the boat to have a certain semblance to a ship before inviting my principal, Dr. Moyer, up to see my masterpiece’s progress. When I did finally invite him, I didn’t receive an enthusiastic response. In fact, it took a day before I even heard from him. At the time I was happy to have more minutes to get the ship that much closer to completion. When Dr. Moyer did finally join me in my room, he brought bad news.
Clearly, it pained my principal to inform me that after all of the work that I had put into this beautiful masterpiece, it was going to have to go. It wasn’t his decision. He shared with me an email from maintenance that he had received. The message explained that “The pirate ship being built in room 207 had to be removed, immediately” due to several violations and concerns. Dr. Moyer didn’t see any way around it, but suggested that I talk to the head of maintenance.
The pirate ship was just about done at this point. I called my school district’s head of maintenance several times before we finally connected. Over the phone I told the person who is in charge of not only maintaining all of the district’s facilities, but also responsible for students’ safety that I understood every point that he was making in his email to my principal. I explained that some of the concerns could be remediated and I asked for a chance to make some adjustments to my creation. This saint of a man told me that he would consider my changes and take another look at my project.
This was it. I had to move the ship away from the sprinkler head in the ceiling, make sure the structure was secure, and smooth rough edges as much as possible. I put last minute, finishing touches on the ship to make it look as good as it could… And then, I waited for a verdict.
I am not listing every concern that my masterpiece had raised in the mind of the head of maintenance, but suffice to say, I was unable to completely rectify enough of them to satisfy the justification of leaving the heap of wood in my room, permanently. It was honestly touching how obviously moved this understanding and caring individual was when he told me that, “Unfortunately, the pirate ship still had to be removed from the classroom.”
I had worked feverishly with an obsessed passion to complete this project before school began. I wanted to have this amazing, awe-inspiring, gigantic addition to my pirate-themed room ready for students to appear Monday morning. I couldn’t wait for them to feel the presence of the sunken pirate ship looming in the back of the room. Removing it would be like losing a limb.
Although temporary, the pirate ship made an impression.
Hesitatingly, I inquired if I could just keep it long enough for students to see it. After a pause, my savior said that he needed the ship removed, but that he wasn’t planning to do a walk through of my building on the first day of school. It was understood that if anything negative happened, it was on me. Having constructed the creation myself, I knew that it was perfectly safe. And, I was very confident in my classroom management, so I took the chance of letting my students at least view the craziest creation I had ever attempted.
Dignified Defeat
I took the pirate ship down. I was okay with this decision because it was made with the safety of students in mind. But, make no mistake about it, this was a defeat, a loss, a failure. As I said earlier in this text, I struggled to publish any information about the pirate ship. I never tweeted images of it or talked about it publicly on Facebook. Was I simply embarrassed? Yes, but even more than that, my dream was defeated.
…Or, was it?
I told the head of maintenance that I had envisioned this creation over the summer, and I felt like I just HAD to make it. He suggested that I speak to the people who produce plays at the high school to help with making their sets. There was a respect for my creativity. I’m not sure that he ever completely understood, but I could not NOT construct this pirate ship. I had to see if I could do it. I had to see if my vision would work. I had to see if I could puzzle out the angles and curves. I had to see what it would look like. Could it become anything even close to what I envisioned? As it turned out, yes, I could. Yes, I did. Yes, it was… beautiful. And, now it is gone.
I eased myself into my defeat by thinking I would reconstruct the ship down by my pool. But, I’d have to build a whole new frame, and I didn’t think that the low-quality wood would hold up outside. In the end I let the thing get moldy and threw it all away.
A chess tournament training I attended recently shared what kids must master before attending their first match. They have to know how to checkmate or win a game. They should know how to operate a chess clock. There are a couple other elements, but what stood out the most to me was the idea that kids must learn to lose. At the time I pictured my 7 year old daughter who hates losing. She has melted down to tears when she loses. But, since then, I have mulled this concept over. At both the beginning of a chess match and at the end you shake hands. It is different from other sports. You don’t jump into competition and then slap hands carelessly at the end, chanting, “Good game, good game, good game,” while never looking the victor in the eyes. A dignified defeat is thankful for the opportunity to learn through this match. I was able to try out my skills, make some good decisions, show my stuff, prove myself to myself and perhaps others, and I am now a better stronger person having competed against you. Maybe, like a match I played against someone better than I, the outcome will be a feeling of “At least I held my own.” There is dignity in that attitude. Dignity is an attitude.
In conclusion, I am pleased to profess that although my room does not dawn a disaster of a sunken pirate ship, it does house one classy educator who has learned the lesson of dignified defeat.
Have you ever had a conversation where you felt like the listener was not paying attention? Is there anything less classy than bad listeners? Listening is not natural. Teachers should not assume that their students come equipped with good listening habits. I ALWAYS begin every year with teaching listening skills.
Listening Is a Partnership
Almost before I tell students my name, I am explaining the top three listening strategies. These are a mantra that we say to ourselves all year long: Stop moving, make eye-contact, and smile. In addition to the mantra, I teach the students the importance of being able to repeat the message you are listening to back to the speaker and ask good questions to clarify meaning and show that you care.
First, Make it a Mantra: “Stop moving, make eye-contact, and… smile;)”
Stop Moving
Listening takes loads of practice.
Don’t “Freeze” because that is silly and uncomfortable. Kids like the idea of “freezing” because it allows them to stop with feet in the air, weird expressions on their faces, etc. In fact, I have witnessed students standing or sitting perfectly normal get into contorted positions when they hear the word “Freeze!” Then they laugh, fall over, do everything but listen. Just stop moving.
Get set to listen. This is the opposite of freezing. Students should sit down, put down their scissors, pencils, papers, etc., and turn to face the speaker.
One of the things I do in my class for management is I teach everyone to stand at attention. This is great for getting my line nice and straight. I also use it when kids are listening to the announcements. [They are less distracted by things in the room, and my room can be pretty distracting! I have a 9-inch pleco swimming around a 75 gallon fish tank, for crying out loud!] To stand at attention simply means heels together, standing straight, shoulders back, chins up, and I also teach the kiddos to look straight ahead without smiling or even “focusing” on anything. In fact, their gaze should be a little out of focus. They are tin soldiers, waiting for action… passive… lifeless. If this sounds horrible, don’t worry, I only do it when we line up. During the announcements, we stand this way because rather than making eye-contact, kids are putting all of their energy into their ears. They try not to look at anything in the room.
In addition to the giant pleco, there’s 7 jeweled cichlids in this bad boy.
Now, this attention business is NOT conducive to listening to someone. An alternative reason that I teach standing at attention is so that I can teach the contrast of “At Ease”. Students are instructed to separate their feet shoulder-width, put their hands behind their back (holding them)–this forces their posture to relax and shoulders droop a little; Then can now move their heads around, smile, and make eye-contact. The “Ten Hut” is like saying “Freeze”, but there isn’t the silly element. On the contrary, it is super serious. Then we relax, so that listening is comfortable and focused.
Stillness communicates that you are taking in the information. You are a carefully held container under a spigot in the desert, collecting valuable water that you don’t want to spill.
Eye-Contact
You know what this is and how powerful it can be. Some school thoughts, though…
I teach the students the importance of locking each other’s attention through the eyes. We practice with our turn-and-talk partners. I have the students move as little as possible; They should just turn their heads or pivot, slightly. Eye-contact is a hand-shake of vision. It is a commitment to listen.
In the classroom it is impossible to make eye-contact with every single student at the same time. I teach my students that they should be looking at my eyes so that when I turn toward them, our eyes meet. I demonstrate, and whenever I give instructions, I survey the room, looking students right into their eyes.
If the communicator is directing the listener’s attention to an object or place, the listener should look at what the speaker is referencing. In this instance that place or object is like the eyes of the speaker. It is all about connecting. If you keep looking at the speaker when he/she wants to show you something, you become “disconnected” from the message.
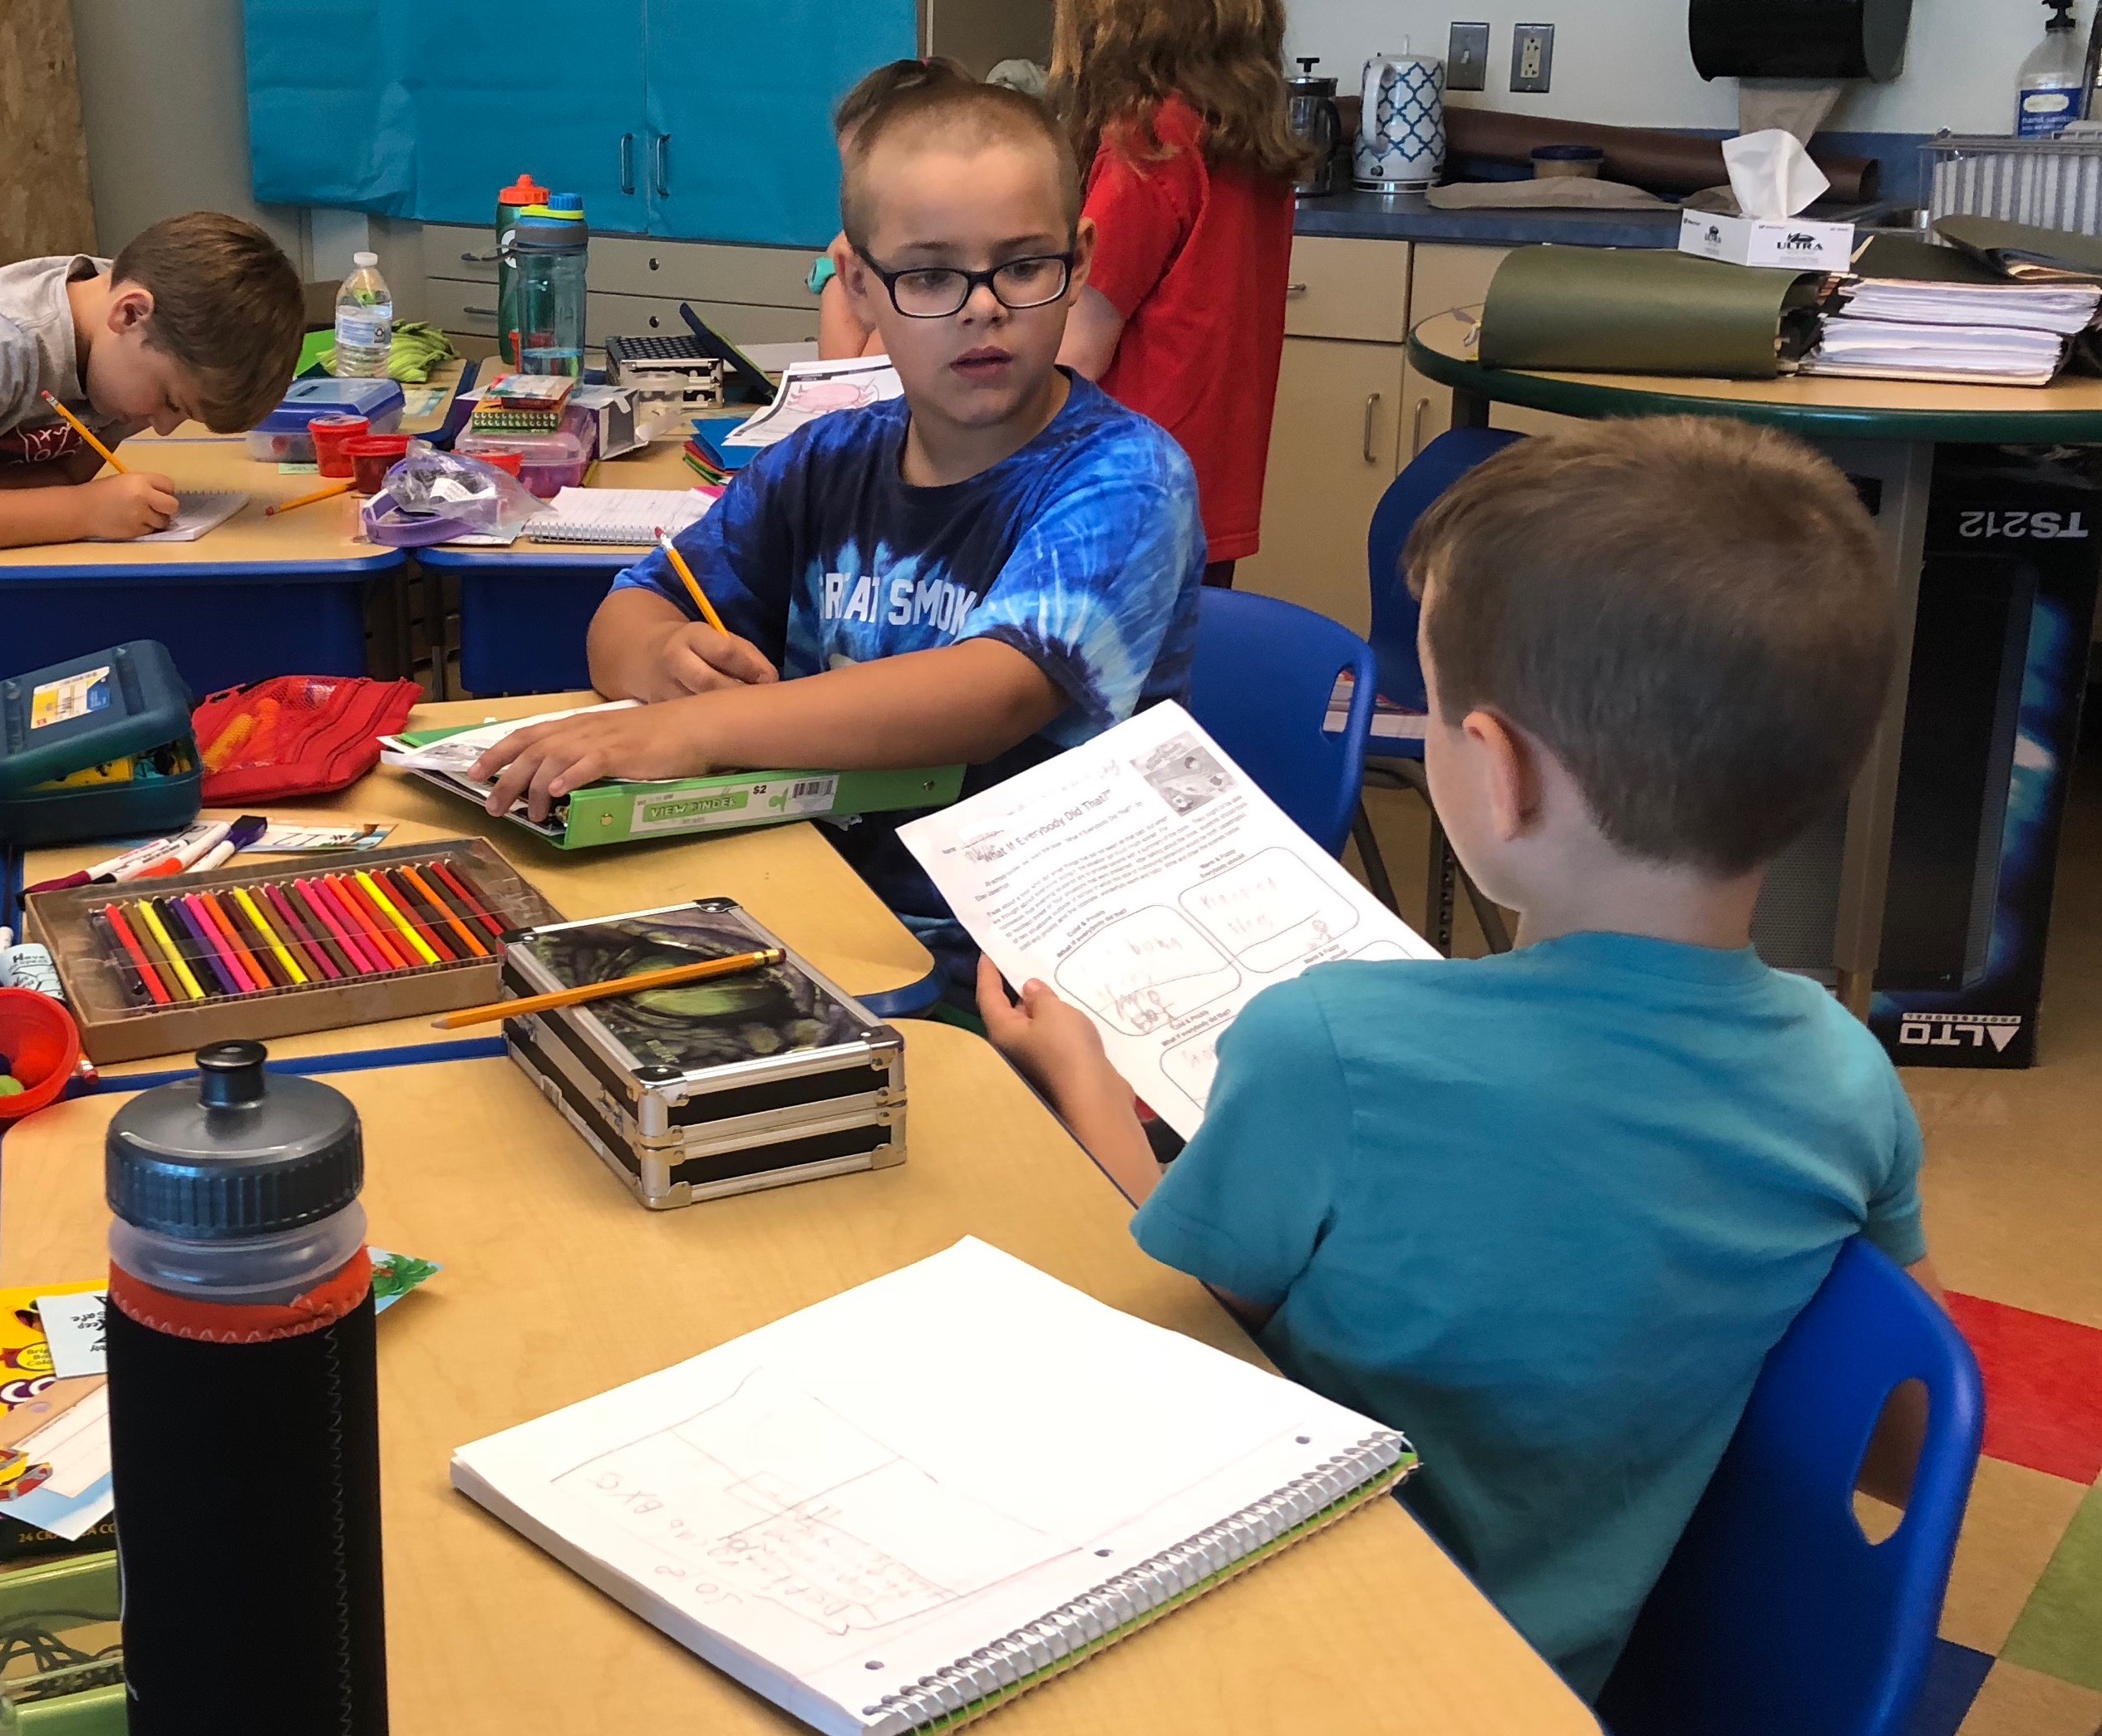
This is what impressed me so much that I had to write this blog. My students were sharing last night’s homework with their turn-and-talk partners, and the listeners were riveted to the task.
Elyse Rycroft teaches “Whole Body Listening” in “TEACHING LISTENING SKILLS IN THE CLASSROOM”. She suggests students use not only their eyes, but turn toward the speaker. Listen with your ears, your eyes, your nose, your cheeks, etc.
Smile
After really serious speeches about posture and eye-contact, this one is a relief. And, it is supposed to be. They all laugh when I keep the same serious tone while instructing everyone to “Smile!” I act like I am angry at anyone who does not smile effectively. This gets everyone cracking up. It lightens the mood and does exactly what I want to teach: Listening should be inviting information into your brain. You will be more likely to accept something if you are smiling. You project onto the person you are listening to the idea that this information is nice.
Smiles foster warm/fuzzy feelings. I don’t’ think I need to explain this.
Active listening; kids can look at you like zombies. Forcing them to smile wakes them up. At “Meet The Teacher Night” one of my student’s parents told me that her son came home on the first day of school complaining about his cheeks hurting. Her inquiry lead to his explaining that his new teacher (me) has everyone smiling all day long. This gave me a laugh. The parent told me that she explained to her son that his teacher wasn’t being “literal”. I assured her that I was. You cannot smile too much! Smile until it hurts! The pain will make the information that you were listening to that much more memorable;)
Second, Put Information Into Your Own Words
Listen purposefully, so that you can retell the main points of the message to someone else.
Be able to summarize the message of the speaker back to him or her. This will help assess understanding. Did you get the message of the speaker correct? If not, then the storyteller can clarify or even add more detail to support understanding.
At the beginning of the year, this provides a fun reason to learn summarizing. You can play games where students practice recounting details of stories back to one another.
And, a good listener transitions very nicely into a good reader.
Listening should be inviting information into your brain.
Third, Questions Show You Care.
Picture telling a friend a story about something that happened to you. It doesn’t have to be all that important. When you are done, your friend turns and walks away without saying a word. What?! That would be sooo rude! Why? We know it is, but can you put it into words? What if your friend waited a moment and then launched into his or her own story. That happens a lot, and sometimes it is no big deal, depending on the conversation. But, if you were telling a significant story about something truly important to you, you’d expect your friend to inquire just a little. There are few better or easier ways for a listeners to show some class and communicate a caring persona than asking poignant questions.
“How long were you there?”
“When did this happen?”
“How did that make you feel?”
“What happened next? Or, after that?”
“Why did you do that?”
These kinds of questions show that you are interested. It flatters the speaker with an attentive audience.
Also, questions can clarify.
Fourth, Analyze the Difference Between Listening and Hearing
Hearing is passive, while listening is active.
Hearing is a park that everyone and anyone can visit at anytime. There are dogs barking. Kids are running around, screaming and playing. Bicyclists pedal through the middle of it. A couple relaxes on a blanket only to have a teenager trip over them while trying to catch a frisbee…
Listening is a birthday party. Specific people are invited. Everyone plays a game at the same time. Together, we all sing “Happy Birthday”. No one talks while the birthday boy/girl blows out the candles. Gifts, pleasantries, and well wishes are exchanged. There are no bikes passing through or frisbee catchers crashing the canoodling.
In the same way that you can take all of this listening thought and apply it to reading actively, for fun, you could turn it around and try using reading strategies on listening attentively.
Visualize what the speaker is telling you.
Identify cause and effect within the storyteller’s message.
Use questioning to deepen understanding.
Predictions make reading and listening fun and rewarding
My students loved this! I put together a ten-question, multiple-choice quiz using Google Forms that I read to the class. This was the first time that the kids signed into their Google accounts, so it took some time, but it was worth it. They had to access their Google classroom, and then click on the “Listening Skills Quiz” assignment. Once everyone was logged in and looking at the quiz, the fun began. I read the questions out loud to the class. I also read the answers. I told them that this was not supposed to be tricky. “I am assessing your listening, so listen up: I will tell you the correct answers. If you don’t do well, it is because you weren’t listening.” Their heads nearly exploded. Now, I did not just say that “The second choice is the correct answer,” mind you. I read the quiz with emphasis on certain answers as I circulated the room. If I saw kids wavering between two choices, I’d read it again and give an example. We laughed. The kids were successful. At times I did just say, “The answer to this one is the last choice, your welcome!” They loved it, and quiz-taking began with a super positive experience.
There was a student who did poorly. This was a clear indication that we needed to revisit some of the listening skills. I simply had the kid take it again during recess, and he did fine. This showed the significance of the assessment, however. Here was one child who wasn’t ready to move on with our listening “program”. Now, he is on board.
Post Script(s) for Teachers
Only have your students “listen” when they are able to do it properly.
Make listening significant. Don’t expect students to be listening to you all of the time. Students shouldn’t be hanging on your every word. In fact, one of the questions that students struggled with on my “Listening Skills Quiz” concerned how often they should listen. I will need to adjust this question for next time that I administer the quiz. [Maybe I won’t, and use this as a teaching tool. We’ll see.] I make such a big deal out of listening; It makes sense that students would think it should take precedence over everything. But, this would be exhausting. You hear everything… but listening is work.
Have a bunch of ways to get the class’s attention. No matter how interesting your method, kids eventually tune it out (Daniels, n.d.). The clapping works, but gets old. “Touch your nose if you can hear my voice,” whispered a few times is fine once in a while. I started one that makes kids look around and is fun to say: “Look at the ceiling, look at the floor, look at the windows, look at the door.” It gets them moving and looking. I then change it up “Look at the ceiling, look at the floor, look at the board… now look at me.” They laugh, because it wasn’t what they expected.
Give them time/empower them to be classy listeners. For example, don’t tell everyone to listen, and then start talking before they stop moving or make eye-contact. I usually pause and compliment smiles. This gets everyone’s attention and makes listening fun and attractive.
I only began using Google Classroom last year, and I instantly fell in love with it. It is easy to work with as a teacher: You can find things fast. There are convenient pathways to Google Drive, Youtube, and previous posts from other classrooms for assigning tasks. The format is simple enough for primary grades to navigate, but complex enough for older grades to utilize.
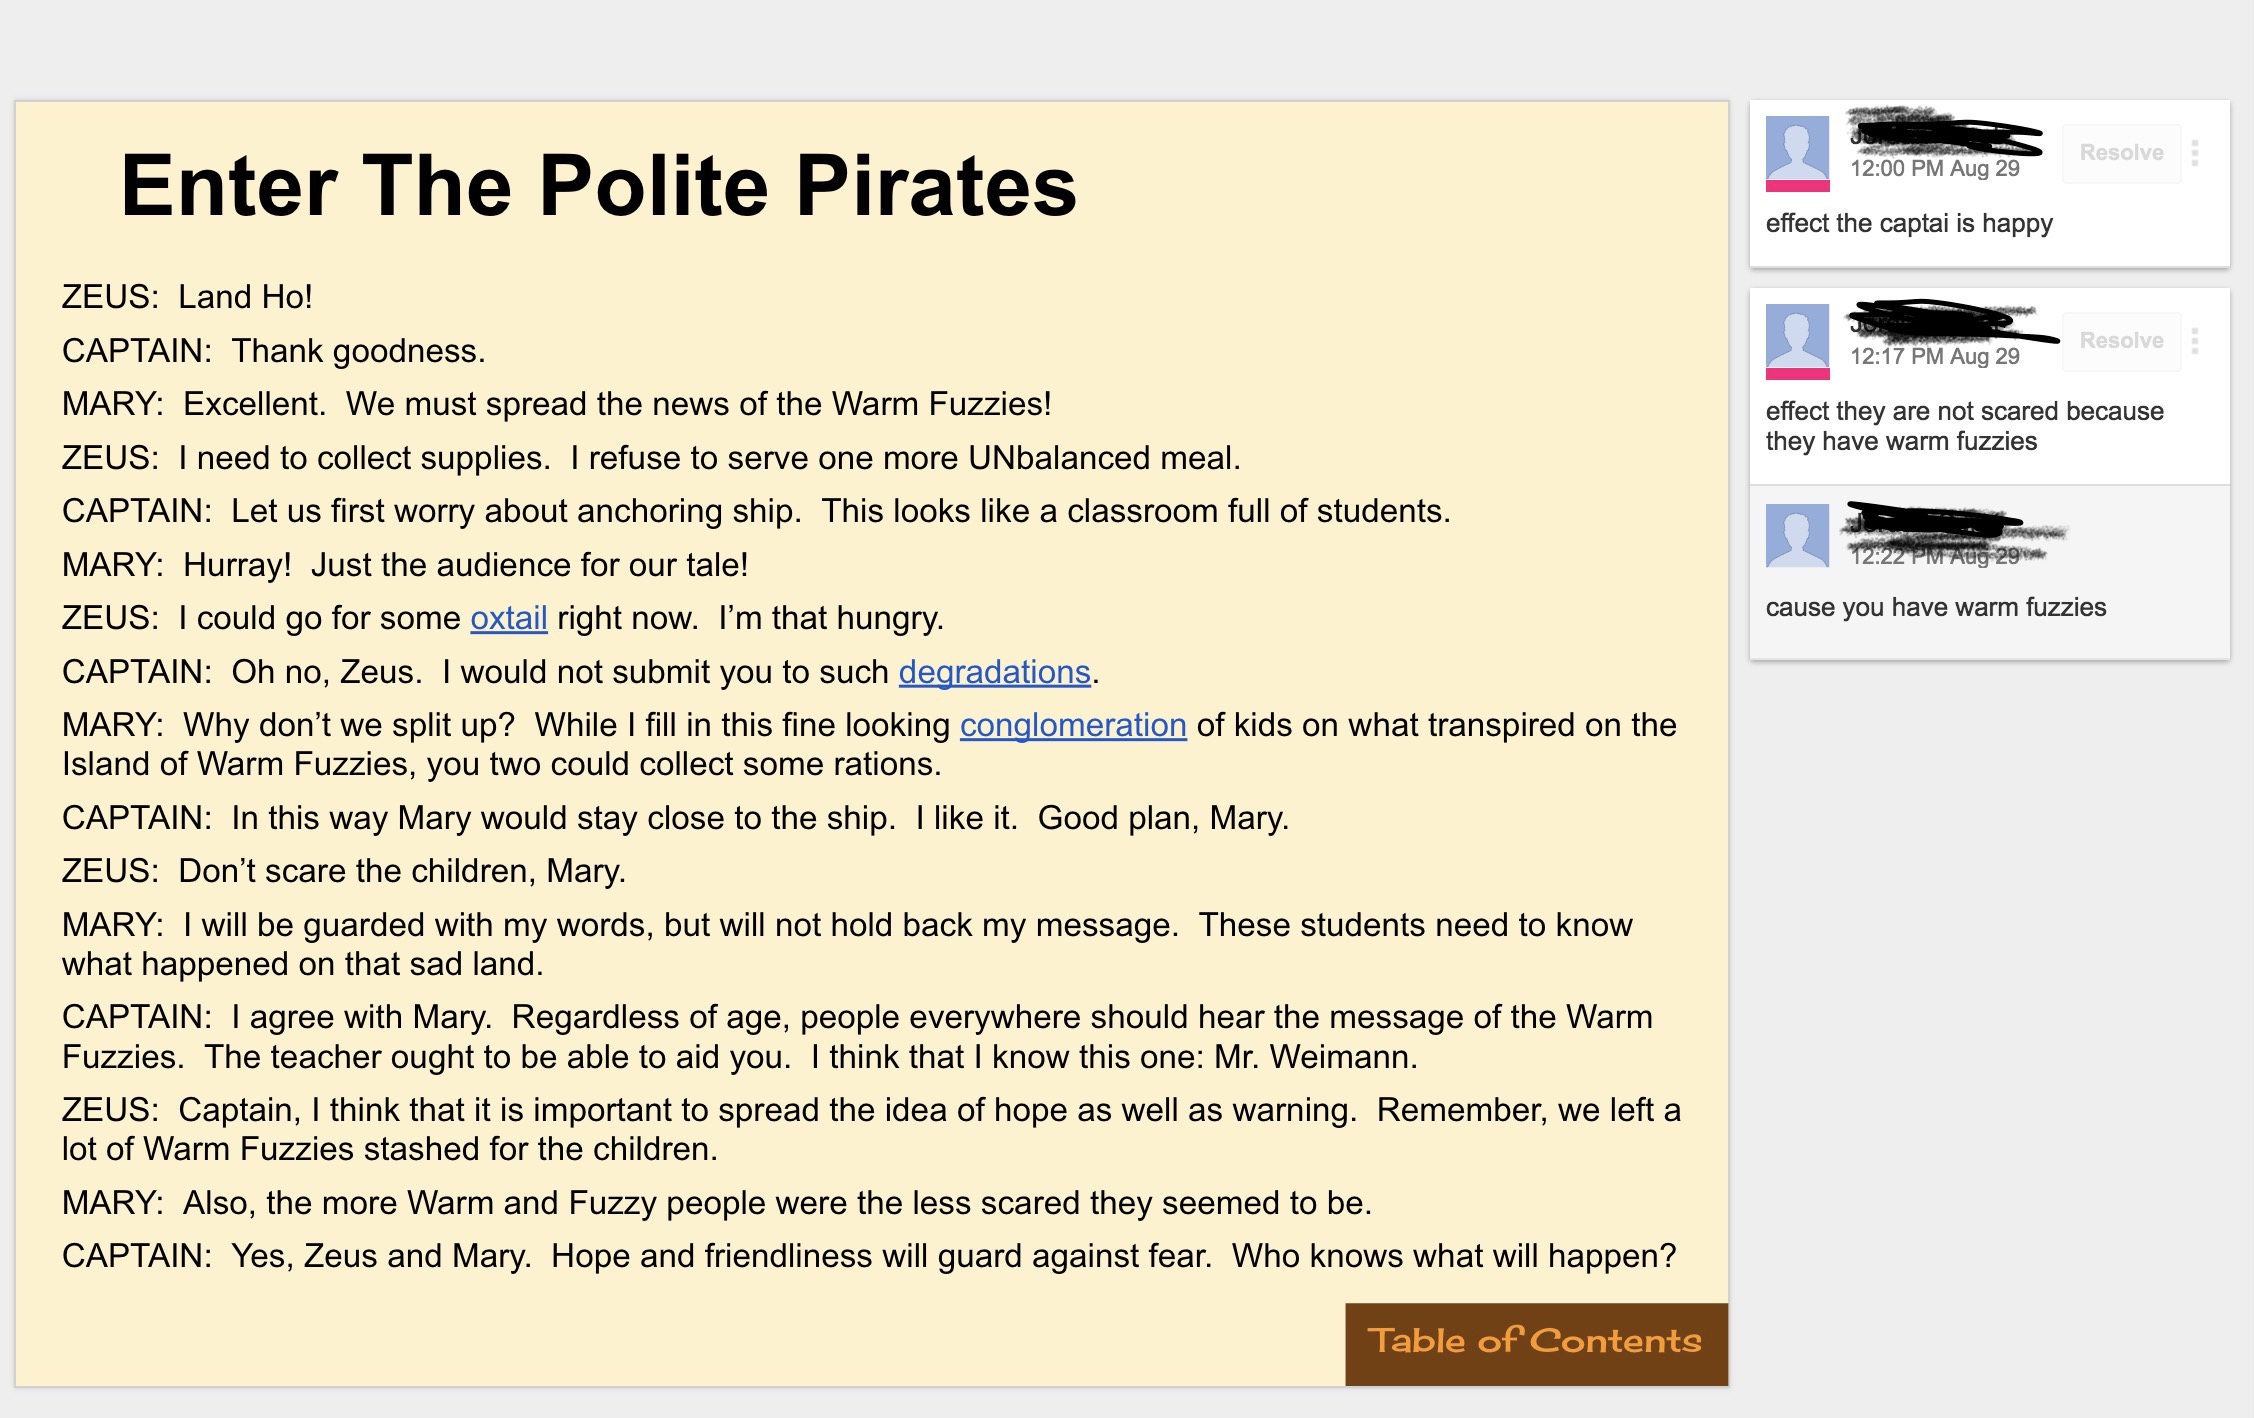
This blog is bubbling out of a realization from assessing an assignment that I administered this week. Rather than have all of my kiddos sitting on a carpet for too long and only partially engaged in the story that I was reading to them, I put the story into a Google slideshow and shared it with my class in Google Classroom. I made it so that the slideshow created a copy for each student in the class.
It was tricky to word the rules as a “Cause”. I had to erase the word “No” a couple of times.
Before having students begin the slideshow activity, I presented the classroom rules in a unique way. I did not tell the students, “No laying down in the classroom!” I wrote the words “laying down” on the board, and then, as a class, we discussed what could happen as a result of students laying down. The first student to volunteer information suggested that kids might fall asleep. I thought that was rather far-fetched, but we discussed not paying attention, the difference between actively working and passively producing work (just going through the motions). Through this students suggested that laying down would communicate “Disrespect”. I thought that was a great observation!
After writing several byproducts for laying down on the floor, one of which was “Being a trip hazard”, I drew a line between the action and what that action might bring about. Then I drew a solid line above both sides, creating a T Chart. I didn’t say anything as I wrote “CAUSE” above the left side of the chart. Kids only had to see the C-A-U before they were calling out (breaking one of the rules we were about to discuss;) “EFFECT!”
I barely had to mention the concept of “Cause & Effect” after that, and we easily came up with other rules and why we have them. This just came to me, while in front of the students, but it was by far the classiest rules discussion I have ever witnessed. I had to be careful to write the rules as though they were the cause, which was tricky at times, but even this made the concept of behaving appropriately seem less militaristic. Rather than “No Calling Out”, I wrote “Not raising your hand”. So, what happens when you don’t raise your hand? We discussed the feeling you get when you have an awesome answer that you would be proud to share, but someone else yells out a similar thought. Ugh! That person just stole my spotlight!!
Now, I have a story that I usually use to accompany the rules. It introduces the concept of consequences for breaking them. The students had been sitting on the carpet for several minutes, though, so I, within seconds, made through the “First Quarter ELA” Google Classroom that I had just created over lunch an assignment that provided the slideshow to everyone. Not only would each kid have access to it, but the classroom software made a copy for each student. In this way, I had the students open their individual copy in the Google Slides App, so that they could leave comments.
This is the 2nd slide, the first with text, and I gave the students what to type as comments, so they could practice. Those links on the slide were active for the kids to go to websites I had vetted and linked to the story for them to deepen their understanding.
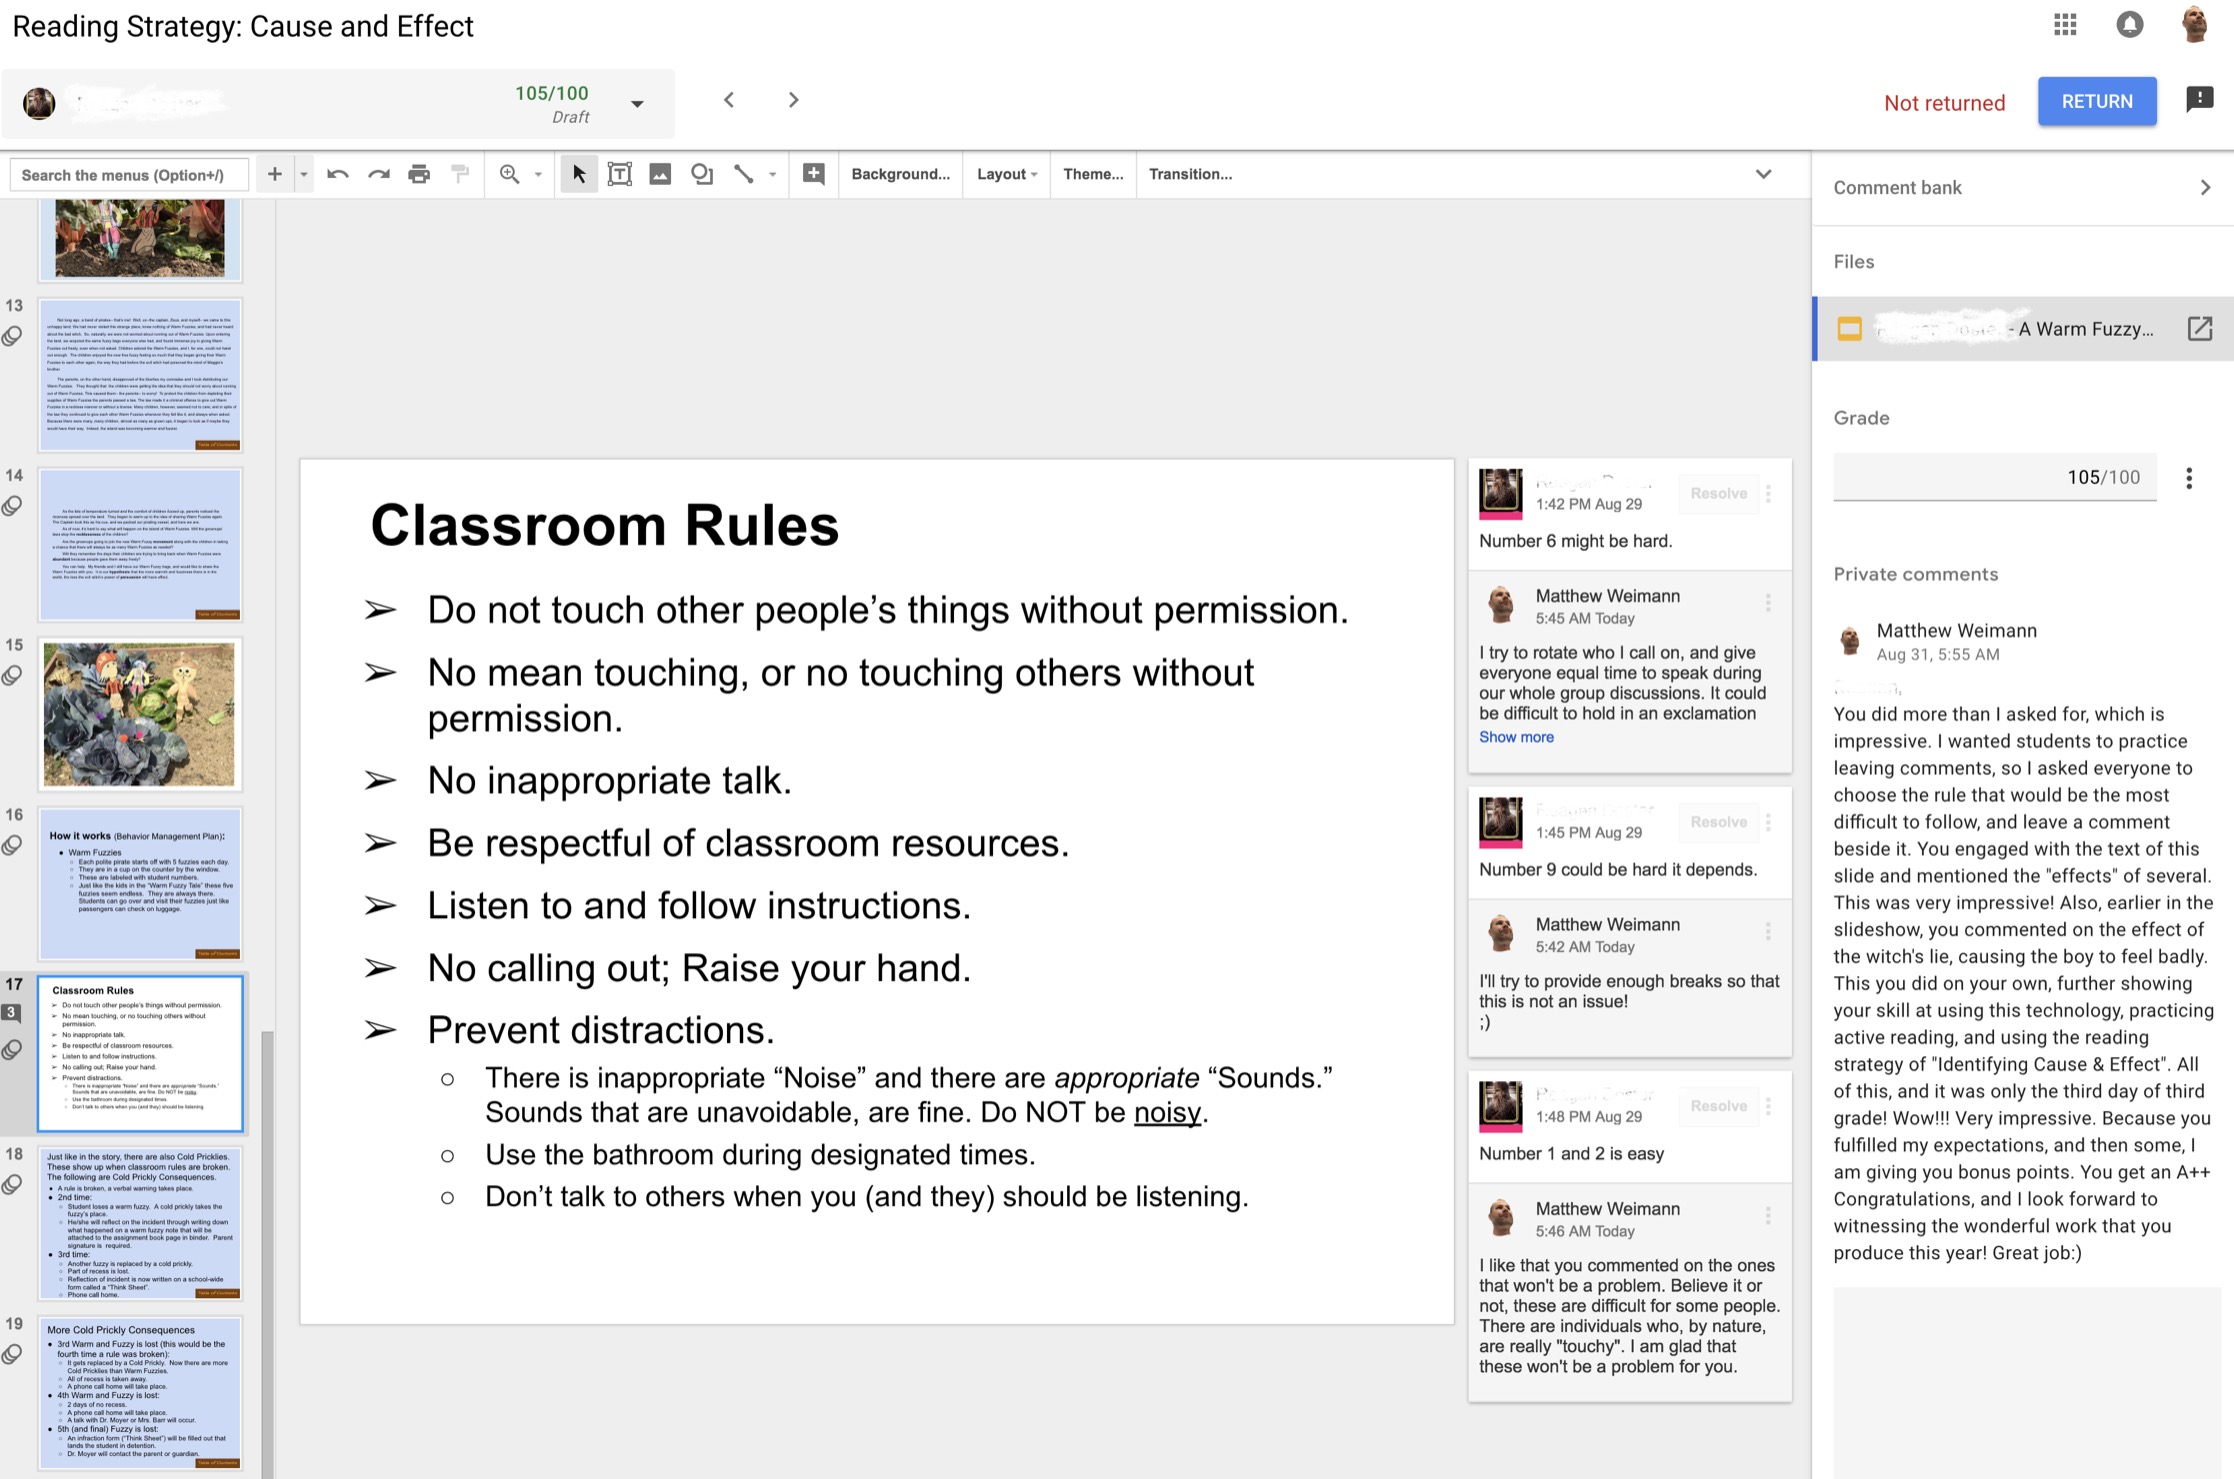
I walked them through accessing their slideshows, navigating the app, and reading the slides. I showed them where the button for “Adding a Comment” was and even gave them an example of “Cause & Effect” from the first slide for them to type. Then, some students read the text independently, seeking causes and their effects. Many students read the text to themselves, while I read it out loud from the interactive board. When we finally got to the rules that I had typed into the slideshow, I had the students engage with the slide, telling me which rule they thought would be the hardest to keep. They were to leave a comment about it.
I used to only leave comments within the slideshows. Now, I can leave feedback that summarizes the reason for the grade. Providing evidence is classy.
Here comes the truly amazing part. I am sitting down at my computer at home getting ready to assign some grades for this project. I plan to be gracious, giving high marks for kids who simply did anything. In addition to just a grade, Google Classroom has made it so that I can leave feedback for the whole assignment!!!!!!!!!!!!!!!!!!!!!!!!!!!!! This was not available last year. I left comments throughout slideshows, but never one for the whole assignment. This is great! Thank you, Google. Very classy idea.
Not only can I grade these slideshows, something I did last year, but I can provide feedback for why students received the grades.
If you connect accounts to parent emails or if you are using this with older students who have their own email addresses, they will be alerted that there is a grade with corresponding feedback that they can view.
It was my first real teaching assignment; I was long term subbing for a second grade teacher out on maternity leave. She had the typical “traffic light” behavior management system; When a child misbehaves/breaks the rules, he/she “moves his/her stick” from green to yellow, and then from yellow to red, with subsequent consequences. With this system nothing happens as long as the kid is NOT breaking the rules, but the moment he/she messes up, alarms go off.
While I wanted to keep things as similar to the way students had started the year as possible, I also needed to make my management work for me. With the traffic light system, student behavior is only addressed when something goes wrong. I wanted a more positive atmosphere. I wanted my students to be motivated to practice good behavior intrinsically, because they wanted to; not because they were afraid of “moving their stick”.
I introduced the word “classy”. It stuck, and all year we discussed the ways we could be classy. The kids loved it, and it has defined my methodology ever since. It was and is admittedly cheesy, but that is a big part of its appeal. And, since its conception, seven years ago, the idea of exhibiting class in teaching has come to mean more than just a behavior management system.
It seems education is being blamed for all kinds of ills. My aim, through teaching my group of students, and now with the creation of this blog, is to bring “Class” to the institution that lies at the foundation of our society: the classroom.


 Mommy and daddy are having Scarlet do more and more things for herself. Taking care of her lunch box at the end of the day is one of her new duties. Huffing and complaining,
 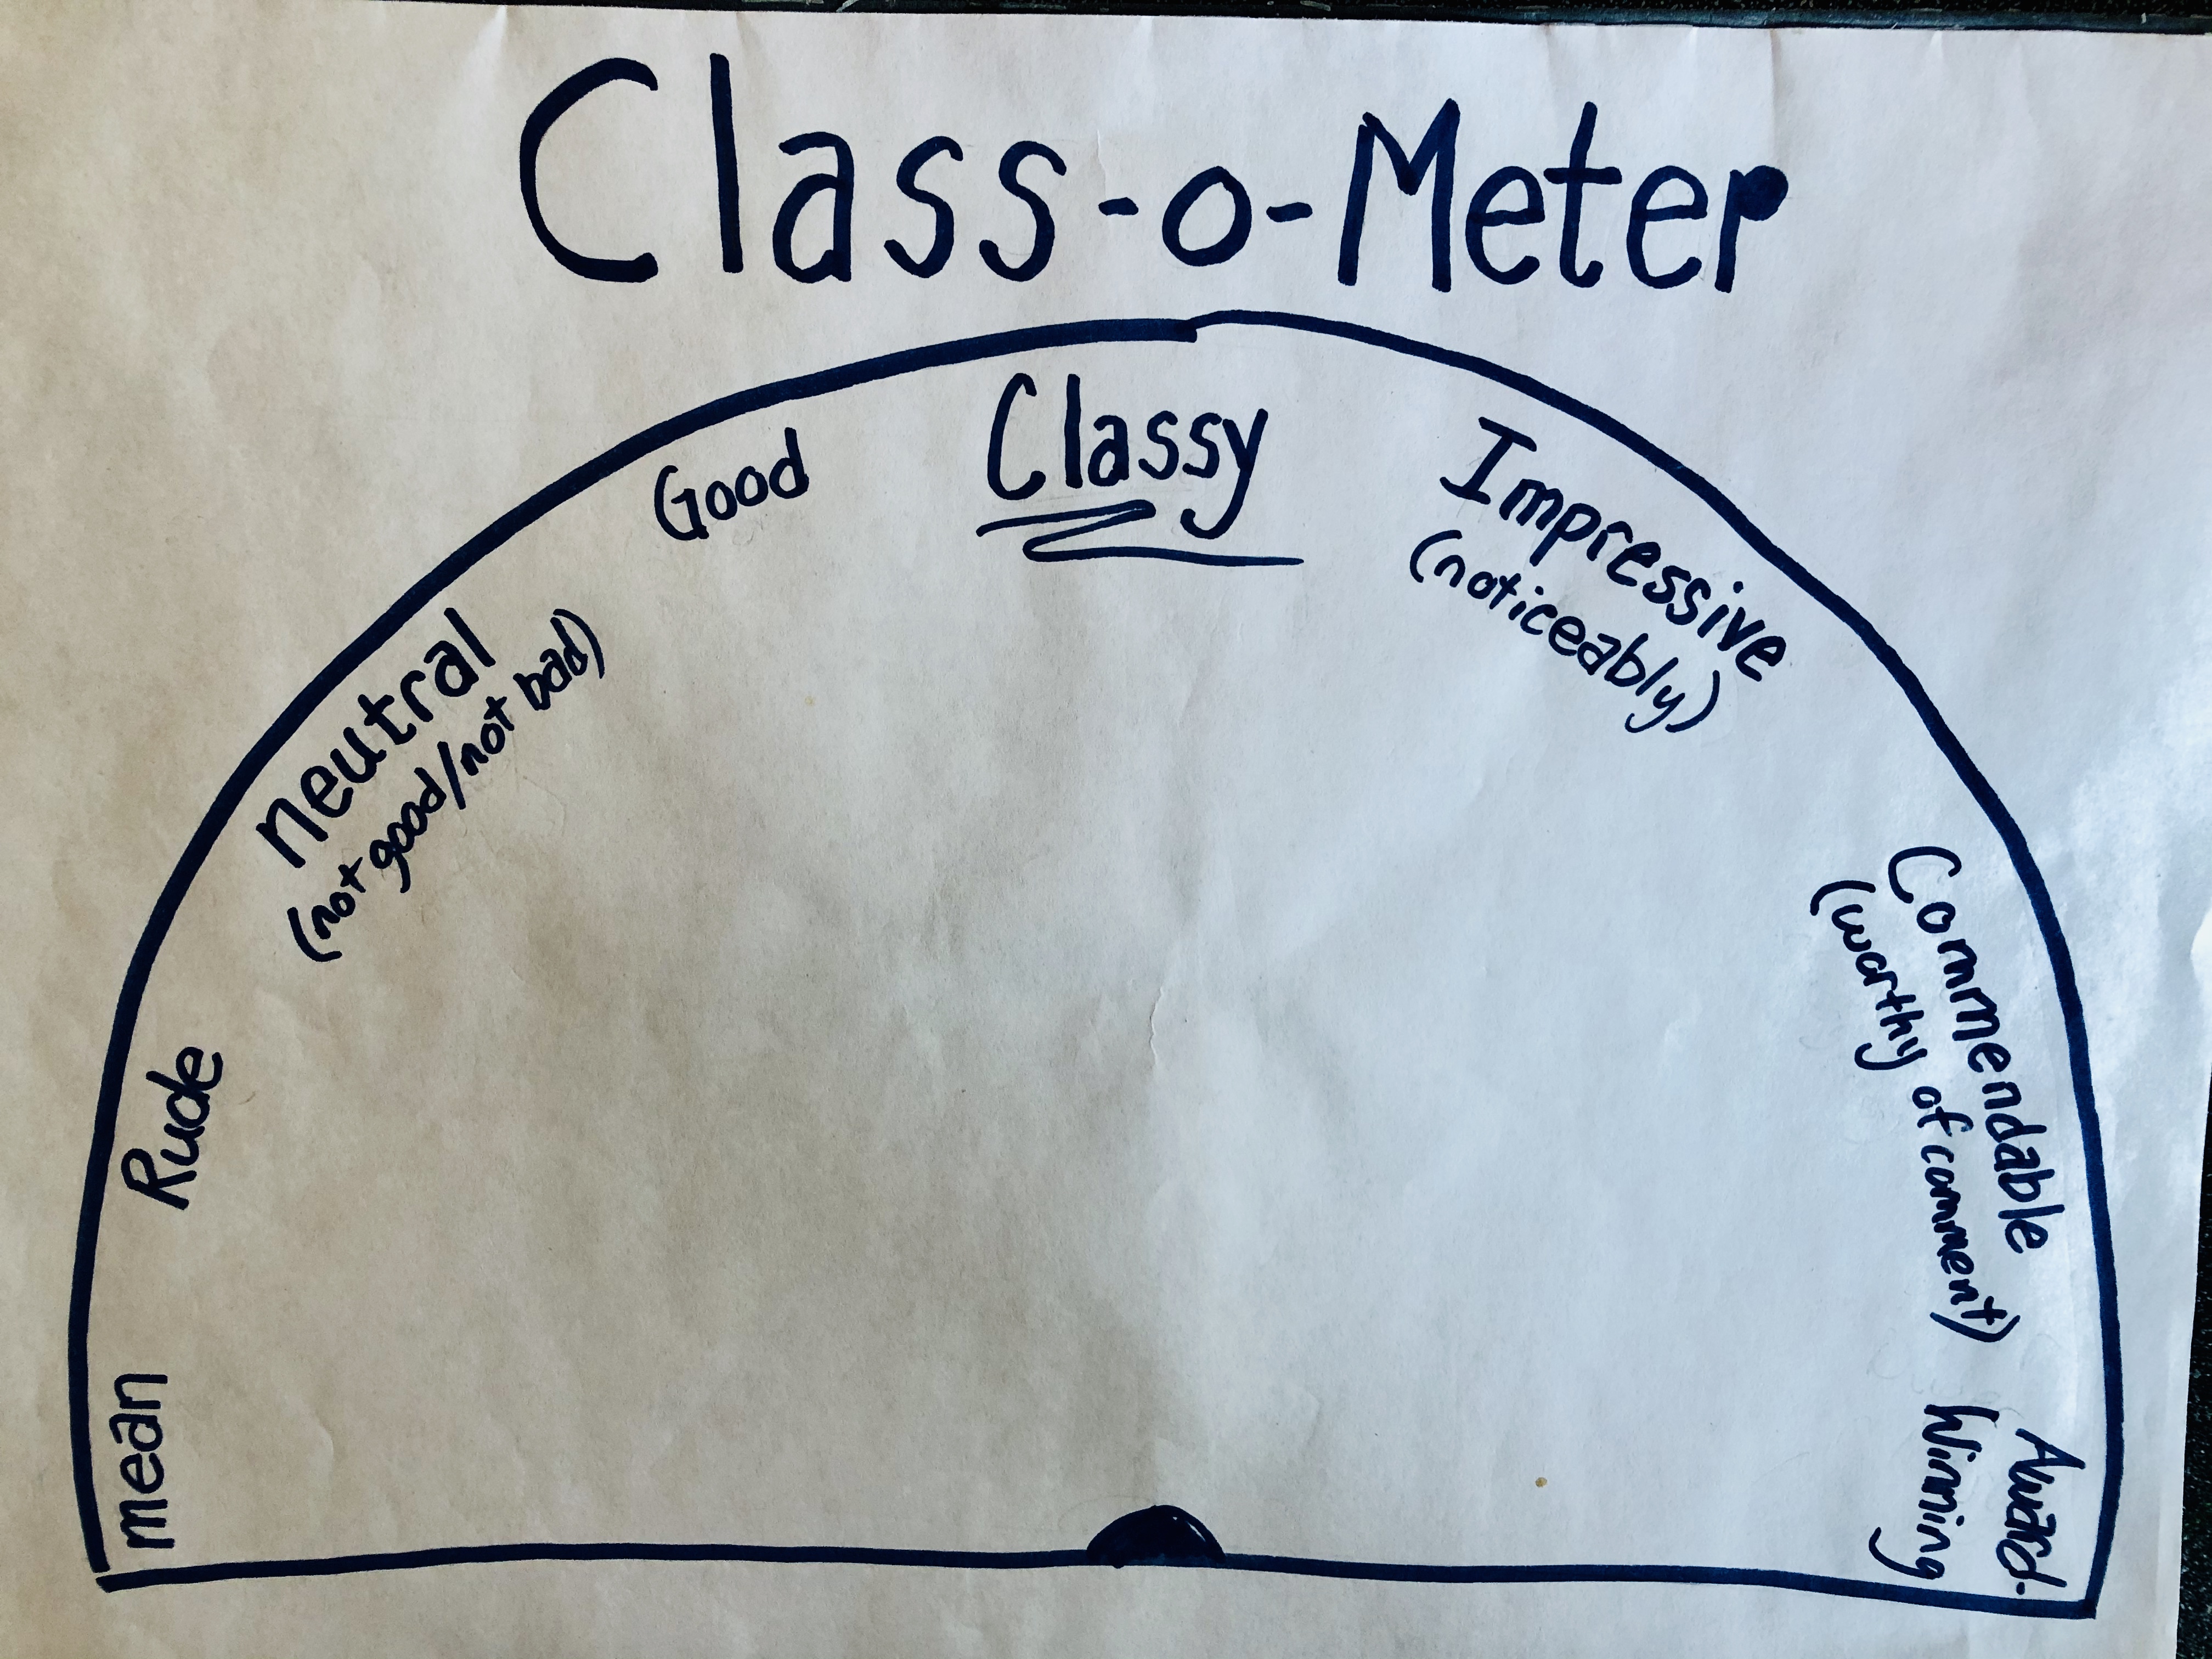 or requiring her parents to hound her to take care of this is far from classy. That is rude behavior. Needing a reminder, but taking care of the lunch box independently would be neutral, neither classy not “unclassy.” Doing the chore without any reminders, and doing it effectively and immediately would be good, which is moving closer to a classy attitude of taking care of school materials in general, working toward being a helpful contributor to a friendly family life. If you want to be really impressive, you could ask if there is anything that mommy or daddy need help putting away, take care of things other than just the lunch box, keep toys and supplies nice and neat, etc.


 The top part of the ship would be flat or vertical, having no curve, to show that this was more than just a rowboat. It had been a tall mast ship. I continued the framework and attached more planks.
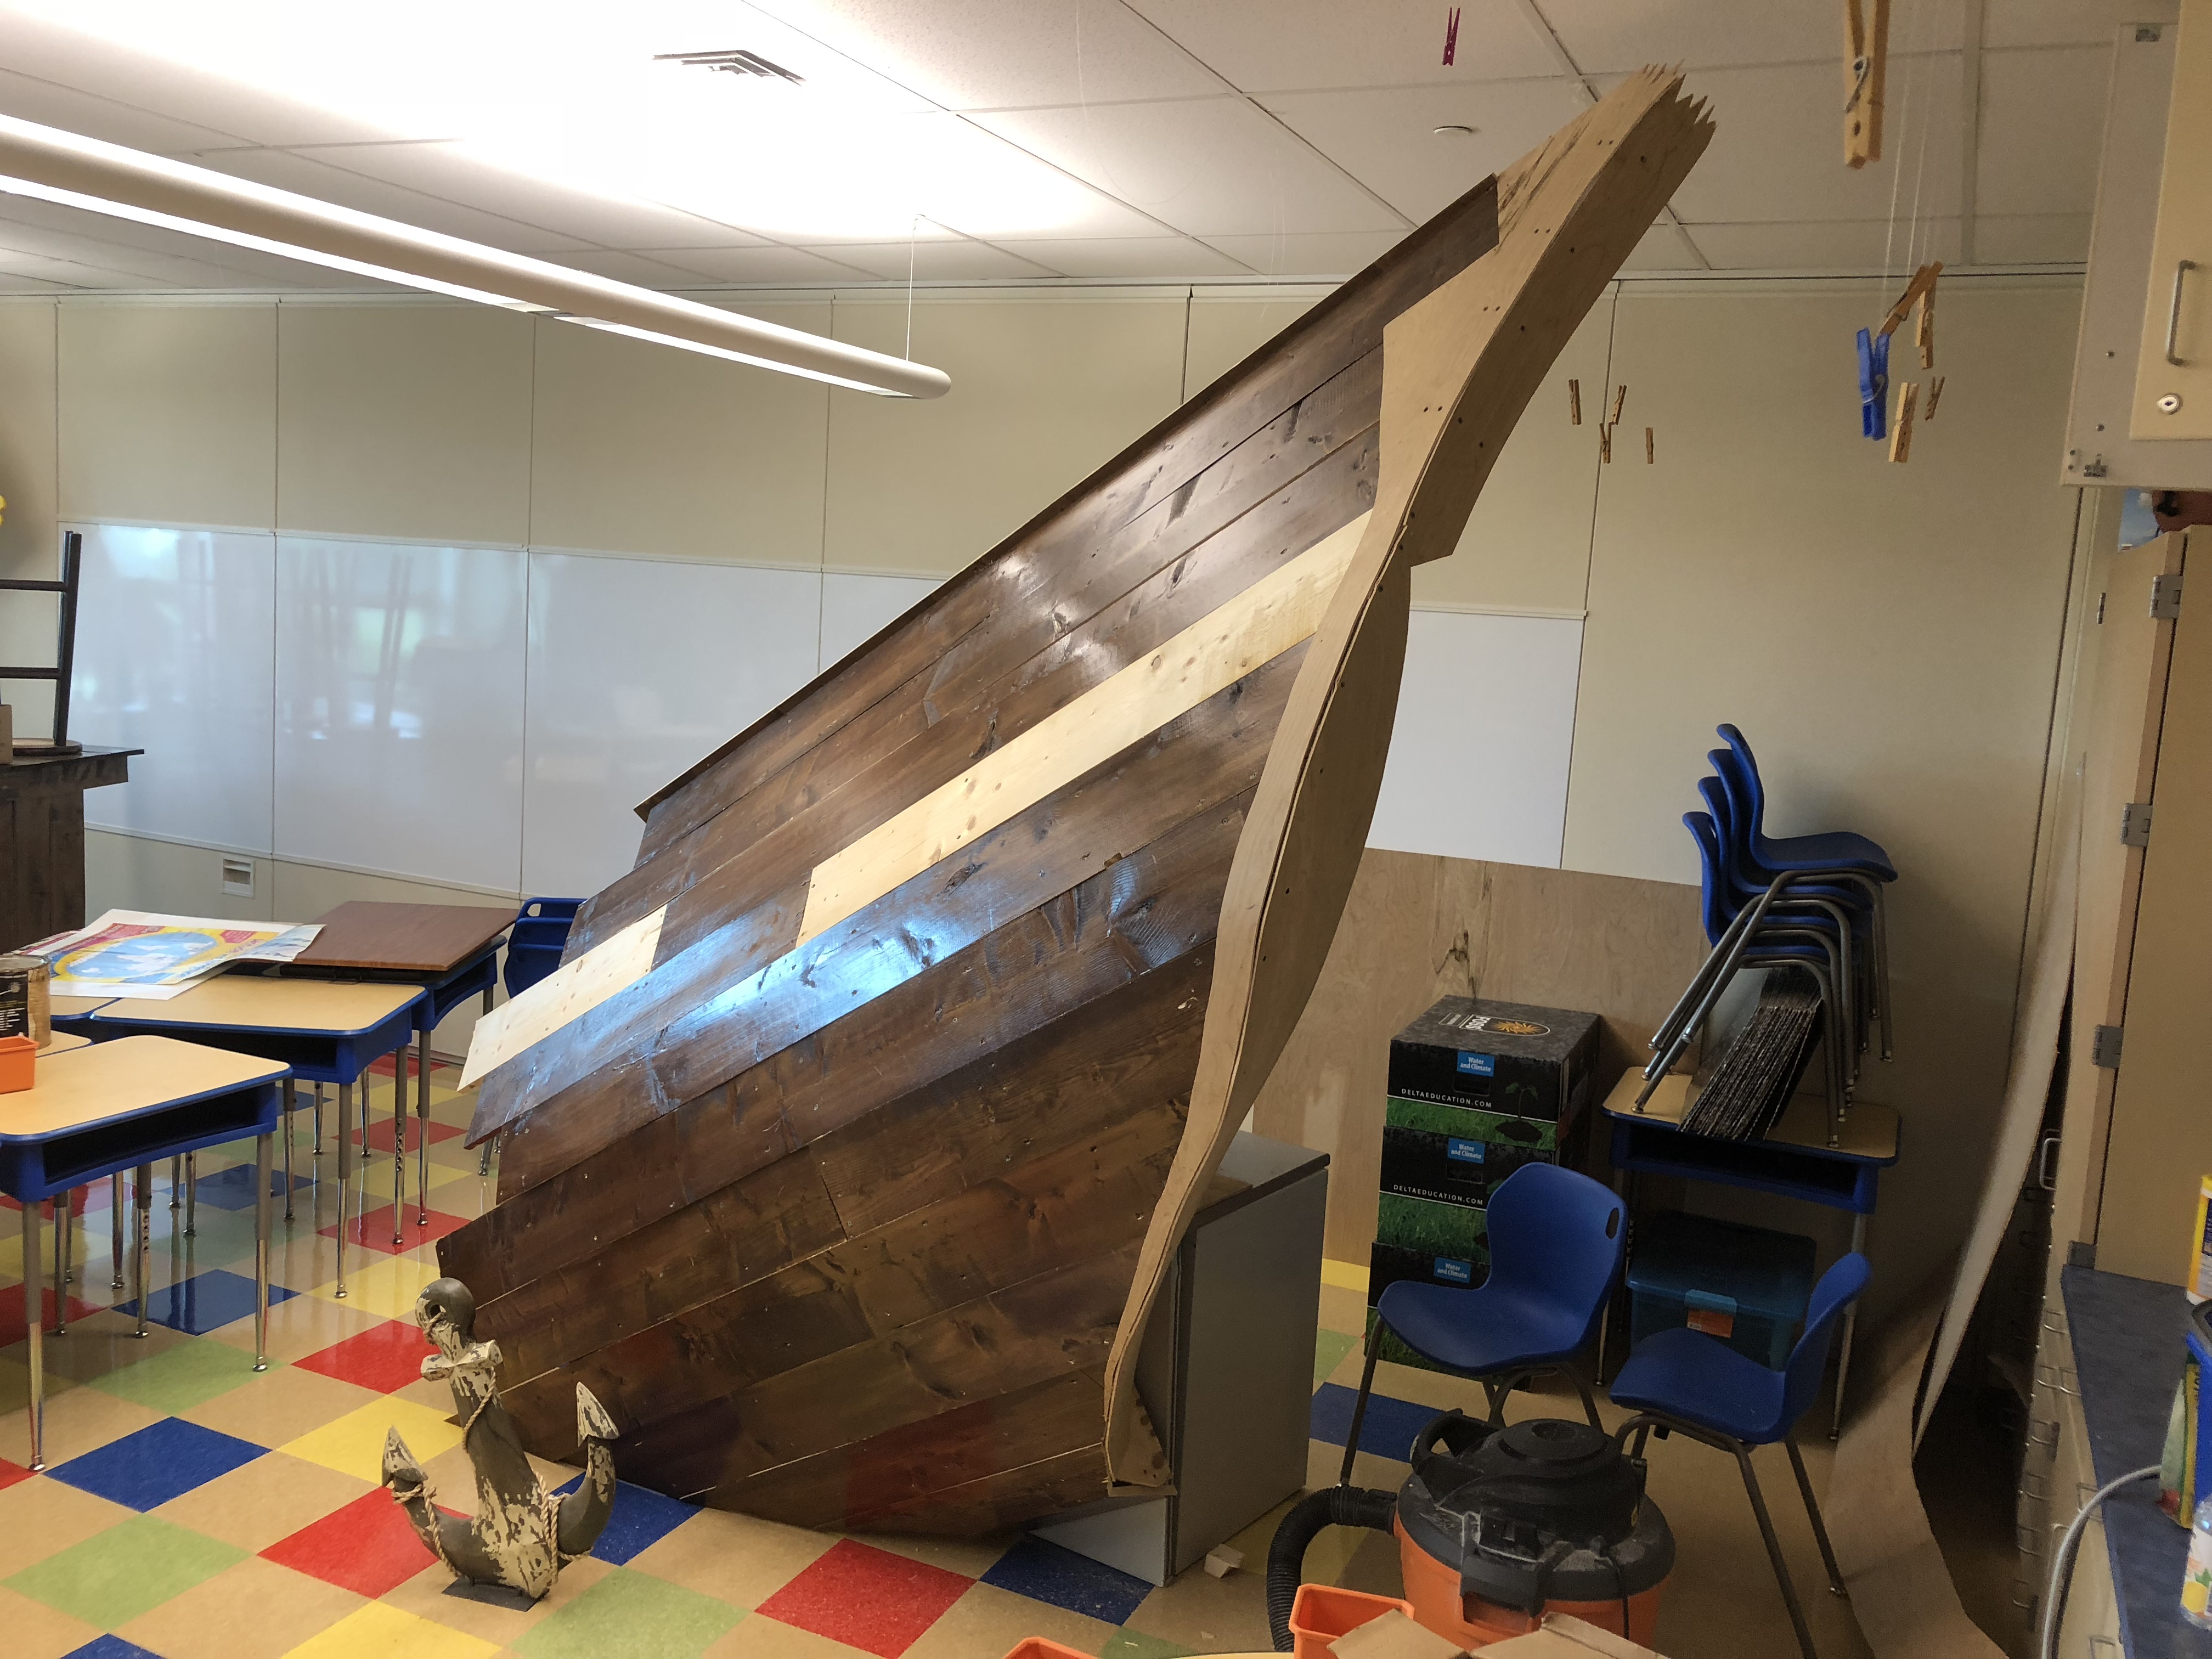


 should know how to operate a chess clock. There are a couple other elements, but what stood out the most to me was the idea that kids must learn to lose. At the time I pictured my 7 year old daughter who hates losing. She has melted down to tears when she loses. But, since then, I have mulled this concept over. At both the beginning of a chess match and at the end you shake hands. It is different from other sports. You don’t jump into competition and then slap hands carelessly at the end, chanting, “Good game, good game, good game,” while never looking the victor in the eyes. A dignified defeat is thankful for the opportunity to learn through this match. I was able to try out my skills, make some good decisions, show my stuff, prove myself to myself and perhaps others, and I am now a better stronger person having competed against you. Maybe, like a match I played against someone better than I, the outcome will be a feeling of “At least I held my own.” There is dignity in that attitude. Dignity is an attitude.


 stand at attention


 questions that students struggled with on my “Listening Skills Quiz” concerned how often they should listen.


 I introduced the word “classy”. It stuck, and all year we discussed the ways we could be classy. The kids loved it, and it has defined my methodology ever since. It was and is admittedly cheesy, but that is a big part of its appeal. And, since its conception, seven years ago, the idea of exhibiting class in teaching has come to mean more than just a behavior management system.