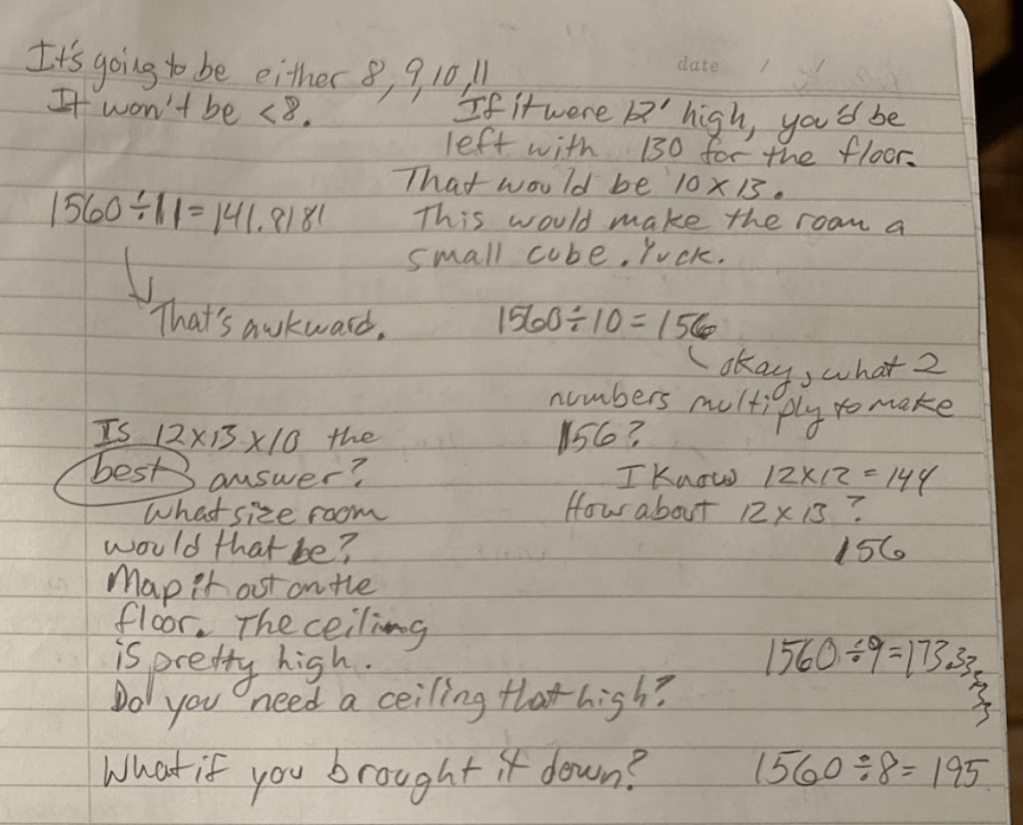
This is my journal entry when I first came up with the idea.
Math enrichment, fifth grade style…
This idea came to me several weeks ago, but I hadn’t had a chance to throw it to my fifth grade gifted students until today. The topic that I started with was volume. The fifth graders were learning the algorithm to solve for volume at the time.
I wanted to come up with a reason they would need to discover the dimensions of a 3-dimensional space. My background as a painting contractor came in handy. When I estimated the prices for painting ceilings and walls of rooms, I had to do tons of math. How could I bring that experience into the classroom?
I had the idea of working backwards. I would give them a large number, and they would have to figure out the dimensions of the space.
I decided to turn my fifth grade gifted students into interior decorators. They would need to figure out the measurements of floor space and wall surfaces.
In creating my math problem I tried out a variety of numbers, multiplying length times width times height, until it created a nice round number. I made the ceiling 8 feet high, and the room 13 by 15. That comes to 1560 cubic feet. Before settling on this number, I tried breaking it up various ways. You could do 12 X 10 X 13 for a higher ceiling. This was good, because I wanted there to be more than one correct answer.
I wrote the problem out and put it on the board for fifth graders to read prior to class beginning. After the announcements, I read the problem aloud to everyone. We practiced our Ready Math routine, the same four-step method I wrote about in a blog about 2nd graders writing their own word problems. First, I asked the fifth graders what the problem was about. Then we discussed what we were asked to find. Next, we identified the information necessary for solving the problem. As it turns out, the only number is 1560, but what does this number represent? And, don’t you know an algorithm that can help you interpret this number? “Yes!”
I wrote L X W X H = 1560 on the board, when the fifth graders said it. “So, we identified the topic of the word problem; We know what we have to find; What are you going to do with this number and algorithm?” I guided my fifth graders. “You could try making some predictions. Plug in numbers and see what you come up with,” I suggested when I saw that they needed a nudge.
Some students were still stuck, so I asked them what they thought the space looked like. “A cube,” someone suggested aloud. Dylan jumped on deciding the room was not a cube. He used his iPad to find the cubed root of 1560 to be 11.5977, and since one of the parameters was that the dimensions are whole numbers, this option was off the table.
“You can’t use your iPad,” a peer protested.
“I never said anything about not being able to use iPads or calculators,” I offered. Fingers feverishly fought to open devices. Not everyone, though. There were some students who chose to stick with paper and pencil.
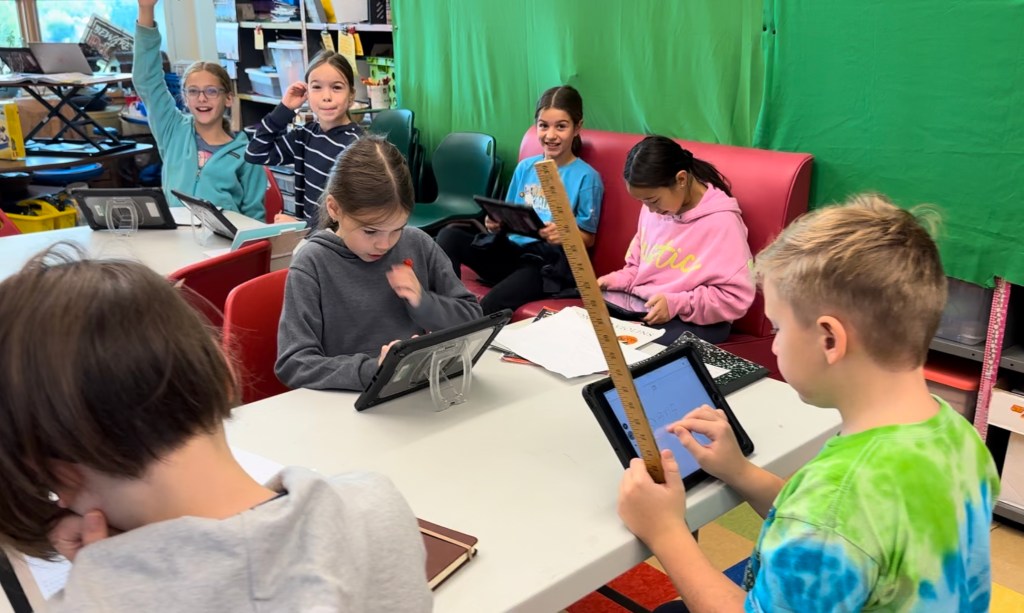
A group of girls asked to use some rulers. When I asked why, they told me that they wanted to get some ideas. This seemed perfect to me. They realized that they needed some background knowledge. They began measuring the classroom.
A student came to me with the dimensions 40 X 39 = 1560. At this point I brought eveyone together for a teaching moment. “If the room were 40 feet by 39 feet, and the volume of the three-dimensional space were 1560 cubic feet, how high would the ceiling be?” They thought about it for a second. Some multiplied 39 times 40 and discovered that it equals 1560. “The ceiling would only be one foot from the floor! Two measurements would make it a two dimensional space. You need a third measurement to give it depth,” I explain. “What could you do with these numbers?”
“2 X 20 X 39,” several students say at the same time.
“So, now we have a two foot high room. This needs to be a space that normal adult humans can walk around and live in.”
“4 X 10 X 39”
“We are getting closer. Why don’t you do to the 39 what you were doing to the 40? Try breaking it up.”
After a while, a few students were beginning to figure out more reasonable dimensions for a living space. They thought that they were done when they came up with three numbers whose product produced 1560, but “Oh, no! You still have to do the interior decorating work. Now that you know the lengths and widths of the walls, you must figure out how much hardwood flooring you need to get. And then, you have to calculate how many double-rolls of wallpaper to order,” I remind them.
I shared the word problem with the class via a Jamboard, so that they could share their work. They could write right on the Jamboard, or take a picture of their papers, using Jamboard. The classroom was electric with mathematicians calculating, communicating, collaborating. I don’t know about interior decorating, but these students were making my room look and sound great!
It’s October, and the second graders in my school are learning the basics of solving word problems. The arithmetic is super simple single-digit algorithms. Likewise, the stories couching the numbers are unadorned with character development, setting, or plot. Time for some #MathEnrichment!
My idea was for the 2nd grade gifted students to write their own word problems. Before creating our own, I thought I’d model some. I wanted to provide some math that was challenging, but doable, albeit with my help. As it turns out, my math riddles had the second graders perplexed to the point of paralysis.
It wasn’t just the numbers. Somehow, I’d forgotten what Ready Math had taught me! There is a specific way to read word problems. Even the smartest of the smart; kids who can wrestle with and make sense of the math; won’t be able to decipher what is being asked of them if they aren’t taught how to comprehend what is going on in a math story. It is like an Olympic runner being dropped into the middle of a forest and expected to sprint to the finish line that she can’t even see.
I constantly tell my students that challenges are fun. These kiddos weren’t buying it. Challenges are only fun when there is some hope.
Like an idiot, I dragged my students through my word problems, doggedly showing them what the numbers were doing. They were good sports. When I let them write on the Google Jamboard, they perked up. In the end, they left my room with number hurricanes storming their cerebrals. I was left to pick up the mess of math misconceptions strewn about the streets of seeming failure.
That was last Friday. Over the weekend I remembered; There is more to solving a word problem than crunching numbers! The Ready Math curriculum instructs teachers to have the students use a 4 step approach to solving word problems. When you break the process down this way, it is much more manageable.
First, read through the word problem and decipher what the story is about. Don’t worry about the numbers. What is the topic? Are we talking about reading books or alien monsters that can control your actions with their minds?
Next, identify the important information. What are the tools you’ll need to fix this problem? Don’t be fooled into thinking that unnecessary numbers or information will be needed. Sometimes there are superfluous facts stirred into tricky math stories to trip you up!
Before doing any math, you must figure out what you are asked to find. (This step might come second. I can picture needing to know the end goal prior to identifying the important info.)
Finally, we begin doing some math. Show all of your work/thinking.
There’s a fifth or bonus step that I told my 2nd grade gifted students about, that has to do with communication. Just like we include publishing in the “Writing Process” and the “Scientific Method,” we are not done solving our word problem until we share the answer. Make sure to label the numbers with whatever unit of measurement or name of thing you are talking about!
The answer of this word problem doesn’t even have any numbers in it! But, you better show and be prepared to explain your work for full credit.
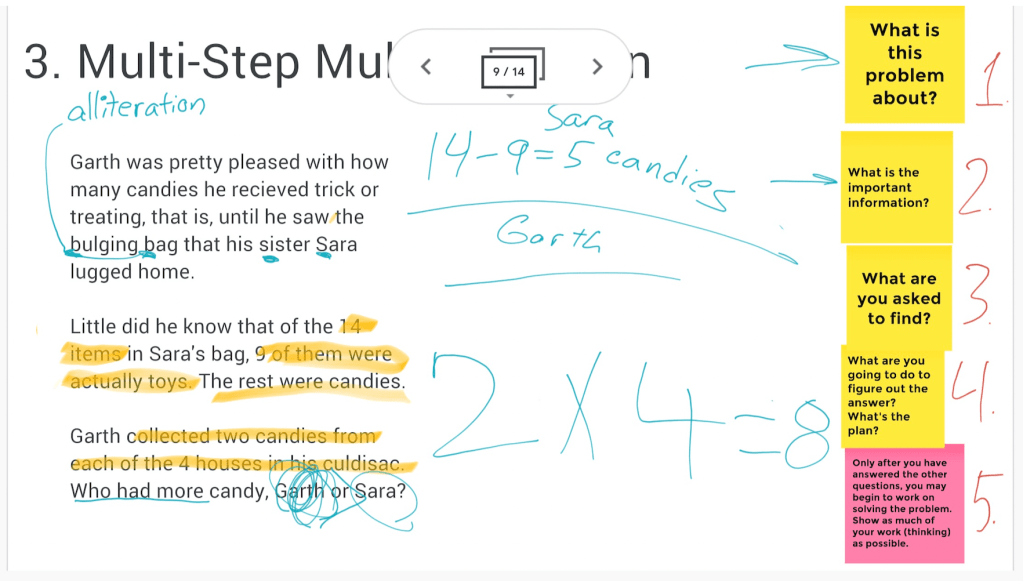
Tuesday morning, the day after Indigenous People/Columbus Day, we were back at it with more challenging word problems. When I first showed my students this Jamboard, I had the “sticky notes” layered on top of the word problem. As we read and discussed what each one meant, I moved them to the sides and shrunk them, so that they all fit on the right for reference. Only then, did we read this word problem.
My 2nd graders kept yelling out numbers, like there was a contest for who could solve the problem first. It was humorous to tell them that every single number that they would say, no matter what it was, would be wrong. This was perfect for drawing their attention to step 3. “What are you asked to find?”
“Are you supposed to provide a number as an answer?” I asked my students. This got them thinking. And, even after solving how many candies each kid had, they still needed to compare the numbers in order to really finish the problem. It wasn’t enough to just know how many each had.
This is only the first of many word problems to come for our 2nd grade gifted students.
Once we had successfully solved our Trick or Treat word problem, it was time to make up our own. Before getting creative, we decided on the numbers and operation. We would have the mathematicians subtract seven from twenty.
I wanted to include everyone’s ideas. That is why the math story has flowers named after a student’s pet bunny, a main character named “Kid Pineapple, robots, laser blasts, and lots of the word “stinky” in it. Ha ha. We had a figurative blast coming up with our story.
We look forward to making up and writing down many more for our other 2nd grade friends to solve… The Ready Math way.
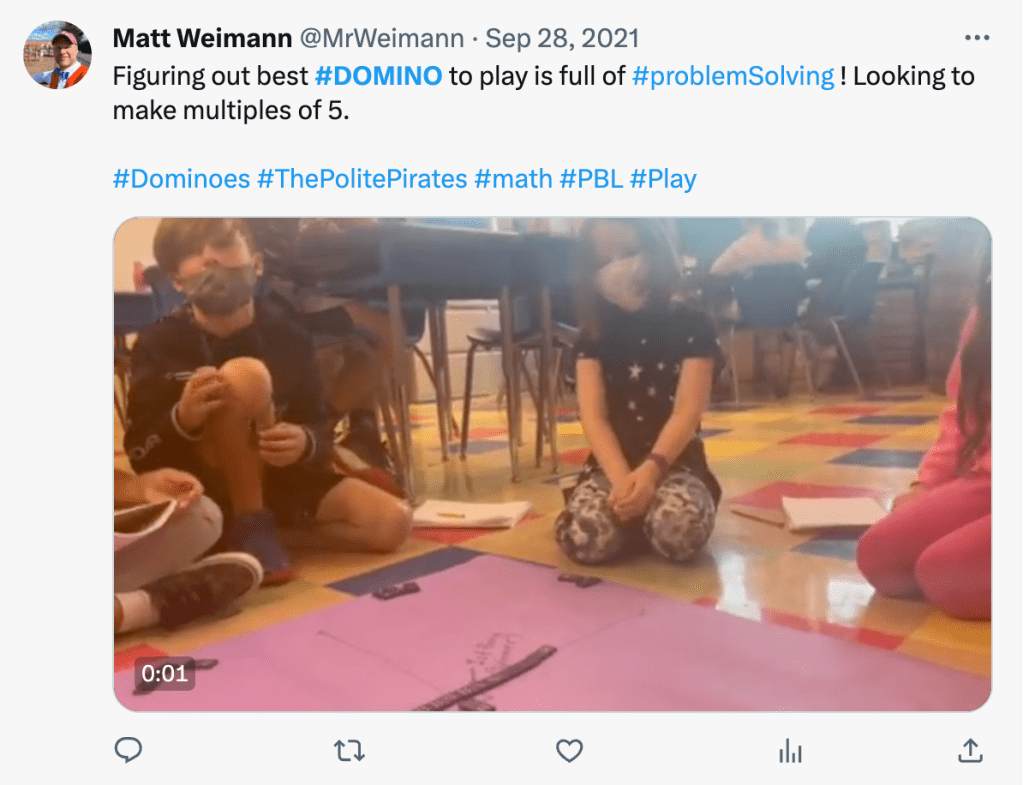
This is a screenshot of the last paragraph + picture from my last blog, with the question of the day above it. I presented this on our Google Jamboard at the beginning of gifted teaching time for students to wrestle with.
I’m back with some more Dominoes word problem work. At the end of my last blog about Dominoes I dreamed up what I thought would be a good problem to get students thinking. It seemed not only doable to me, but I worried that it might be too easy. Not so.
I asked my students, “What is the highest score possible in one play of Dominoes?” I put 28 bones (one whole set) on each table, and encouraged students to move them around looking for the best combination.
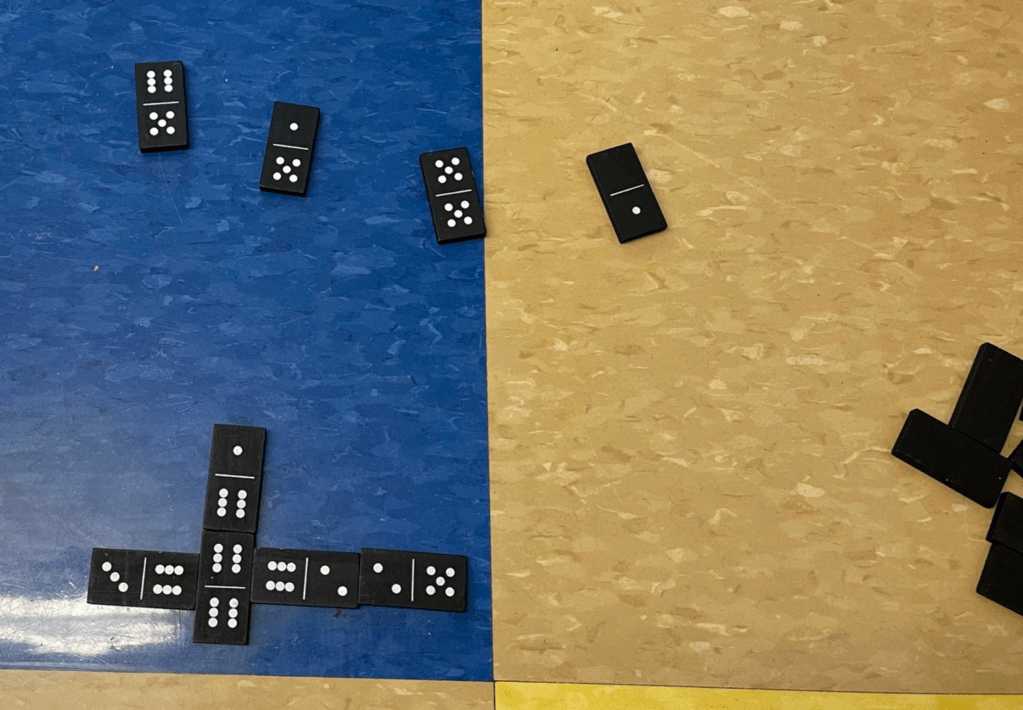
This is a screenshot of photos that I used to show students how to connect Bones, adding up all of the ends, and analyzing which Bone would make the best play.
A game of Dominoes proceeds until one player or team acquires 150 points. It takes several rounds to accumulate that many points. During each round the players add Bones (Domino pieces or tiles) to an existing cross of Bones. You have to connect the same numbers, so a 6-4 Bone could not be added to a 5-1 Bone. It could be added to a 4-4 or a 6-6 Bone. When you connect a new Bone to the Line of Play, you add the last number from each end. Your goal is to have a sum that is a multiple of five. Only multiples of five get recorded as points, pushing you closer to the goal of 150; victory.
The first group that I met with are 5th graders. They are still learning the game. I thought that providing the question of figuring out the very best play would create a goal; “This is what I can aim for.” Instead, my students began building towers with the bones and grumbled, “Why don’t we just play Math 24?” Upon self-reflection, I now realize that my word problem was like asking someone who is just beginning to learn how to construct an airplane to calculate how fast it will go. “Dude, let me get the wings on this thing, already!” Ha, ha. Sorry, students.
Before wasting too much time, fostering further frustration, I decided to scrap the 5th graders’ warm up and move on. I made a mental note on the idea of a Math 24 preference, though. This gave me much to think about; More to come on that, soon.
My 4th graders were at their wits’ end.
I didn’t even try the problem with my 2nd graders, who are also novice Domino players. I thought I’d wait and see how my experienced 4th graders, the students whom I taught to play the game last year, would do. These guys would love the challenge, and should have all of the conceptual tools necessary to tackle this problem. They’re the ones in the picture on the Google Jamboard, for crying out loud!
My 4th graders jumped into “Problem-Solving” mode right away. Their biggest hangup was trying to play the game from the beginning. They kept trying to build the arms from the center of the game, forming a cross they way they always do. That won’t work when attempting to find the highest possible score, though. They would have already used the Bones with the greatest number of Pips (that is the technical term for the dots on the Dominoes) on them. Those need to be saved for the ends.
Finally, success!Frustration.Start over, and over, and over, again.
I must have told them to, “Focus on the ends of all four arms. Don’t play a whole game. You don’t need the center of the cross in order to calculate the largest point accumulation possible,” a dozen times. I began to feel like a broken record.
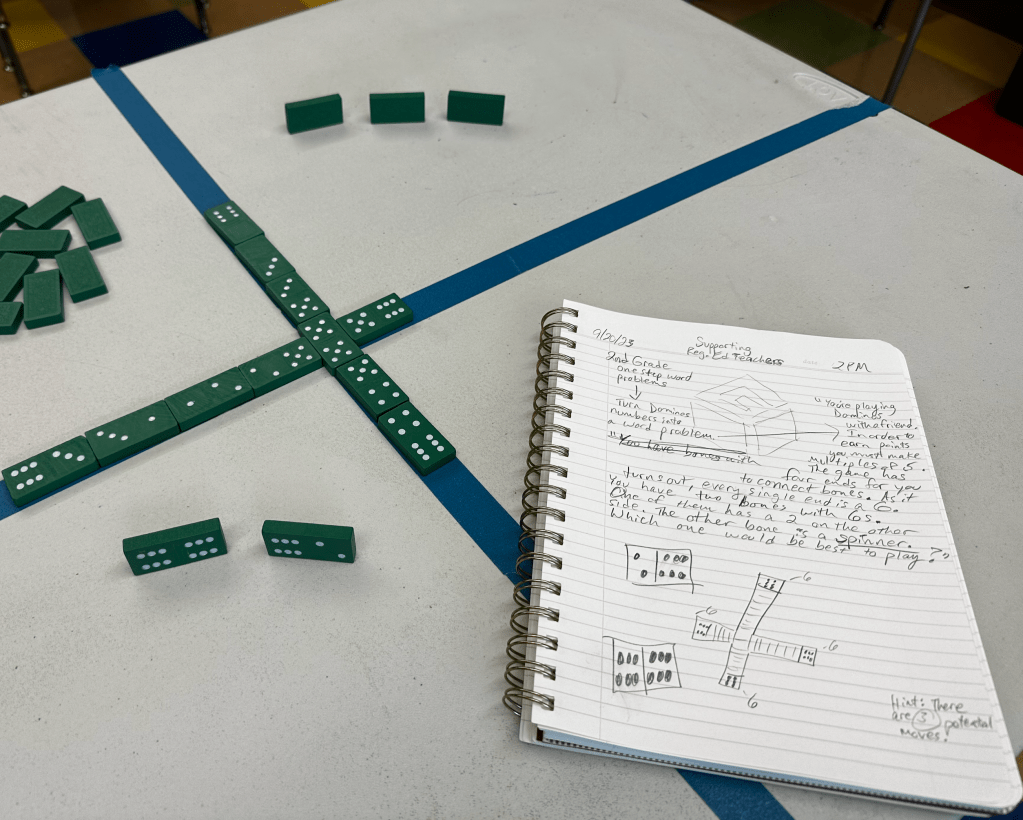
This is a picture of the notes from my journal that led to this “Wonderful Word Problem.” I only focused on the ends of the Line of Play. I’d hoped that this is what my gifted students would do.
Finally, I stopped them and taught them a new vocabulary word: Hypothetical. “This is a hypothetical situation. If you could have the ideal play; The absolute best play ever, what would it be? Don’t worry about what was already played. What Bones would give you the very highest points?”
This is truly Out-of-the-Box Thinking. I wanted my gifted students to leave the box of the game and imagine only the very last play. All previous plays are fog. They don’t matter. You can only see the tips of the Lines of Play, and they have huge Bones… Doubles, every one of them; The highest Doubles, even! Eventually, I had to just tell them the answer.
I had one last group to try out my wonderful word problem. I started the Domino difficulty by sharing with my 3rd graders that the 4th graders could not do this. That got their competitive juices flowing! Next, I did not allow them to put any Bones in the center of the cross. “We are NOT playing Dominoes,” I explained. We are figuring out a hypothetical question: “What if you had an opportunity to make a play that gave you an enormous amount of points? How many points would be the greatest possible in one play of Dominoes?”
Believe it or not, the 5-5 Bone is worth more than the 6-5 Bone, because it can be played differently.
I guided their thinking toward the Bones that represent the greatest numbers. Even though a 6-5 Bone has more Pips than a 5-5 Bone, it does not present the greatest value when played at the end of a line. Why? Because, you don’t add the 5 and the 6 from the 5-6 Bone. Only one of the numbers would be available for adding. However, if you played the 5-5 Bone sideways, you’d have ten. Gasps, sighs, intake of breaths… Doubles were explored. I forced them to put the Doubles at the ends of the lines of tape I’d stuck on the tables to guide Lines of Play.
“Place the Doubles at the ends of Lines of Play.”Afterward, we explored what Bones may have been played previously, working backward from our hypothetical best play.
Letting the 3rd graders figure out answers to my guiding questions, I led them through Out-of-the-Box Thinking. In the end, they felt like they had solved the problem, and they had (with a little guidance from their teacher). Lesson: People can be taught to Think Outside of the Box. It is not necessarily natural.
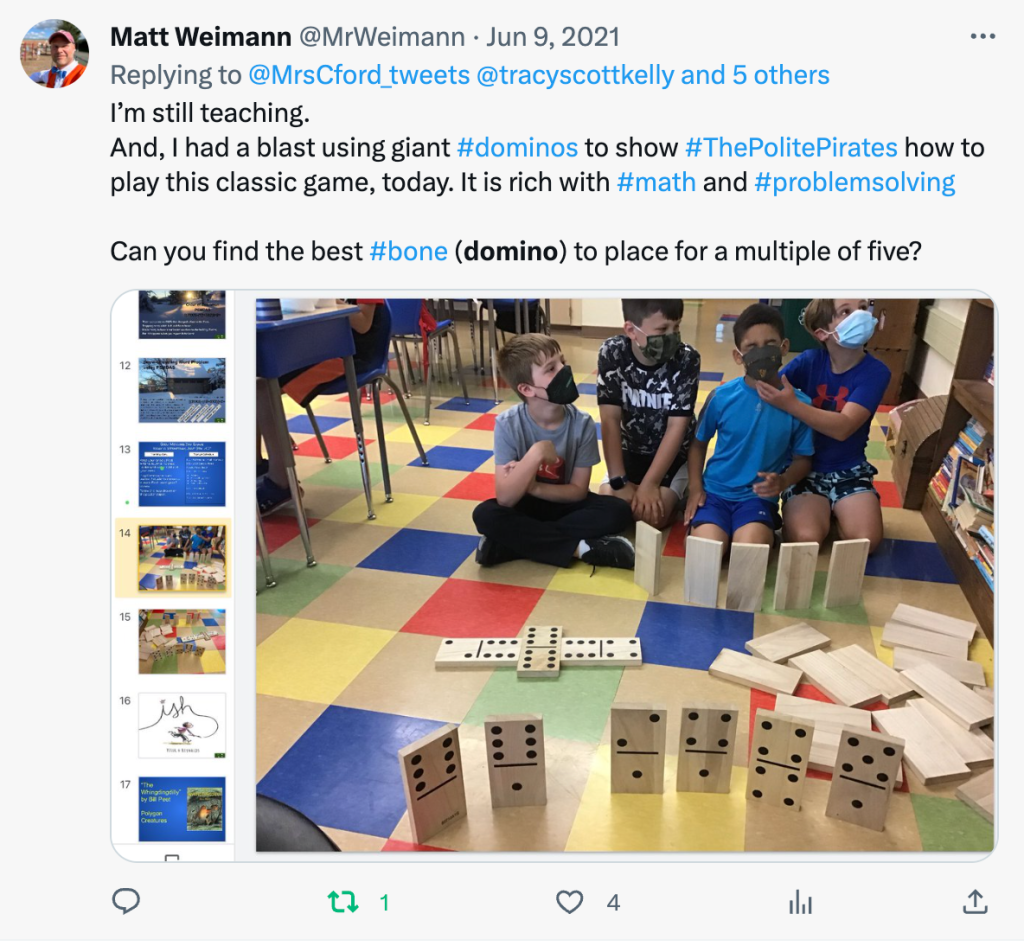
I used to use a giant set of Dominoes to introduce the game to The Polite Pirates (my 3rd graders).
Playing the game of Dominoes is an excellent way to introduce and practice problem solving. I’ve used this game for several years in my 3rd grade classroom, and now I am introducing it to my gifted students.
This past week was the first week that I met with my elementary (K-5) gifted students. Obviously, the various grade levels were in different places when it came to math concepts. Second grade is working with word problems. Third grade will be tackling multiplication soon. Fourth grade is focused on geometry right now. And, 5th grade is preparing to use formulas to solve for volume.
Dominoes can be used to introduce multiplication, using cumulative property, strengthening mental math, not to mention strategic thinking.
Tuesday morning’s second grade gifted lesson began with my typical introduction to Dominoes. I told the students that each tile is called a “Bone” and the pile of unused tiles is the “Boneyard.” They learned that there are always 28 Bones in a game, and that every single Bone is different. Each one has two numbers on it, even the ones that look empty! “What number is on this side?” I asked holding up a Bone with a six on one side while the opposite was blank. They didn’t skip a beat in guessing “Zero.”
It took a little longer to explain adding the ends of each Line of Play. “You add up any number that is at the tip of an arm, no matter how long or short the line is,” I told them. We practiced some play. The adding wasn’t a problem. We discussed using the cumulative property to switch up the order of numbers, so that the mental math was easier. “Look for combinations that create ten,” I told them. “Rather than adding 4 + 5 + 4 +2 equals fifteen, combine the 4, 4, 2, first. Then you instantly know that the five makes fifteen.”
I let students draw and write on the Google Jamboard to show and explain their thinking.
“Points are only awarded when the sum is a multiple of five. The ends of all of the lines of play add up to ten. Is that a multiple of five?” They knew that ten was made up of two fives. “How many fives are in 15? 20? 50? 500?” Flawless computation… Multiplication, here we come!
“Whenever you earn points, you say, ‘Give me ten…’ or however many points you earned.” I learned this from a fun video that taught me how to play ages ago, and elementary students LOVE this aphorism.
“Give me ten!” one of my second graders beckoned. I put 10 on the board, and we played a couple more sets before moving on to our Self Portrait project. Even though I only have my gifted students for 40 minutes at a time, I found doing more than one mini lesson to be helpful in keeping their interest.
After school, I came up with a word problem for Wednesday using Dominoes. I typed it into a Jamboard. Even though I tried to word it in such a way that you could visualize the game in your mind, I went ahead and used Domino tiles (Bones;) to make a model of the hypothetical game on a table and took a photo. I imported the picture on the Jamboard slide with the word problem text.
I snapped this pic, so that I could show my students the thinking behind their word problem. I am hoping to inspire them to use their “Gifted Journals” to jot down ideas through drawing diagrams and writing notes just like this.
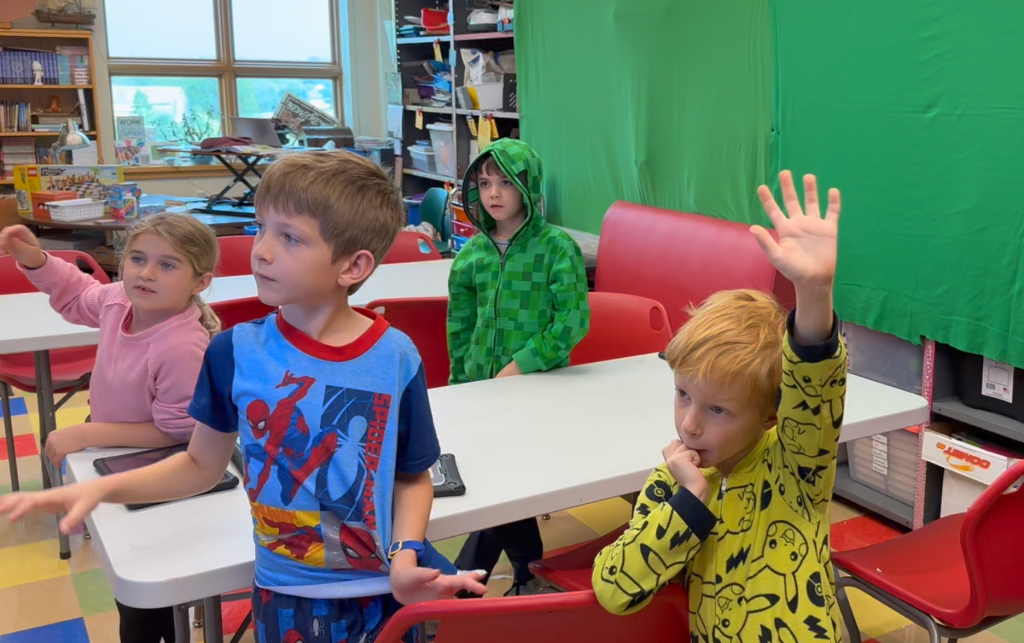
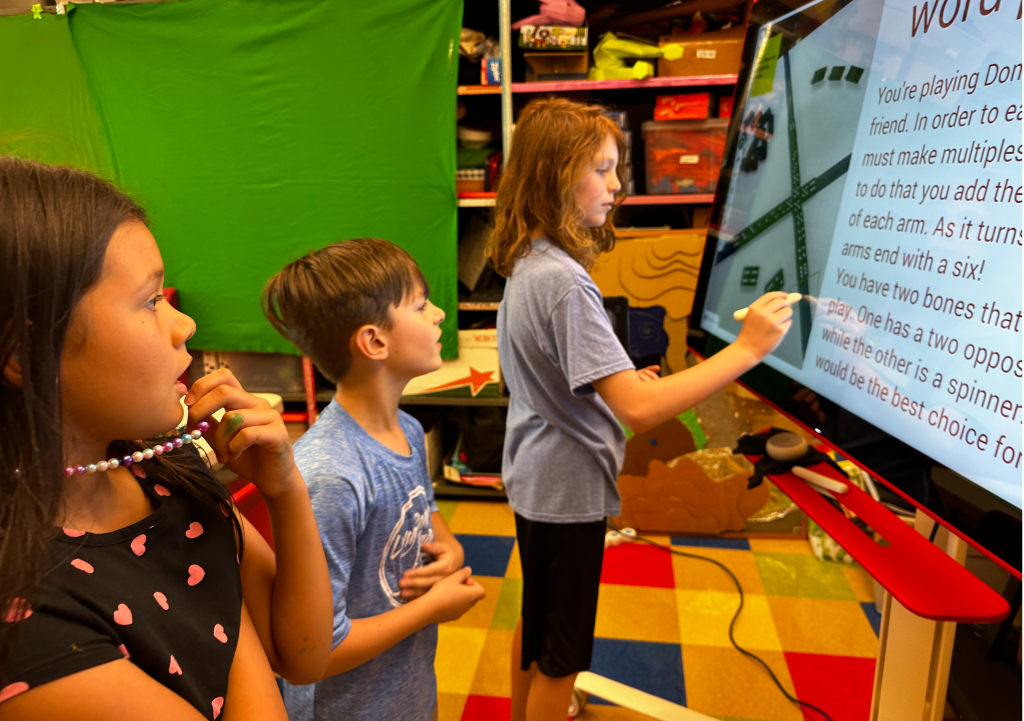
When Wednesday arrived I was excited to try out my word problem. The first group of students that I met with was 5th graders. Because I do car duty, I get to my room at the same time as my students. This morning I had placed a note on the open door, instructing them to try to work out the answer to this problem while they waited for me to show up. The word problem was presented on a giant Google Jamboard that I’d rolled in front of the entrance to the room.
The group was crowded around the screen when I got to my room. I enjoyed listening to their discussion of possible moves. From what I heard, a couple students were aware of the general concept of matching numbers. They didn’t quite understand adding all of the numbers from the end of each line of play, but that was okay.
When one of the students decided the trick to solving the problem was to simply take a new Bone from the Boneyard, I invited the 5th graders into the room. Before talking Dominoes, I praised their persistence and told them that I was proud of how hard they worked. I purposefully pointed out the failure to solve the problem as an example that not everything will come easily to them. It is my job to come up with challenges that stretch their thinking, and I intend to make not only their intellects but also grit grow.
My 5th grade gifted students experienced something new this morning: bewilderment.
As I explained the solution to the puzzle, I used it as a teaching tool. When I informed them on how the points work, they noticed that placing the Bone with the two on one side at the end of one of the lines of play would bring the total sum of all of the arms to 20, a multiple of five, and thereby an opportunity to earn points. “Good. But, there is a third and less obvious option,” I told them. “This one,” I said, pointing to the Double that had a six on both sides, “Is a Double. It is special. Not only can you play it with one six touching the line of play (also a six), but you can set it perpendicular to the line, thereby creating an extra arm.” I waited for someone in the group to notice the new sum.
It didn’t take long for a fifth grader to notice that all of the sixes add up to 30 points. “Turning the Double on its side, created a fifth number to add. Since all of the numbers were the same, you can’t help but have a multiple of five! It is literally five of the same number.”
I tried the word problem on my daughter Scarlet who had a brilliant reason for using the Double instead of the 2-6. In addition to the points, you would cause your opponent to have to take from the Boneyard, because chances are they won’t have a six. Limiting their options was very strategic thinking. I shared this strategy with my 4th graders who already knew the game well.
Next, it was 2nd grade’s turn. These kiddos had just learned how to play the game for the first time the day before. I used the word problem to reteach some of the ideas. More than focusing on problem-solving, I walked my second graders through the mechanics of writing a word problem. We discussed the details of Dominoes that I included in my little story. “Why did I mention multiples of five?” I prompted. “The goal is to earn points.”
I had toyed around with the idea of only having words. When I originally crafted the word problem, I didn’t have the Dominoes laid out on a table. I tried to provide just the right amount of text for students to be able to visualize all of the details necessary for solving the problem in their heads. At the last minute I decided to include a photo with the problem. This was only the third day I was teaching these students! Watch out, though. Word problems, here we come!
Pride flooded my person when fourth grade arrived in my room and crushed this problem within seconds. I’d taught all but two of these students how to play Dominoes last year. When I saw how quickly they solved the puzzle, I wished I’d hidden the photo.
I pointed out the verbiage at the end of the word problem. “Why is it okay that I didn’t say what numbers were on the Double in the word problem?” I asked them. I had left out this vital information on purpose, and I wanted to see if they could find the puzzle within the puzzle. I did this kind of trick with them all last year. They understood that it had to be two sixes because the word problem stated that “You have two bones that you can play.” If the double were any number other than six, you couldn’t play it.
Here’s a question I failed to float: “Is it possible that the player has more than two Bones?” And, this is where a photo is limiting. Because you can see only two Bones on the table, it is difficult to imagine there being more than two. But, yes, the parameters of the problem leave that detail open. You have two that are “able to play,” but you may have more. I’ll have to work that riddle into a future problem!
My last group of the day was third grade. Here, I used the word problem differently. After exploring the numbers and solving the puzzle, plus revisiting how to play the game, I drew their attention to the structure of the word problem. It was a story, providing characters (you and a friend), a setting (a game of Dominoes), and a conflict. “This word problem has a plot,” I pointed out. (Plot is the language arts concept that third graders are learning right now.)
The problem of which Bone to play is the climax of our story. The resolution is a mystery. You could use either Bone. Which one is better? What is the third, less obvious option? How will the story end?
And, this is the end of my blog about this amazing word problem. But, is it? Through the process of fleshing out the many lessons that coated these Bones, I have come up with some additional puzzles. Here is a taste: “What is the highest score that can be collected in one play of Dominoes? What would the Bones look like at the ends of each line of play?” I think I’ll provide manipulatives; Bones; for pupils to push around when solving this. Good luck!
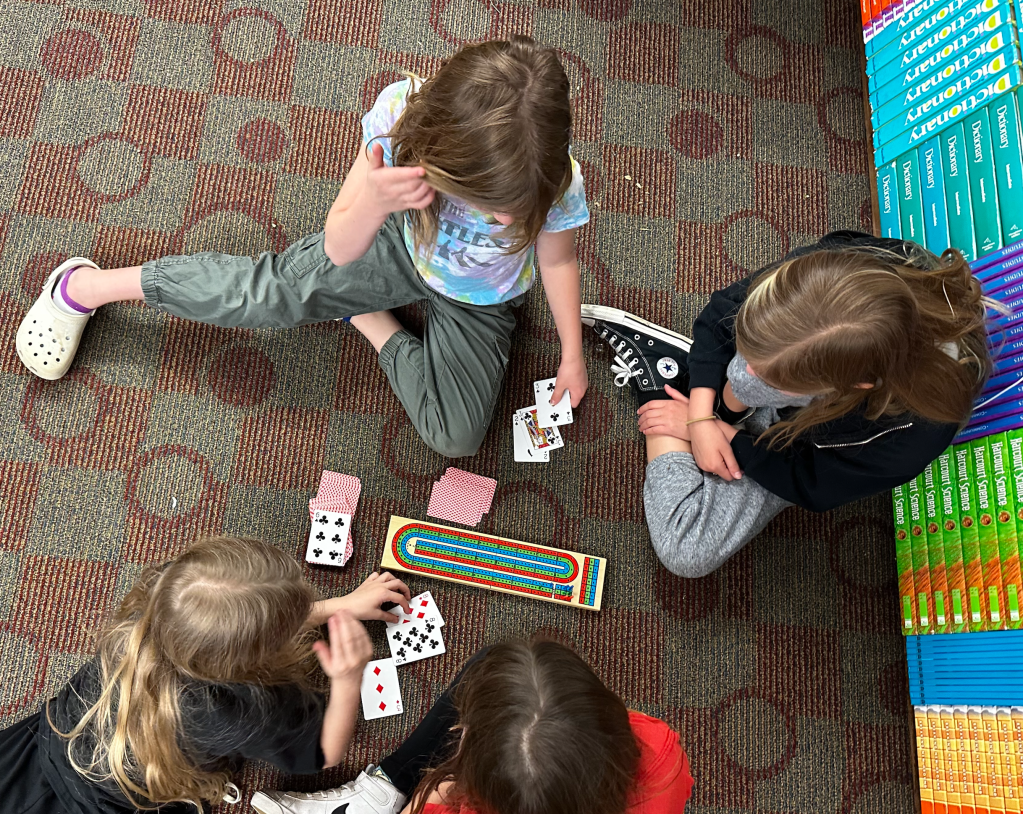
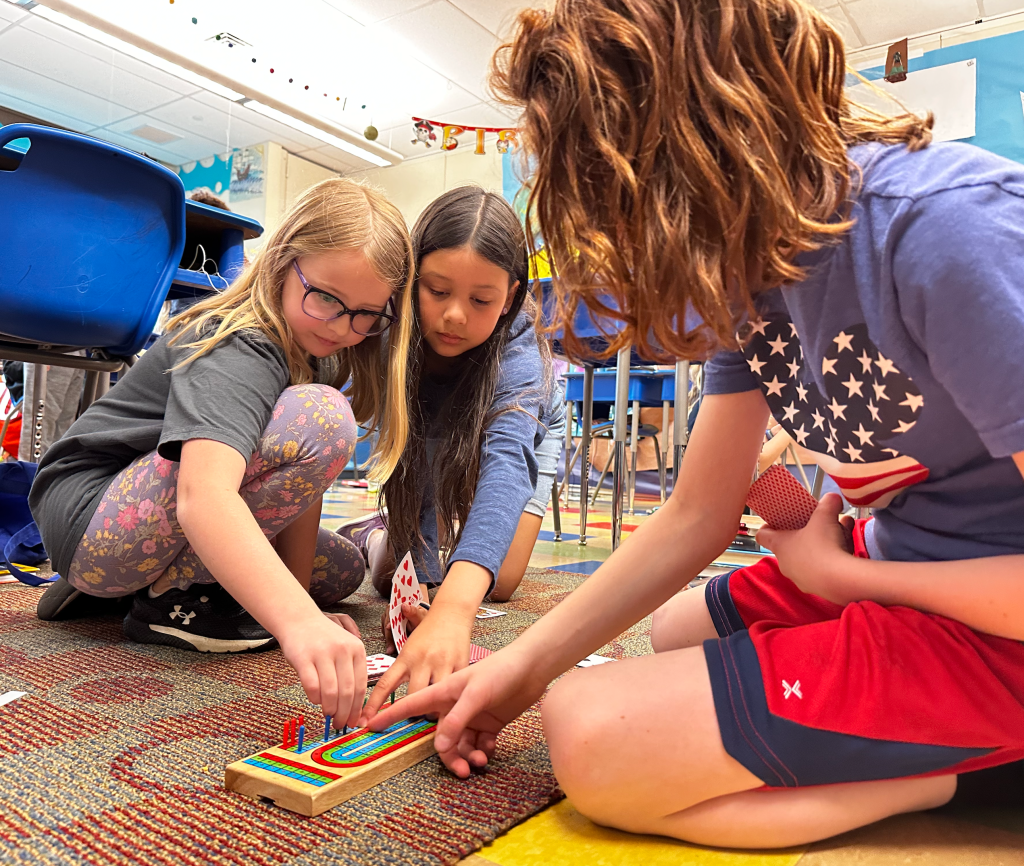
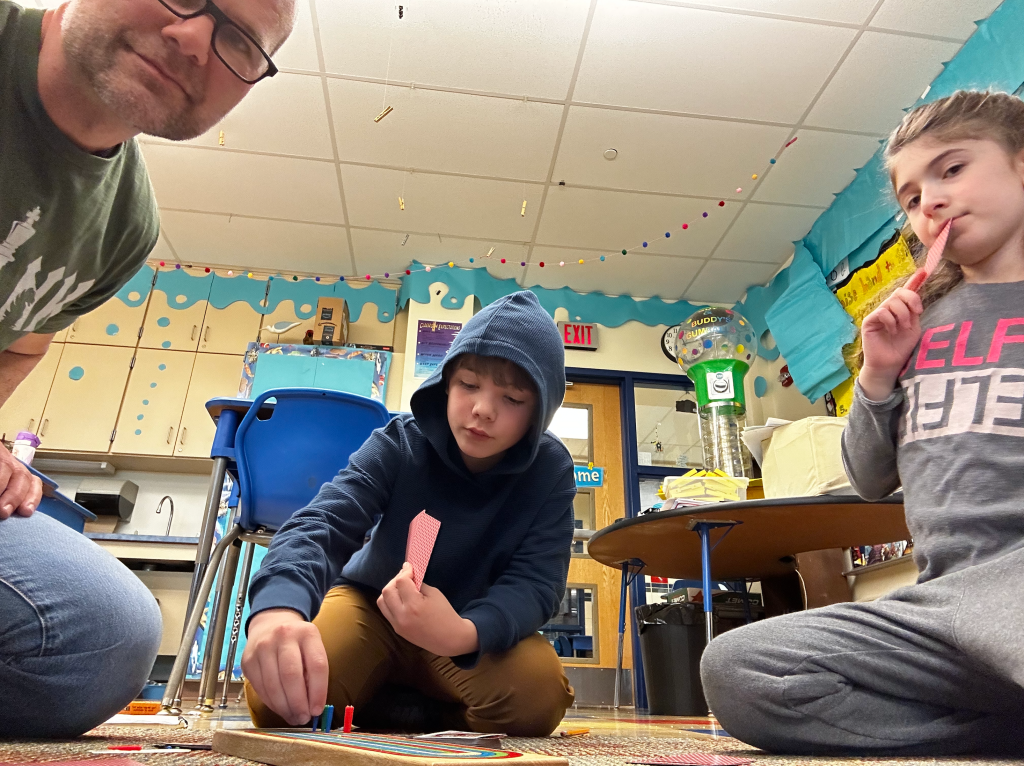
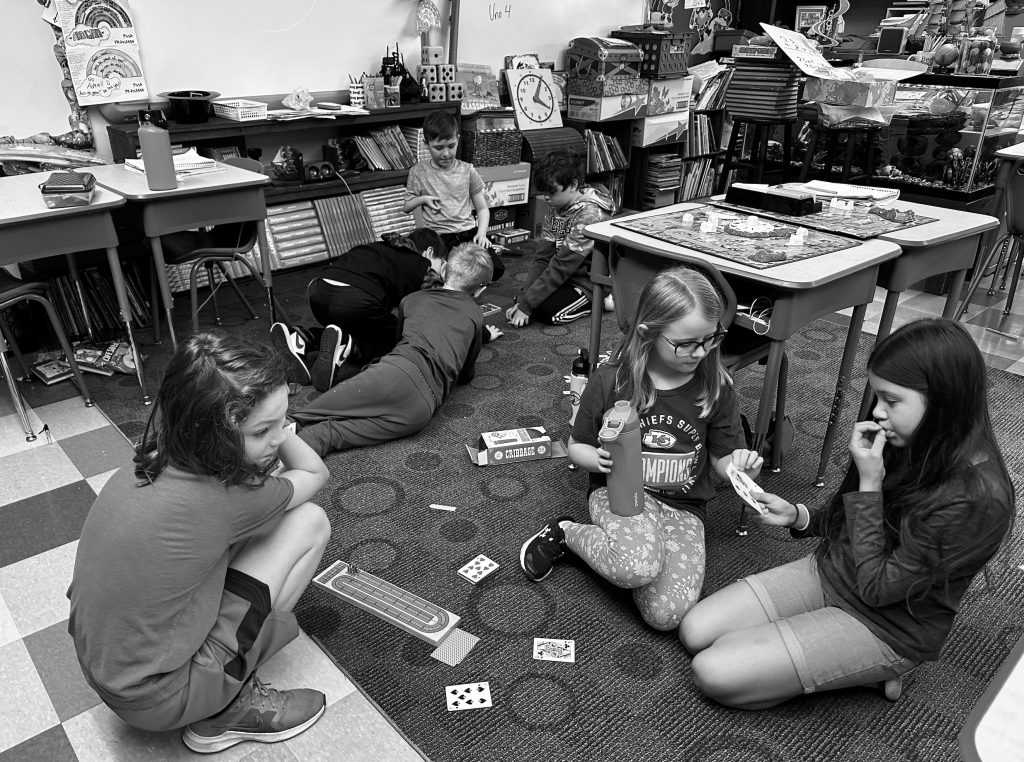
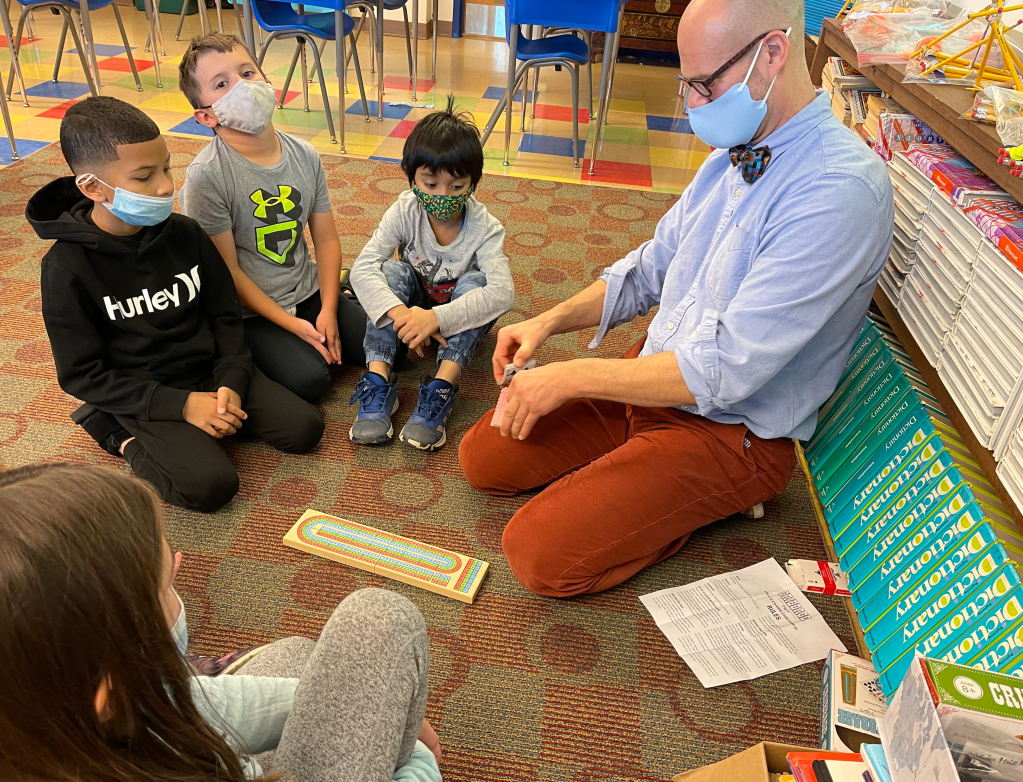
At the beginning of each school year I introduce a few fun games that encourage number sense and problem solving. Dominoes are great for mental math, recognizing patterns, and teaching multiples of five (Playification). Another favorite is Cribbage (First “How-To” on Cribbage).
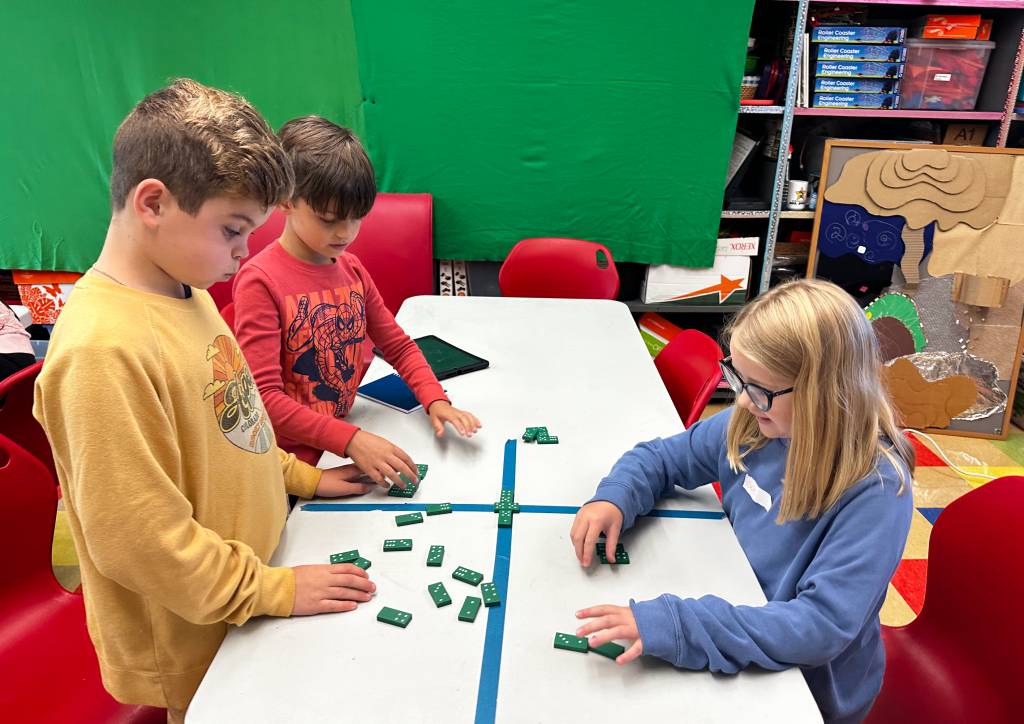
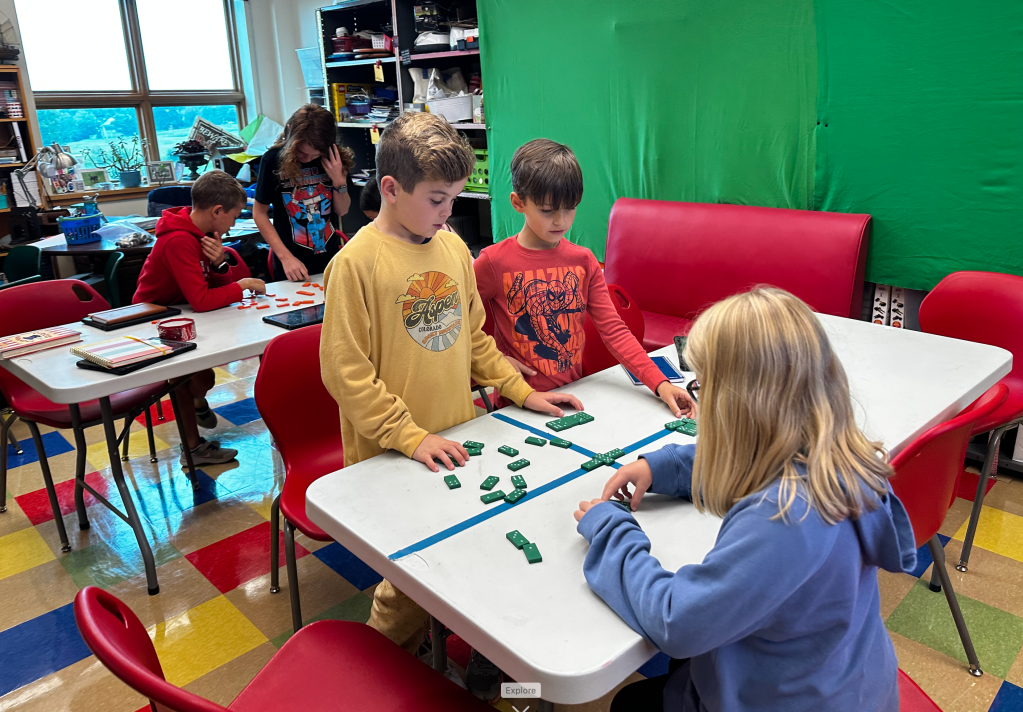
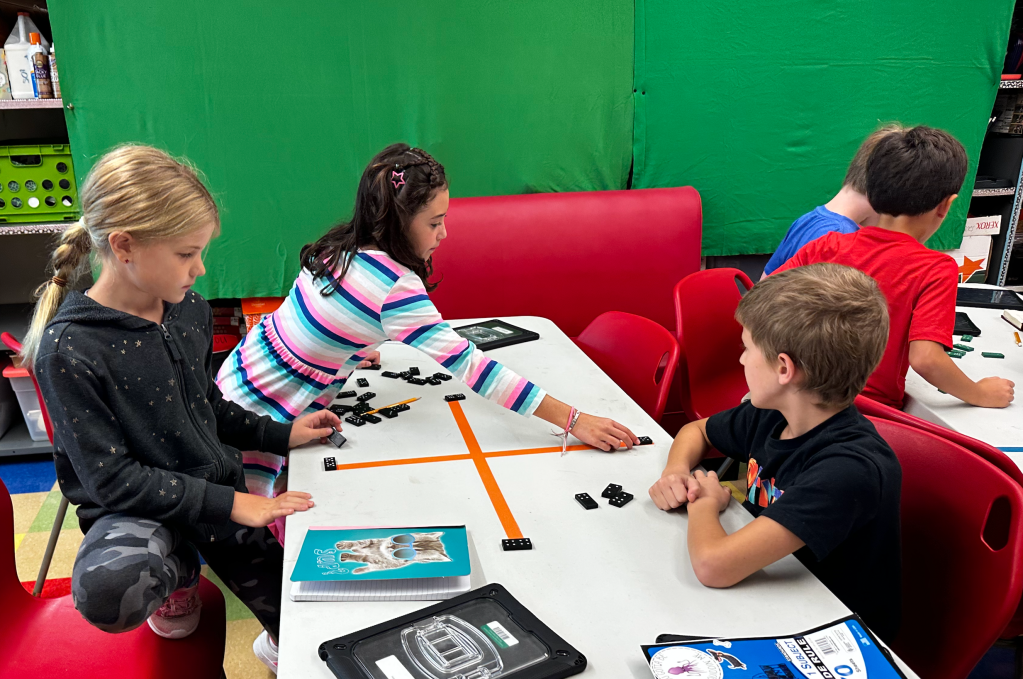
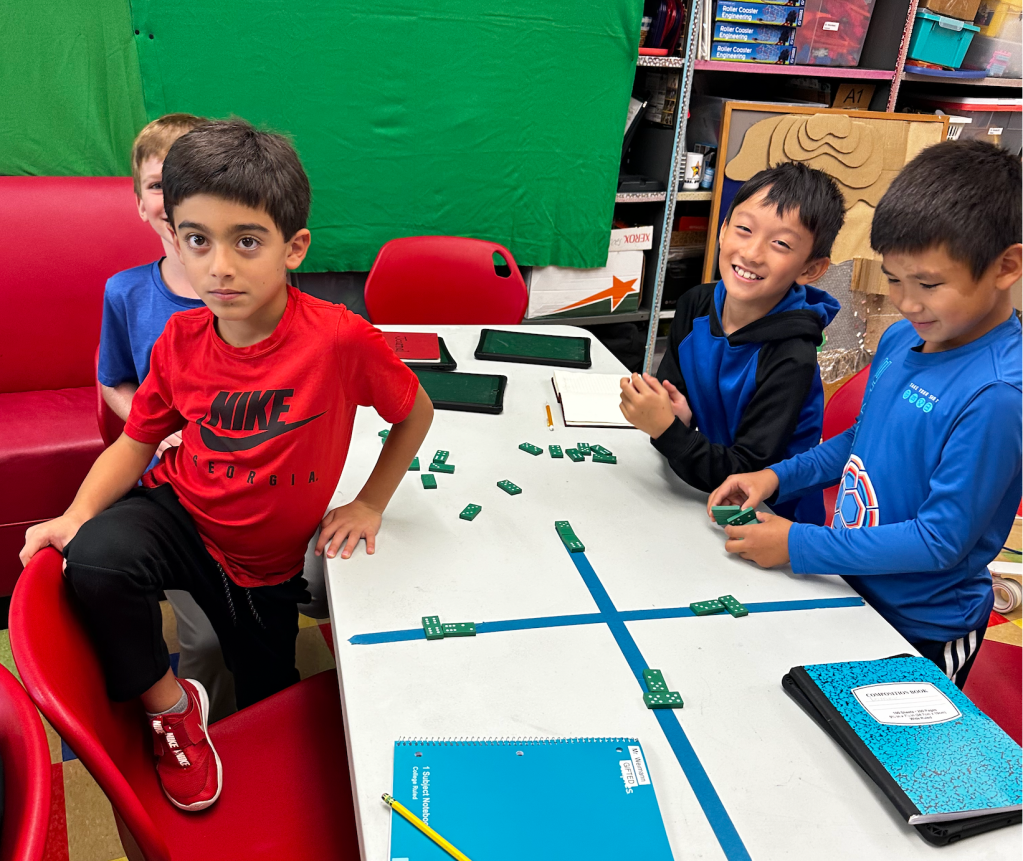
Polite Pirates problem-solve in pairs
Cribbage is a card game that has two parts. I’ve written about the first part, the one that requires players to analyze their hands and decide which cards to keep and which to place into a crib.
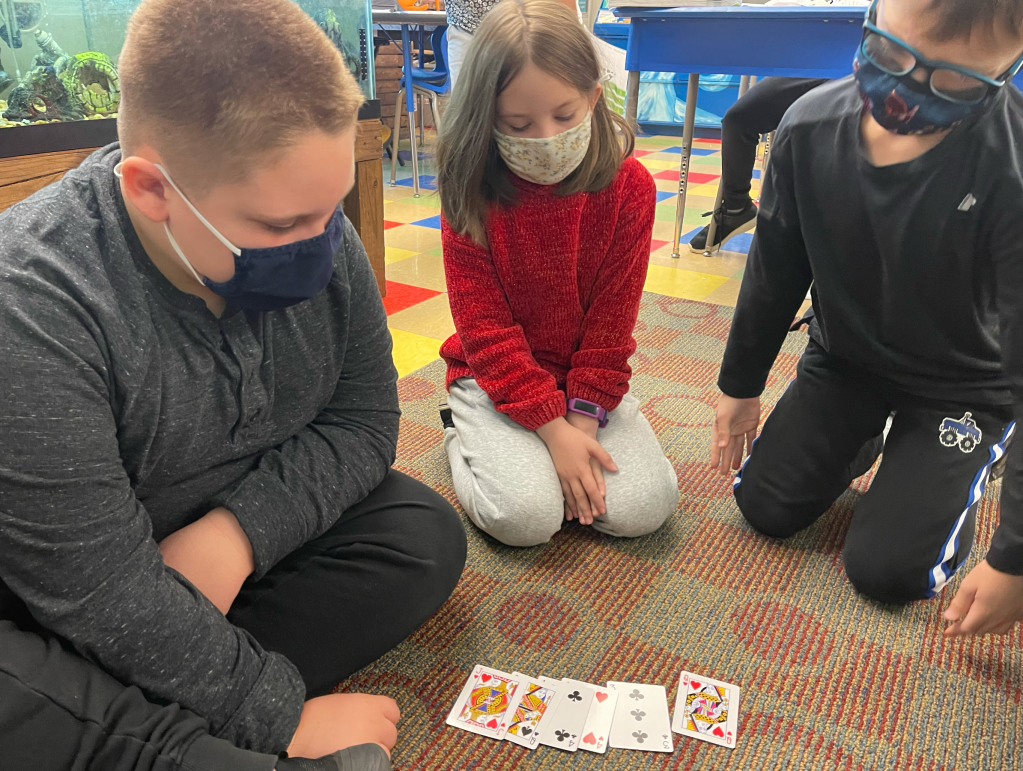
During Math Centers, I have students work in teams of two or three to figure out which four cards of a six-card hand will generate the most points. Every student is very attentive, because if a team misses any combinations that provide points, and a student from another team can articulate the potential point-producing combination, this other student gets to claim the points, virtually stealing points from one another. They love that!
The “Starter” is placed face up on top of the deck and shared by everyone.
After a little practice with this, I explain cutting the deck to provide a “Starter” card. This card gets placed face up on top of the reassembled deck and is also used for making point-producing combinations at the end of each round. The Starter is shared by every team and the crib. Now, when students decide which cards to “lay away” for the crib, they should keep in mind the idea of collecting those points later, if the crib is theirs, or potentially providing points for opponents. Students practice mental math and problem solving for a few more Math Centers.
Once my students are well-versed in how to choose the best cards to keep, it is time to learn how to actually “Play” the game. There are loads of rules to learn and remember, but what makes it fun is that nearly everything you do gets you points! When teaching the Play, be sure to peg points. The kids get super excited with each and every point.
Polite Pirates help one another count points. The holes are marked in increments of five, so math can be used even while pegging your points!
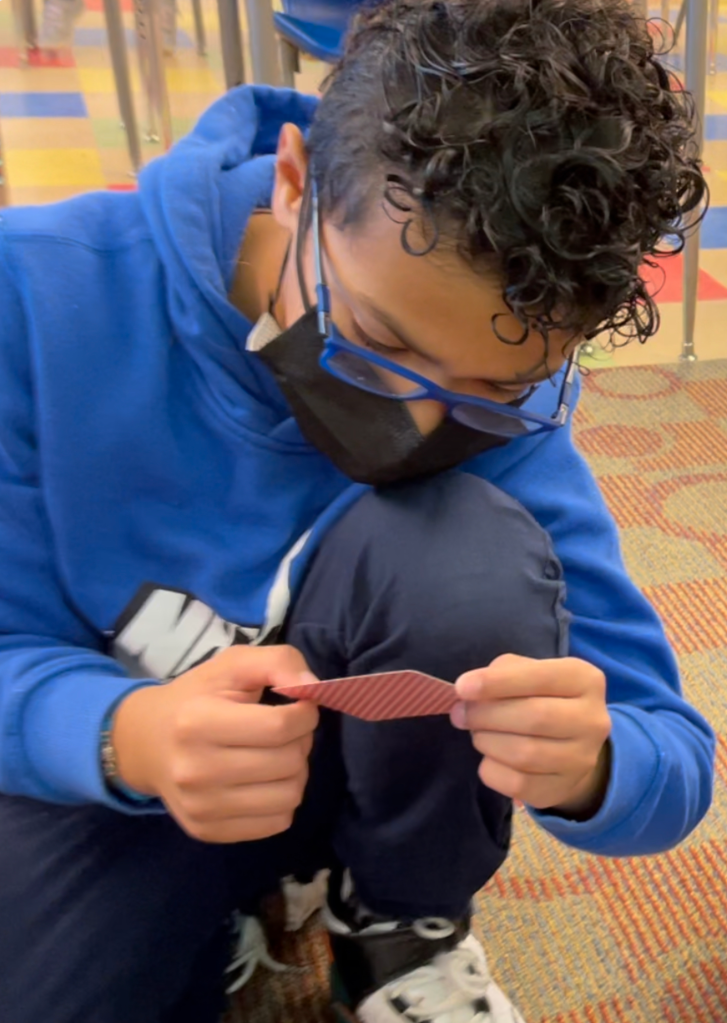
The first thing I show students is how to hold their Hand. This is new to some nine-year-olds. They have to hold the cards they’ve kept because we place one down on the table or floor at a time, and you don’t want to get them mixed up.
Something unique to cribbage is that players (teams) will recollect their cards in order to calculate the points their hand is worth when Play is over. For this reason, have students place the cards that they are playing right in front of them; separate from other players/teams.
Next, I explain that, during Play, we add up a running tally of “Pips.” Pips are the symbols on the playing cards. A “Five of Hearts” has five pips or hearts on it. Each face card (Jack, Queen, and King) are worth ten pips in cribbage. An Ace is valued at only one pip in this game. It is very useful; Hang on to those! (Here is a very interesting blog explaining pips and the symbolism of cards.) As students place one of their cards face up on the table or floor, they don’t say the number on the card. They announce the new sum of all of the face up cards. So, if a King had already been played, and that player (team) voiced “Ten,” and then I play a Two, I will say “Twelve” out loud. If the next player (team) places a Three face up, they will say “Fifteen” out loud, keeping a running tab on the growing tally of pips.
The player or team that plays the Fifteen is rewarded Two Points on the cribbage board. You get points during Play whenever you form a combination of Fifteen, a pair, three or four of a kind, and/or a run. These point-producing combinations are similar to what students were looking for when deciding which cards to place in the crib and which to keep. But now, students are forming them with the help of their opponents’ cards.
Let’s say two Queens have been played. The player who placed the second Queen on the table or floor will be rewarded two points. If a third Queen gets played, the person (team) that played it will get six points, because it forms three pairs.
Similarly, when a run of three or more cards in consecutive ascending order are played in a row, the player (team) gets the number of points that represents the number of cards. In other words, if a Ten, then a Jack, and lastly a Queen were played in a row, the person (team) that played the Queen would get three points.
During “Play” the pips can never exceed 31. This is the magic number of cribbage play. As players are placing cards face up and voicing the running sum of pips, they are mindful of what cards they have left to play. The closest to 31, without going over, gets a point. If you can play a card to make the Play value exactly 31 pips, you get two points. As the Play gets close to 31, if a player (team) does not have any card to play that would keep the play under 31, they say “Go.” This is when the other team gets a point. That team must play any cards that they can, keeping the tally under 31. They can collect points from pairs, runs, and even score two points for making exactly 31.
At this point, all of the cards that have been played get turned over (facedown), so that they don’t confuse the players during the next Play. The player (team) who said “Go” during the last play starts off the new play.
Once all of the cards have been played, and a point was awarded to the player (team) who plays the “Last Card,” it is time for each player (team) to gather up all four of their cards and get points for their individual hands. (Here is a website to reference for points.)
This we do one team at a time. The dealer goes last. The crib is counted separately, and that is the very last thing to be tallied. It’s important to count in this order, because whoever reaches the end of the cribbage board first, regardless of how many points are in a hand, wins. In this way, you may not want to be the dealer if a tight game is nearing the end!
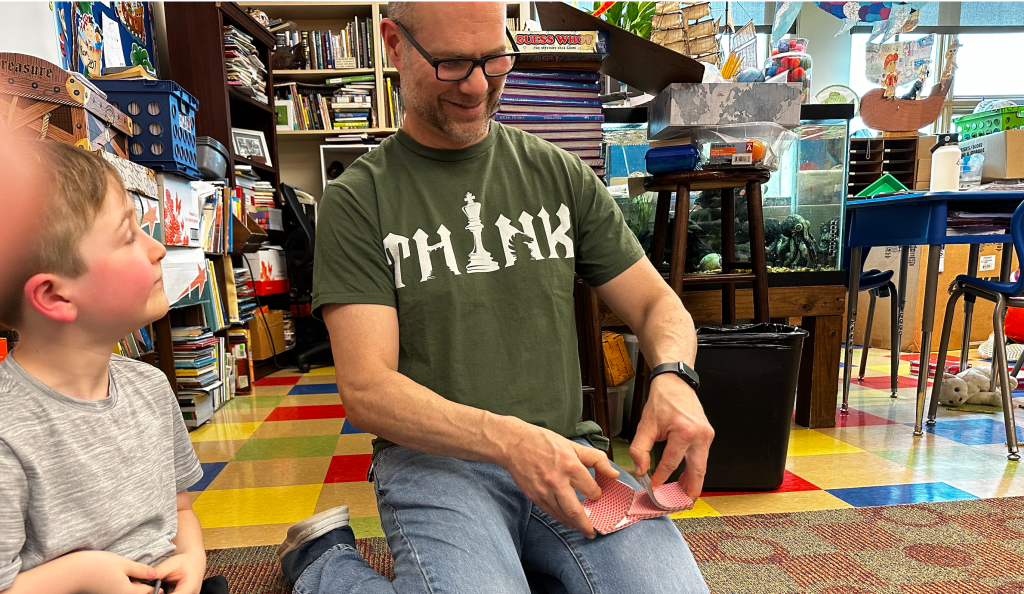
I hope this blog is helpful for learning how to teach cribbage to students. One of the many benefits of learning this game is the cross-generational play it opens up. It was one of the first games that I was able to play with the “grownups” during holiday celebrations and vacations. My dad told me about a league he played at his Senior Center in Massachusetts. One thing that he complained about was how fast those games were. It was too much pressure.
That being said, you might want to put timers on for students, in order to keep the game moving. Also, you could have a timer for the whole game; Whoever has the most points when the timer goes off wins! Have fun!
How deep does your teaching go? One way to help students understand a concept and remember the lesson is to share a story. On Thursday I was teaching an idea about fractions that was difficult to grasp. We had been working on understanding this concept all week. I had drawn models on the board and number lines on students’ papers. A few simply were not getting it. I was at a loss.
The lesson had to do with the fact that whenever the numerator is the same as the denominator, a fraction is equal to one whole. It doesn’t matter if it is 365 over 365 or 5/5, they both equal one whole. How? While I could stop at providing the rule, I like to explain the “why” of math. The following story ensued.
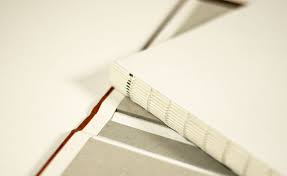
This is my dad, well past his book-binding days.
When I was in high school, I had the worst job! (This got everyone’s attention.) At least it was my least favorite job. I worked in a factory. What we did was kind of cool. This factory bound books. It was a book bindery. My dad worked there. He was a manager, so he was in charge of a team of people who operated different machines. He got the jobs, planned out how to complete them, gave people orders, made sure things ran smoothly, fixed machines, and was responsible for shipping out completed jobs to happy customers.
The book bindery had two parts. My dad’s part worked on orders of new books. The other part of the business would repair or re-bind old books. This part would get a shipment of books from university and school libraries in the summer. Workers would use a huge cutting machine to slice the spine of a book away. Then the front and back cover would be removed. A new cover would be made and glued onto the old pages that had been either glued or sometimes sewn together. The new cover would get stamped with the name of the book, author, and publisher. There was a different gigantic machine for each part of this process. This is where I worked for a summer right after graduating from high school.
What was so bad about it? Sounds kind of neat, right? There was NO freedom. You had to “clock in” at 8 AM, sharp. It was best to do it a couple of minutes before eight. If you were late, you’d get a “talking to.” A manager would come by and tell you that you had clocked in late too many times. One more and you were gone; You’d be fired. The manager might allow you to explain yourself, but there was no empathy. The clock was unforgiving, and you need to be on time. “Clocking in” meant getting your stiff paper card from a metal sleeve holding many cards, pushing it through a slot on the top of a metal machine displaying the time on the front. You’d push your card down until a cha-gump was heard. At the same time the sound happened, you would feel something grab your card. When you pulled it out, a time would be stamped on it.
One more thing. It wasn’t a good idea to stamp your card more than a couple of minutes early, unless you had permission. The owners of the bindery did not want to pay anyone more than they had to, and if your card had any extra time on it, they would be responsible to give you money for that time.
A book with the cover removed, you can see the stitching.
After clocking in, I would get to my workstation to pick up where I left off the day before. I was lucky. Whether it was because my dad worked in the other part of the bindery or I was good at it, I don’t know, but I got to operate “The Blade.” This was the gigantic cutting machine that sliced the spines off of old books. I also used it to trim the edges of pages, so that they were clean and straight for rebinding.
In order to work the machine, you would place the book onto a metal surface and push it against the back wall with the spine facing you. I would adjust the depth of the cut by turning a knob to move the book closer or farther away. When I had it just right, I would press a petal down with my foot. This lowered a metal wall that clamped the book down and held it in place. At this point I could see whether I had lined up the book just right or not. I might need to fine-tune the settings before making my cut. [I had to be careful, because if I cut off too much, the book will not have enough space on the inside of the pages for anyone to read it. If that happened, I’d just wasted an old book. You would get into big trouble if that were to happen. There are no do overs! If you didn’t cut enough off, then you could do it again, but you are wasting valuable time.] With the book held tight by the big clamp, I would push two buttons on either side of the front of the machine with the thumb of each hand, and a giant guillotine of a blade would swoosh down right in front of the clamp, slicing the spine away from the book.
Why the TWO thumb buttons? Let’s say you wanted to push a book against the back with one hand while slicing the binding away. You could accidentally cut every finger off of your hand with one fatal swish of that blade! Forcing you to use both hands at the same time ensures zero accidents.
Unfortunately, other machines had work-arounds; ways to bypass the safety procedures; and even the cutting machine could be fooled. You could tape a piece of cardboard over one button, tricking the machine into thinking that one of your thumbs was pushing it in. Basically, there were opportunities to become seriously injured on the job. While management might give someone a hard time for doing something dangerous, they would also heap tons of pressure on everyone to achieve inhuman amounts of productivity. You constantly felt like you weren’t getting enough done fast enough. If only there was a way to quicken what you were doing. What if you eliminated one of the timely safety precautions…?
At 10AM a bell would ring, and we could take a fifteen-minute break. The workers would pile into a break room in the middle of the factory where picnic (ironic name) tables were set up. We did this even if it was a gorgeous summer day. It was probably better to NOT know how beautiful it was outside! At the tables we ate snacks, drank coffee, and chatted. There wasn’t any talking on the factory floor; chatting would slow down production, so this was a time for finding out what coworkers had done the night before. We read newspapers to find out what was happening in the world outside of the book bindery.
10:15AM did not find us exiting the break room. We had better already be out of there and at our stations when the next bell rang. Anyone found lingering would get a talking to.
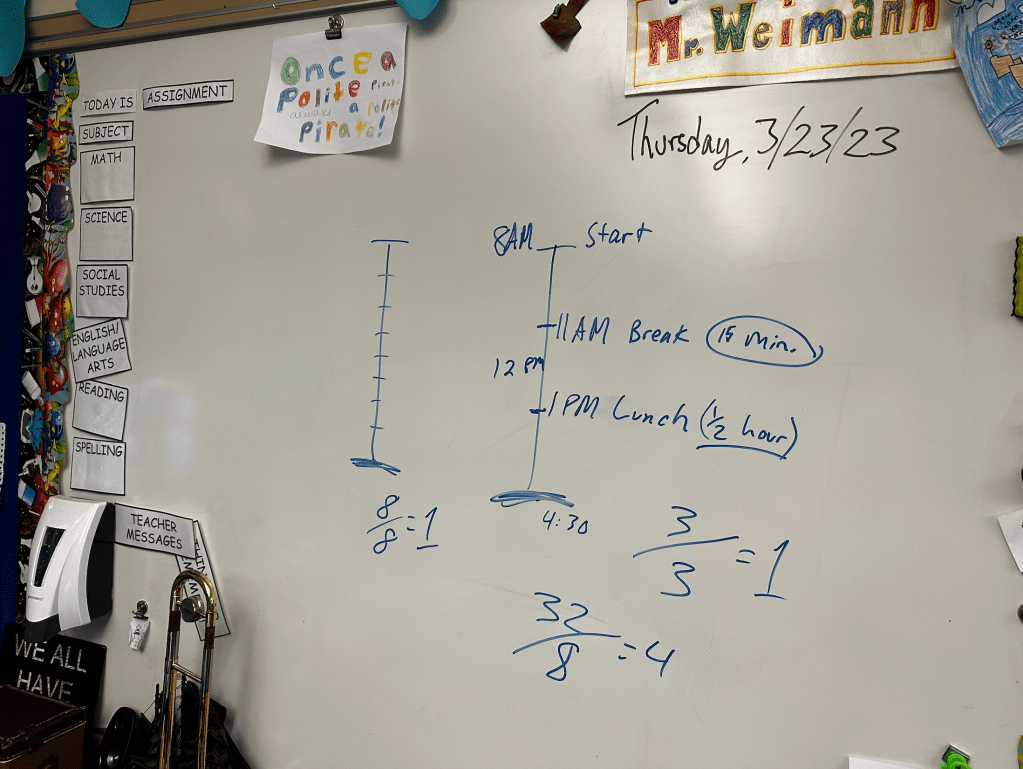
Another bell would ring at noon. [While I was sharing all of this information with my students, I was drawing a timeline of my prison-like day on the dry-erase board.] You would go back to the break room. You better have a packed lunch, because there’s no running to McD’s, even though it was only 2 miles away. I tried it once and the stress of making it back to work on time equaled more indigestion than it was worth!
The factory floor was cement, which caused your feet to hurt. I piled up cardboard boxes to stand on, and I wore sneakers with thick soles, but once your feet hurt, there was no fixing them. Additionally, even though there wasn’t much of a dress code, we did have to wear pants. It was summer time when I worked at the book bindery. Even though the place had air conditioning, the owners were constantly adjusting the temperature to use as little power as possible. It always seemed a little too hot.
It was difficult to avoid counting the hours between breaks and leading up to quitting time. When would the final bell ring?
Now, we get to the math of the story. I look to my students for an answer. Who can help me get out of here? What time did the final bell ring? I began my eight-hour day at 8AM. One student guessed, “6PM.”
“Was that a guess, or did you work that out?” I query. “Come on. Think. Eight to Noon would be how many hours?”
Another student half-guessed, “5PM.”
“You’re getting closer,” I hint.
You can probably imagine that someone figured out that eight hours would take me from 8AM to 4PM, but we have to account for the half hour of lunch. The owners aren’t going to pay me to eat. That was my time. The 15 minute coffee break in the morning was included in my work day. (Probably, this was meant to fuel productivity with a caffeine jolt, not to mention relieve the tension of not being able to talk all morning.)
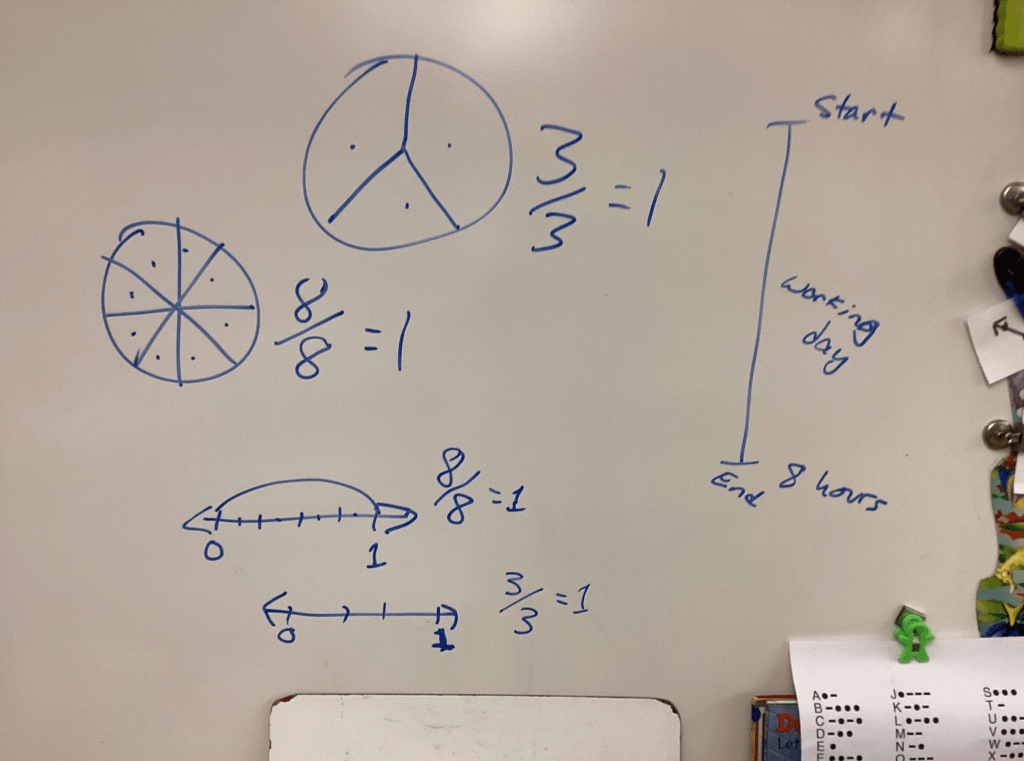
Let’s say a guy has a medical condition that requires him to drink some medicine on the hour, every hour. If he takes a drink each hour of an eight-hour work day, his day is split into 8 parts; 8 hours = 8 parts. He doesn’t miss a dose, so he has had 8/8 drinks per day. The 8/8 is one day.
I didn’t need to stop and take a drink. I only stopped during the allocated break times. With only two breaks, my day was split up into three parts. I work all three parts, so I work three out of my three parts. My 3/3 day is only one day, also. My friend and I both work a full eight-hour day, but mine is simply divided up differently.
8/8 = 1
3/3 = 1
8/8 = 3/3
I’ve drawn timelines (number lines) on the board. It is easy to see that the same amount of time is broken up differently.
If my friend keeps his medicinal drink in a 32 ounce water bottle, and his dosage is one ounce per hour, how many days will he be able to use the bottle before he has to refill it?
How many doses will one day be? With each day broken up into eight equal parts (hours), the denominator will be 8. The total number of ounces (32) will be the numerator. The improper fraction will look like this: 32/8. Is there enough medicine for more than one day? A lot more. How much more?
How many eights go into 32? Or, how many eight-hour days can the 32 ounces be stretched over? You could do repeated subtraction. The water bottle will last four days.
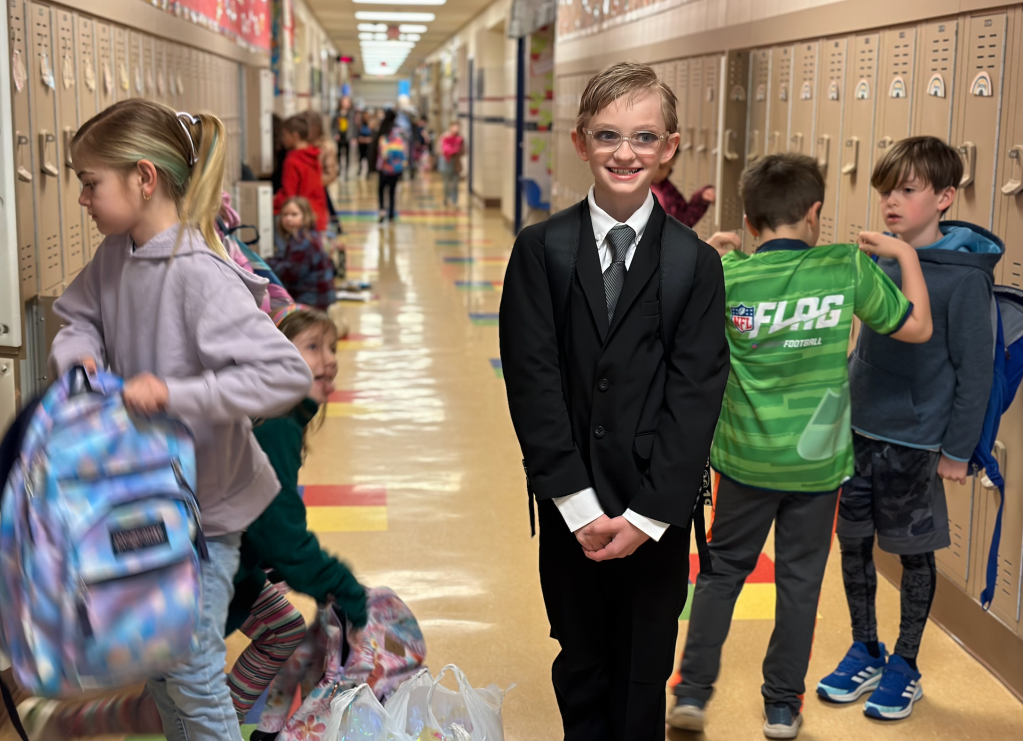
This Polite Pirate would be celebrating her birthday over the weekend. She got all dressed up on Friday to celebrate. I told her that she looked like a “boss.”
Before leaving this story and transitioning to a different lesson, my students had to know why on earth ANYONE would work at such a horrible place. I told them that there are pros and cons to nearly everything. First of all, this could very well be the only job that some of the workers could get. The book bindery employed many people who did not speak English. Once they were trained on how to operate a machine, they could do their job efficiently, and it didn’t matter that they could not communicate via the same language as the owners. Occupations that require more communicating might require people to know English.
But, I knew English, so why did I work there? It was a summer job, and although the hourly wage was not very high, it was the only place that offered a full 40-hour work week to a temporary employee. Other businesses weren’t interested in investing training in a worker who would only be there for a few weeks. Also, if I worked over 40 hours, which the boss wasn’t too keen about, I’d get “time and a half.” Ooooh, I feel more math coming on… Groans.
Many businesses only offer benefits, which include health insurance, to “full-time” employees. This title belongs to people who contract or agree to work a 40-hour week. Sometimes it is worth working a less attractive job, so that you can keep your family safe by having health insurance. This is the American way.
I’ve told the Polite Pirates (my students) all about running my own painting business before becoming a teacher; There’s lots of math in those conversations! At this point in my explanation I point out that while running your own business means you are the boss, and you have freedom, it is a lot of work! Had the stress of making sure that I had future painting projects to do, because if my work dried up… Then what? There’s no money coming in! So, I had to do a lot of marketing, and that costs money. Then I had the pressure of finishing projects on time. Sometimes I had to work more than 40 hours in a week. Because I set prices with customers before beginning the projects, I didn’t make any extra money if I worked longer hours! And, what if I priced it badly? What if I thought that a job would be lucrative if I charged 300 dollars, only to find out that the product needed to complete the job would cost me $250? Don’t even get me started on spilled paint…! How much of that profit would be left if I had to buy a customer a new carpet?
Working at a factory is, believe it or not, liberating from the stress of all of that responsibility. You punch in your time clock, put in your hours, punch out, and leave all of the thoughts of work at work. What you didn’t complete will be waiting for you to finish tomorrow. Let the manager stress out about how a job is going to get done.
Finally, although this all sounds kind of awful, I am glad that I had the experience of working in the book bindery. I learned all about how books are put together, which was interesting. But, more importantly, I got to see first-hand a type of life that I may not have known had I not worked there.
As I rose from my chair to erase my notes from the board, my students understood that all of that was to teach a simple lesson on fractions. “All of that, just to teach us about whole numbers…?” a few students said in surprise. Yup.
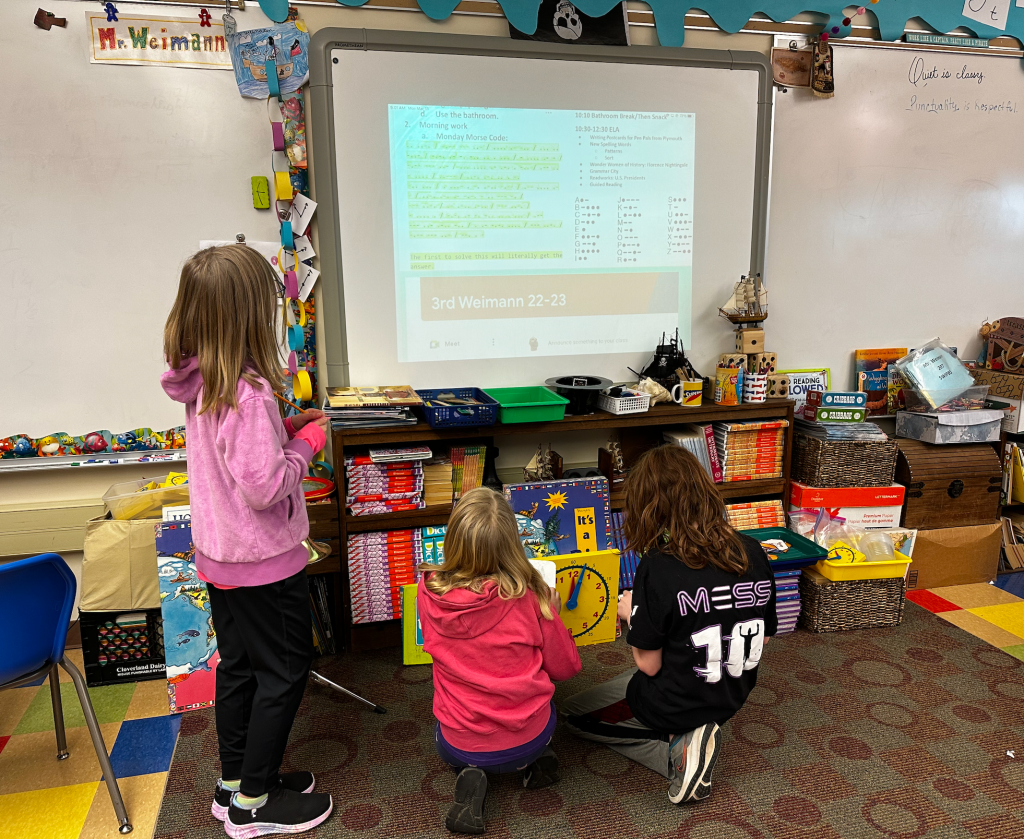
These two were so excited about earning their treasure through decoding the Morse Coded Monday Message that they just had to take photos of their discovery; a pile of Hawk Tickets in the vacant locker.
Yesterday was Monday, and among other things, that means Morse Code Morning Work for the Polite Pirates! Each Monday, since I introduced Morse code to the class back in January (Coding Teamwork), I’ve provided dots and dashes for deciphering. The prize for first decoder varies. At times it’s an intrinsic reward. One time, I hid a pile of behavior-plan tickets in the locker of a student who never showed up at the beginning of the year. Many of the codes contain riddles, so they are codes within codes.
The riddle within a riddle on this occasion was the vocabulary word “nonexistent” that described the Polite Pirate who had never shown up.
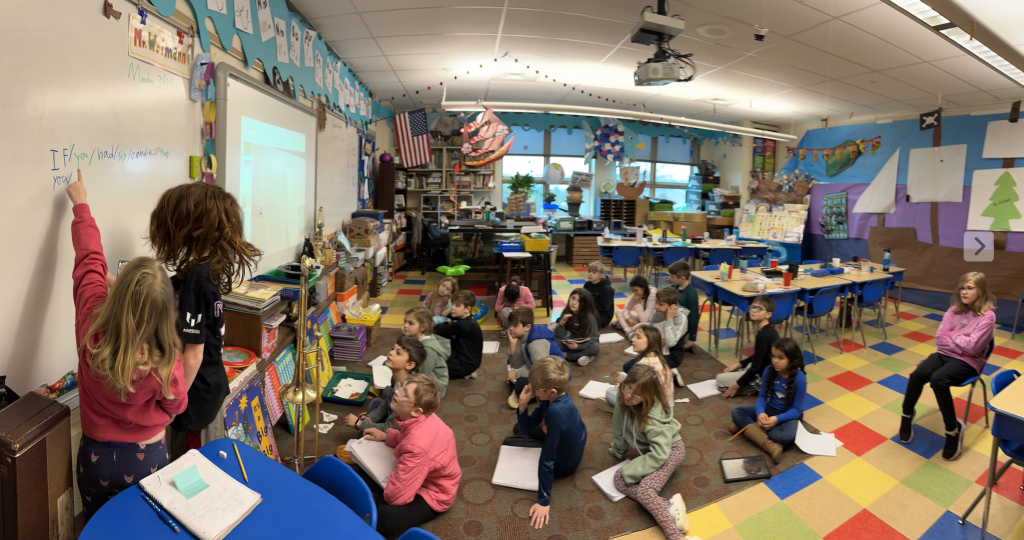
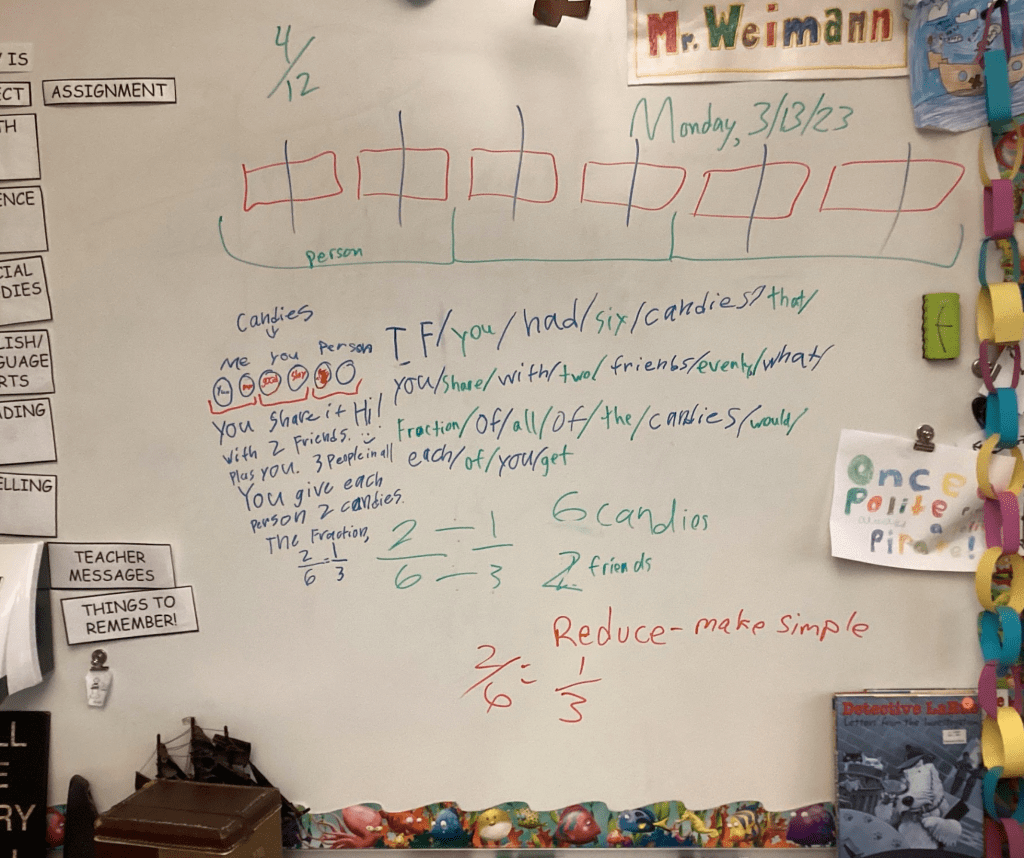
This was the case yesterday. I made up a word problem involving kids and candy. We have been learning fractions, and I was planning on introducing equivalent fractions first thing. Instead of saying, “Today we are going to learn about equivalent fractions,” I buried the treasure within the Morse coded message.
Admittedly, not everyone was super into decoding this message. When I am coming up with a message, I try to keep it short. I don’t want the task to seem daunting. Another thing I have to look out for is only including letters. I avoid punctuation, and any numbers need to be spelled out. There is Morse code for letters and punctuation, but the image of the coded alphabet that I provide for the Polite Pirates does not have that code in it. (A fun, albeit challenging, task could be having the Polite Pirates figure out the code for numbers by embedding dash/dot combinations into messages that would only make sense after doing some calculating to figure out the answers to math problems. My students could build their own decoder of numbers through doing math, mixed in with Morse code.)
I messed up yesterday’s code. I accidentally included a number that wasn’t spelled out. When some students came to the “2” within the text, they knew it was a number. Rather than have them figure out what number it was from the problem, I told them it was an upside down five. (I can’t help myself!) It took them less than a minute to understand it was a two.
Before stumbling across the number within the code, the Polite Pirates had figured out that it was going to be a word problem. This had some of them annoyed and others intrigued. In order to sweeten the deal, I had hinted that there would be a prize for whoever solved the problem first. Of course my hint was also a riddle: “The first to solve this will literally get the answer.” This worked because some of the first few words include “six candies.” My pirates, polite or otherwise, were going to bite onto this extrinsic motivation! Also, I was able to reteach the vocabulary literal versus figurative while they worked.
When the word “fraction” was decoded, students knew what they were up against. Mr. Weimann was up to his many tricks. This was going to be “fun learning.” We have been working on fractions. The decoding heated up, and students began working in a frenzy. They were ready for this.
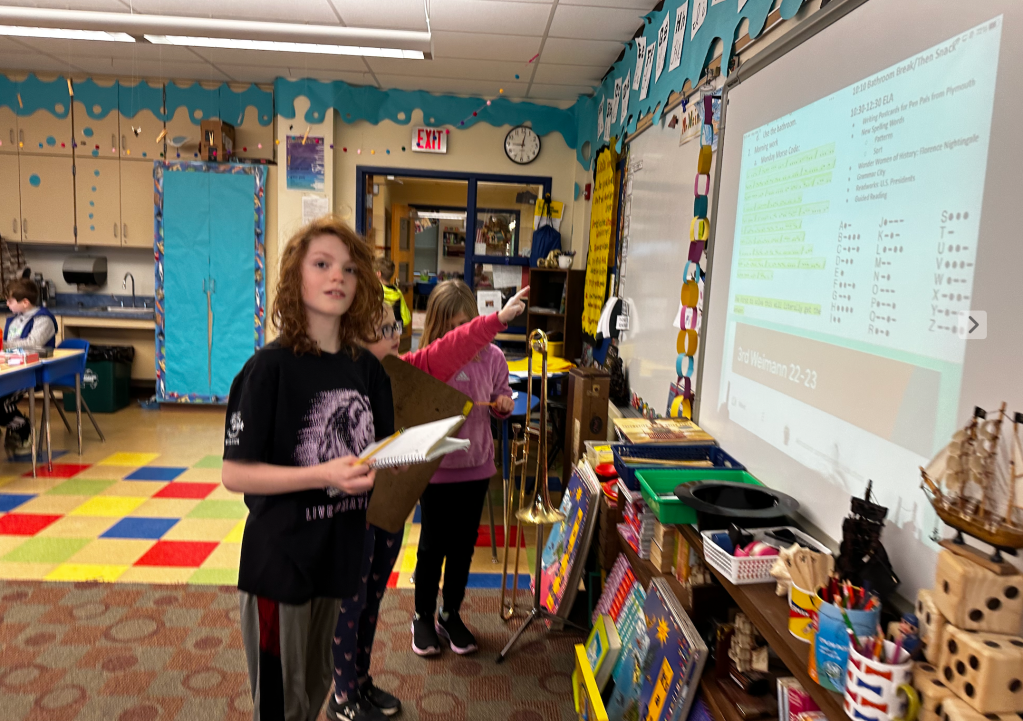
As the final letters and words were discovered a veil of secrecy seemed to lower over the classroom. In order to earn the answer, you must figure it out. Now, students were back at their desks, hunched over their notebooks. “What is the problem about?” I prompted, half for the students working out the word problem, and half for those who were still decoding the Morse code message. I wanted the first half to understand the message of the problem, and I hoped to light a fire under the ones struggling with dots and dashes. This second goal worked, because one of my students who regularly succeeds in decoding these messages first had come into the classroom late that morning. Her pencil nearly carved the letters into her paper as she frantically discovered each letter of code.
“Candy!” nearly everyone exclaimed, for the rumor had flown around the room like flu germs in a cramped elevator.
Approaching the students working out the math, I asked, “What are you asked to find?” This is the second of our four word problem prompts that we use as a mantra when performing problem-solving math.
What is this problem about?
What are you asked to find?
What is the important information?
What are you going to do? (What operations are necessary?)
I informed the front-runners that there was a riddle within the problem within the code. “Don’t be fooled,” I warned. “Look closely at who is getting candy in the end. It is written in the second person,” I instruct. I was hinting at the fact that, while you are sharing the candies with your friends, you still get to have some! “The problem states, ‘What fraction of the candy would each of you get?’” I quietly read to the students who are working out the math.
One of the students got it. “There are three people and six candies,” he whispers.
“Mm hmm,” I encouraged.
“Is this it?” His competition showed me her paper. She has not only written the correct answer, 2/6, but she drew pictures to show her work! I tell her yes, just as the boy shows me his paper. He has the same fraction. I then tell them to see if they can “simplify that fraction. Is there any way to make those numbers smaller, but have it describe the same amount of the candy?” They crunch the numbers simultaneously.
I was so impressed with their work that I took pictures to project on the board.
“One-third!” they exclaim in unison. If I don’t say that they are correct verbally, my face assures them of victory. And, the action of getting a big bag of candy out of a cabinet is more proof of triumph than the class can handle. Everyone’s attention is on the Monday Morse code math masters who have earned the prize; literally the answer to the problem; six candies each to share between themselves and two of their friends.
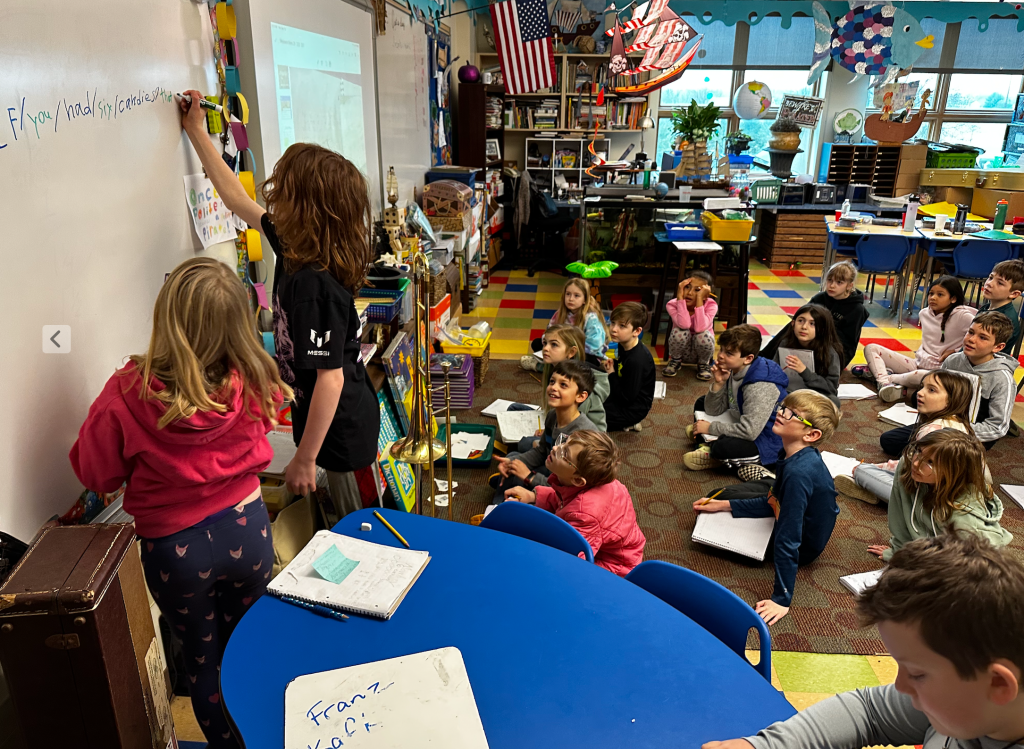
Before giving them the candies, I had them explain their work. They took turns writing and drawing on the board, talking their Polite Pirate peers through what they had done. The student who had drawn pictures in her notebook, not only drew them on the board but wrote complete sentences describing the whole procedure. I was so impressed that I was tempted to give her additional candies, but no, I am a pirate captain, if nothing else, and I be stingy with me treasure! (Really, I like to keep my word, strictly, when I can, because I stretch my meanings all of the time!!)
Who to share their treasure with, these two could not decide. I suggested that they witness who goes back to their desk the quietest and does the best job copying what is on the board into their spiral notebooks. The Polite Pirate pair nodded and the race was on… again. This time, every pirate but two were scrambling to get to their seats, sit up straight, and quickly copy everything the first two had explained. The candy captains walked around inspecting the work of their peers. Candy was dispersed, but you couldn’t tell because everyone was feverishly writing.
And, this is how we began discussing equivalent fractions. As kids crunched on candy, I used the idea of candy to suggest each piece being cut in half or thirds. Halves would produce 4 pieces out of a total of 12 going to each student. Thirds would make it so that 6 pieces out of 18 would be had by each friend. We went backward, too. “How many sixes are in 18?” I asked. I had a worksheet for students to try out, and I circulated my ship… I mean classroom, and checked for understanding.
One last thing about Morse Code. Some students complained and grumbled about the work of decoding the message. When the dust settled, I told my Polite Pirates that my intention is for them to know the code so well that they do not need to keep referencing the alphabet decoder. I had them try it out. I told them to close their eyes. “What letter is four dots?” I asked the group.
“H!” they called out in unison.
“And, what letter is only one dot?”
“S,” the class provided. I did this with several more letters that we have seen over and over, and they had used to decipher the message still in front of them on the Monday Morning Board. They were amazed at their memory. I told them that this is how you memorize something. You have to work at it, practice it, use it. I’m planning on helping them memorize the code and see if they can decipher something without me providing the alphabet.
(Part 1 of obviously more than 1, but not sure how many just yet;)
With the winter holidays approaching, I wanted to prepare The Polite Pirates (my students) for being stuck in the house with “nothing to do.” While I’m not against video games, I think it’s wise to have some alternatives.
Hands-on games that promote thinking and problem solving are my favorite to teach and play. Chess and Dominoes are begun early on in the year. Now, it’s time to break out the Cribbage board.
The fact that there are tiny pieces that could easily get lost makes the unpackaging mysterious and exciting. The board looks interesting, and young students can’t wait to get their little fingers on those tiny pegs! This affords a concrete reward for paying close attention and practicing the game well.
Teaching Cribbage to children requires a scaffolding approach. There are many rules and ways to acquire points. They must learn all of these before earning theprivilege of placing pegs on the board. This motivation helps keep them interested and focused.
Analyzing combinations to find potential points.
After showing and modeling the board just enough to wet their appetite, I explain that the first part of the game is all about analyzing your cards. You must decide which cards to keep and which ones to discard (They go in what is called a “Crib,” but we don’t worry about that at first). First, I model, looking closely at 6 cards. Leaving out the idea of runs, I explain that we are looking for pairs and combinations that make 15. With only these 2 criteria, we work on adding up card values and counting potential points.
[A couple of things to keep in mind: Aces are always valued at 1 in Cribbage, and face cards are all 10. Also, and this is fun for teaching the point system/using combinations, three-of-a-kind is 3 separate pairs, totaling 6 points (2 points per pair).]
Shuffling between rounds makes it feel more like a card game than math practice.
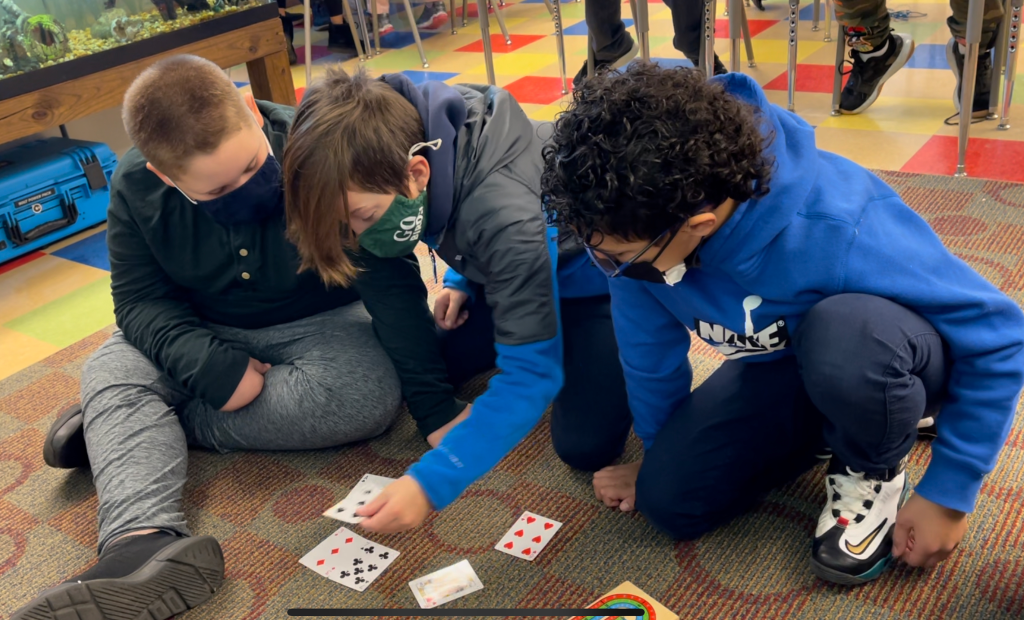
After modeling making wise decisions regarding which card combinations make the most points, I have students try. In groups of 3, I give kids 6 cards to puzzle over. I always shuffle the deck between every “round.” This makes it feel more like a card game and less like math practice.
If interest wanes at all, you could move the pegs on the board. That will get kids into looking for as many points as possible. Also, you could suggest that if one team sees points in another team’s cards that were not discovered and therefore not counted, the team that discovered the missing points gets them!
In other words, you have Team A and Team B. Each team gets 6 cards. If Team A only found ways to earn 4 points, but when they show their combinations, a player from Team B notices an additional way to make a combination of 15 that Team A failed to see or mention, the sly individual from Team B who uncovered the extra points gets them for their team (B, not A). This keeps everyone on the alert.
Notice that the students have to use “math discourse” to share what their cards provide. They do this to prove that they deserve the points they are claiming. It allows every player to perform backup mental math.
This exercise of looking for combinations of 15 will continue in this way for a week or two. Once students have grasped all of the ins and outs, you can introduce “The Starter.” This card is pulled from the middle of the deck after the cards have been dealt. It is placed face up on top of the pile of leftover cards. Students now have one more card to consider when choosing the 4 cards that they will keep. The Starter is static, staying on top of the deck and being used by all teams.
If you are interested in enriching the decision making process, tell the students that one team will actually get the cards that you discard. The two cards that each team gets rid of go into a “Crib” that the dealer uses to make points at the end of each round. This means that, in addition to trying to figure out what combinations of cards will afford you the most points, you want to keep points out of the hands of others. Don’t gift the dealer with good combinations. Or, if you are the dealer, you can feel comfortable placing a pair or good combination into the Crib.
Students practice skip counting by twos.
A way to differentiate for your students who are continuing to make progress but could use some help is providing a chart of addends that form 15. You could also have manipulatives or base-ten boards/charts for students to make 15. Make a lesson of looking for tens and fives in number combinations.
In #Cribbage you start with 6 #cards Keep 4; place 2 in “The Crib.”
Combinations of 15 get 2 points, each. And, pairs get #points.
After teaching #ThePolitePirates this, students analyzed hands, deciding which 4 to keep.
Just as I would have The Polite Pirates practice for a while before introducing further ideas, I will end this blog right here. Playing with numbers, considering the value of combinations, analyzing which cards should stay and which ones should go, students will enjoy the randomness of shuffled hands. “Cribbage affords players both the anticipation of the luck of the deal as well as ample opportunity to exercise their skills in discarding and play” (Bicycle blog).
I was going to title this blog “The Building Blocks of Math Construction” because I liked the play on building/constructing learning from material things. Really, though, I think the most important thing about this lesson was plain old ACTION. Yes, it was creative and fun, but rather than teachers reproducing the exact lesson, I want to share the philosophy behind it. It is a difference between building a beautiful, popular burger joint that everyone in a region admires and franchising the concept all over the world.
In preparing a blog, I thought, what I really want is for Ts to benefit from these ideas… I want them to pirate them… Ting is the most open-source thing in the world… #PleasePirate
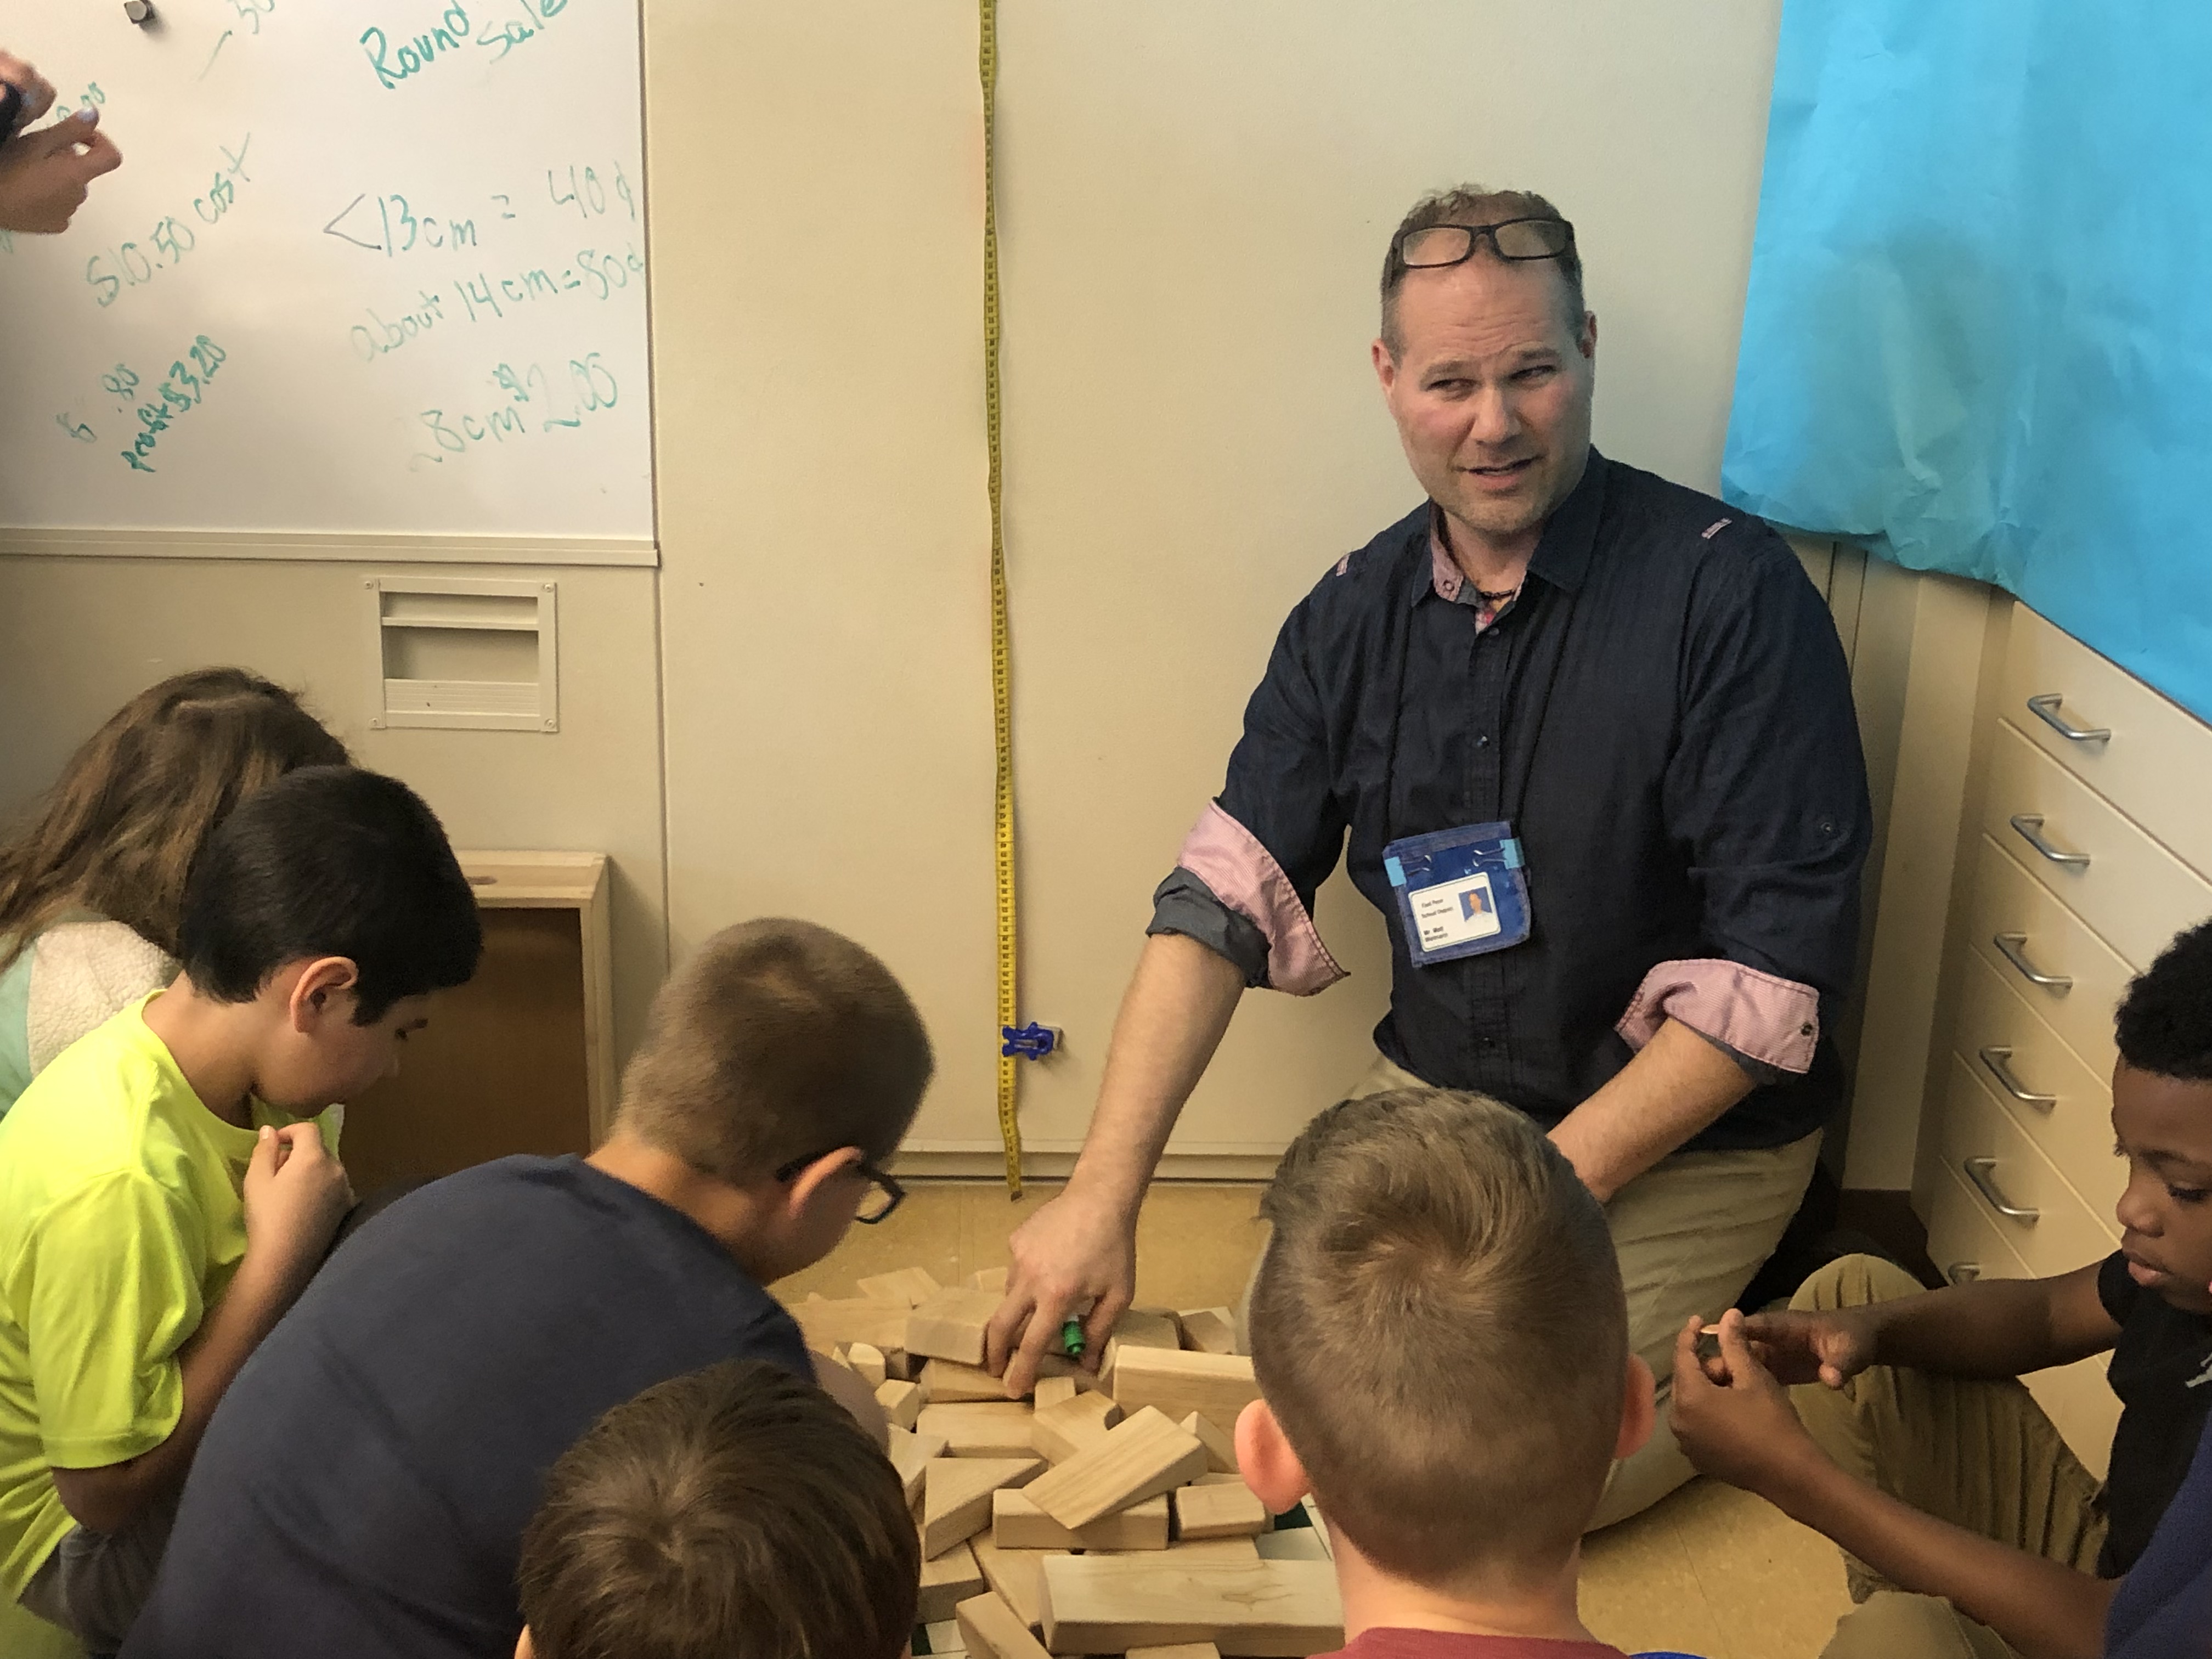
This is what I did. In thinking about teaching money, I was imagining setting up some kind of store in the classroom. In stead, I brought my daughter’s old school, wooden building blocks into the classroom. I thought I would have the students compete to construct the tallest structure while using the least amount of supply: They would stack blocks of value to create vertical towers and add up what it cost them.
I told the students of my plan. They were ecstatic. I assigned value to the blocks, dividing them into four categories: Many of the blocks were around 14cm. Those would cost 80¢. Any block that was less than 13cm would cost 40¢. (I did less than 13cm, because the 14cm blocks were a tiny bit under 14cm.) Now, the fun part. Many of the blocks had round edges that would make it
Students took pics with iPads and identified styles/cost of blocks. This is an image from a student iPad.
difficult to construct with; Those were on sale. They were half off. Here the kids would be using their recently acquired fraction skills. Lastly, there were two gigantic 28cm blocks in the box. Those were $2 each. Why? Because that’s the number that popped into my head. Also, these are super valuable because they are so solid and long. The kids can evaluate the price of these versus the others.
After going over costs, I set students loose!
After talking cost, I started centers and left my top kids to figure out constructing cost-effective building on their own, while I conducted guided reading. The buzz from the back corner was electric. Everyone in the class was dying for their chance to add up the cost of blocks!
Halfway through the first center, I stepped away from my guided reading group to check on my little architects. How were they doing?
Rather than constructing a tall tower, this group of three boys and three girls were designing the most beautiful condominium complex you ever saw. They were finding a way to use every single block they could! At first, I was like, “That wasn’t the objective.” But, I caught myself.
I forgot to mention: I had introduced the whole idea through telling the class that they were going to be designing high rises in an urban area. We would have Lego people rent space in our sky scrapers.
This group was not making a cost-effective creation. Was that wrong? No. No, it wasn’t. “Okay,” I managed to say. “This is going to be pricey,” I told them. “You’ve built a Five-Star resort, here,” I joked. “Let’s add up how much it will cost to construct.” They jumped on taking it apart, putting the blocks into piles, categorizing by the characteristics I had assigned, earlier. I told them that they could reconstruct their building after figuring out the price tag for it. Amazingly, there wasn’t a breath of complaint. I’m pleased to report 100% success, albeit after quite some time.
After this experience I realized that the rest of the groups would probably need some guidance with this project. I decided to use math time to teach how to evaluate constructions. While students did some online work, I brought groups over to the construction corner of the room. I went over the prices of each of the four styles of block. We analyzed similar blocks and categorized them according to cost. Then I built a simple structure with one of each price. Students used dry erase boards to add up the cost. I also had manipulatives (plastic coins) there to help. It took a few tries, and as students showed success, I let them build a four block building. They had to add up the cost before moving on. With each success, they were able to build more.
I grouped students with like abilities to work together. There was a group that did so well so quickly that I let them work in teams with more than four blocks. None of my builders cared too much about making their towers tall, even though the example that I gave them was straight up, as tall as could be with one of each style of block. I did not emphasize this, either.
Look at this amazing construction!
Students had a blast building their block structures. One group built a road. Why not?
We double-checked the cost of each creation.
One thing I would change, and I was tempted to change this halfway through the lesson, is the pricing. I didn’t like that half the price of the 80¢ block was the same cost as the smaller one. The smaller blocks should have been 50¢. Then there would have been more variation in the numbers and coins. Kids would be counting with quarters.
This was solved the next day. We revisited our building blocks motif, but this time with the vertical challenge. I explained that they were constructing in the inner city. I had actually looked up the price of the average urban block. “A city block in Manhattan is worth ONE BILLION DOLLARS!”
“What?!” Screamed the class with gasps of horror.
I had them use my vinyl chess mats as city plans. Each block or square would cost them 75¢. The trick is that for every inch of vertical they could collect 25¢. I formed a bunch of groups and spread students out all over the room, dividing up the blocks. In seconds the room was a buzz with builders. It wasn’t about how tall their building was, so much as how much money they could make.
My students were on fire. They had no idea they were even doing math! I am planning on putting together an elaborate assessment involving an urban plan where city block prices vary, depending on proximity to highway exits. I’ll redo the price of blocks. I’m even thinking about including fractions or weight! We love a challenge.
Over the weekend I finally experienced “Teach Like a Pirate”. I listened to the recently produced (Jan. 2019) audio book, read by the author, Dave Burgess. There were tons of great take aways, some of which immediately developed in the first math lesson, Monday morning!
First of all, if you haven’t already gathered, I am one of the “freaks” that Dave mentions at the outset of his book: I bubble with passion, naturally and eternally. I live for teaching and love “bringing it” every day in every way. In addition to this, possibly because of this–There is definitely some cause and effect, here–I am quite creative find it easy to come up with new, innovative ideas. I left my accidental slip of type in the last sentence because it reminded me of one of my favorite points from “Teach Like a Pirate”: The six worst words that Dave Burgess has ever heard (loved that chapter!)
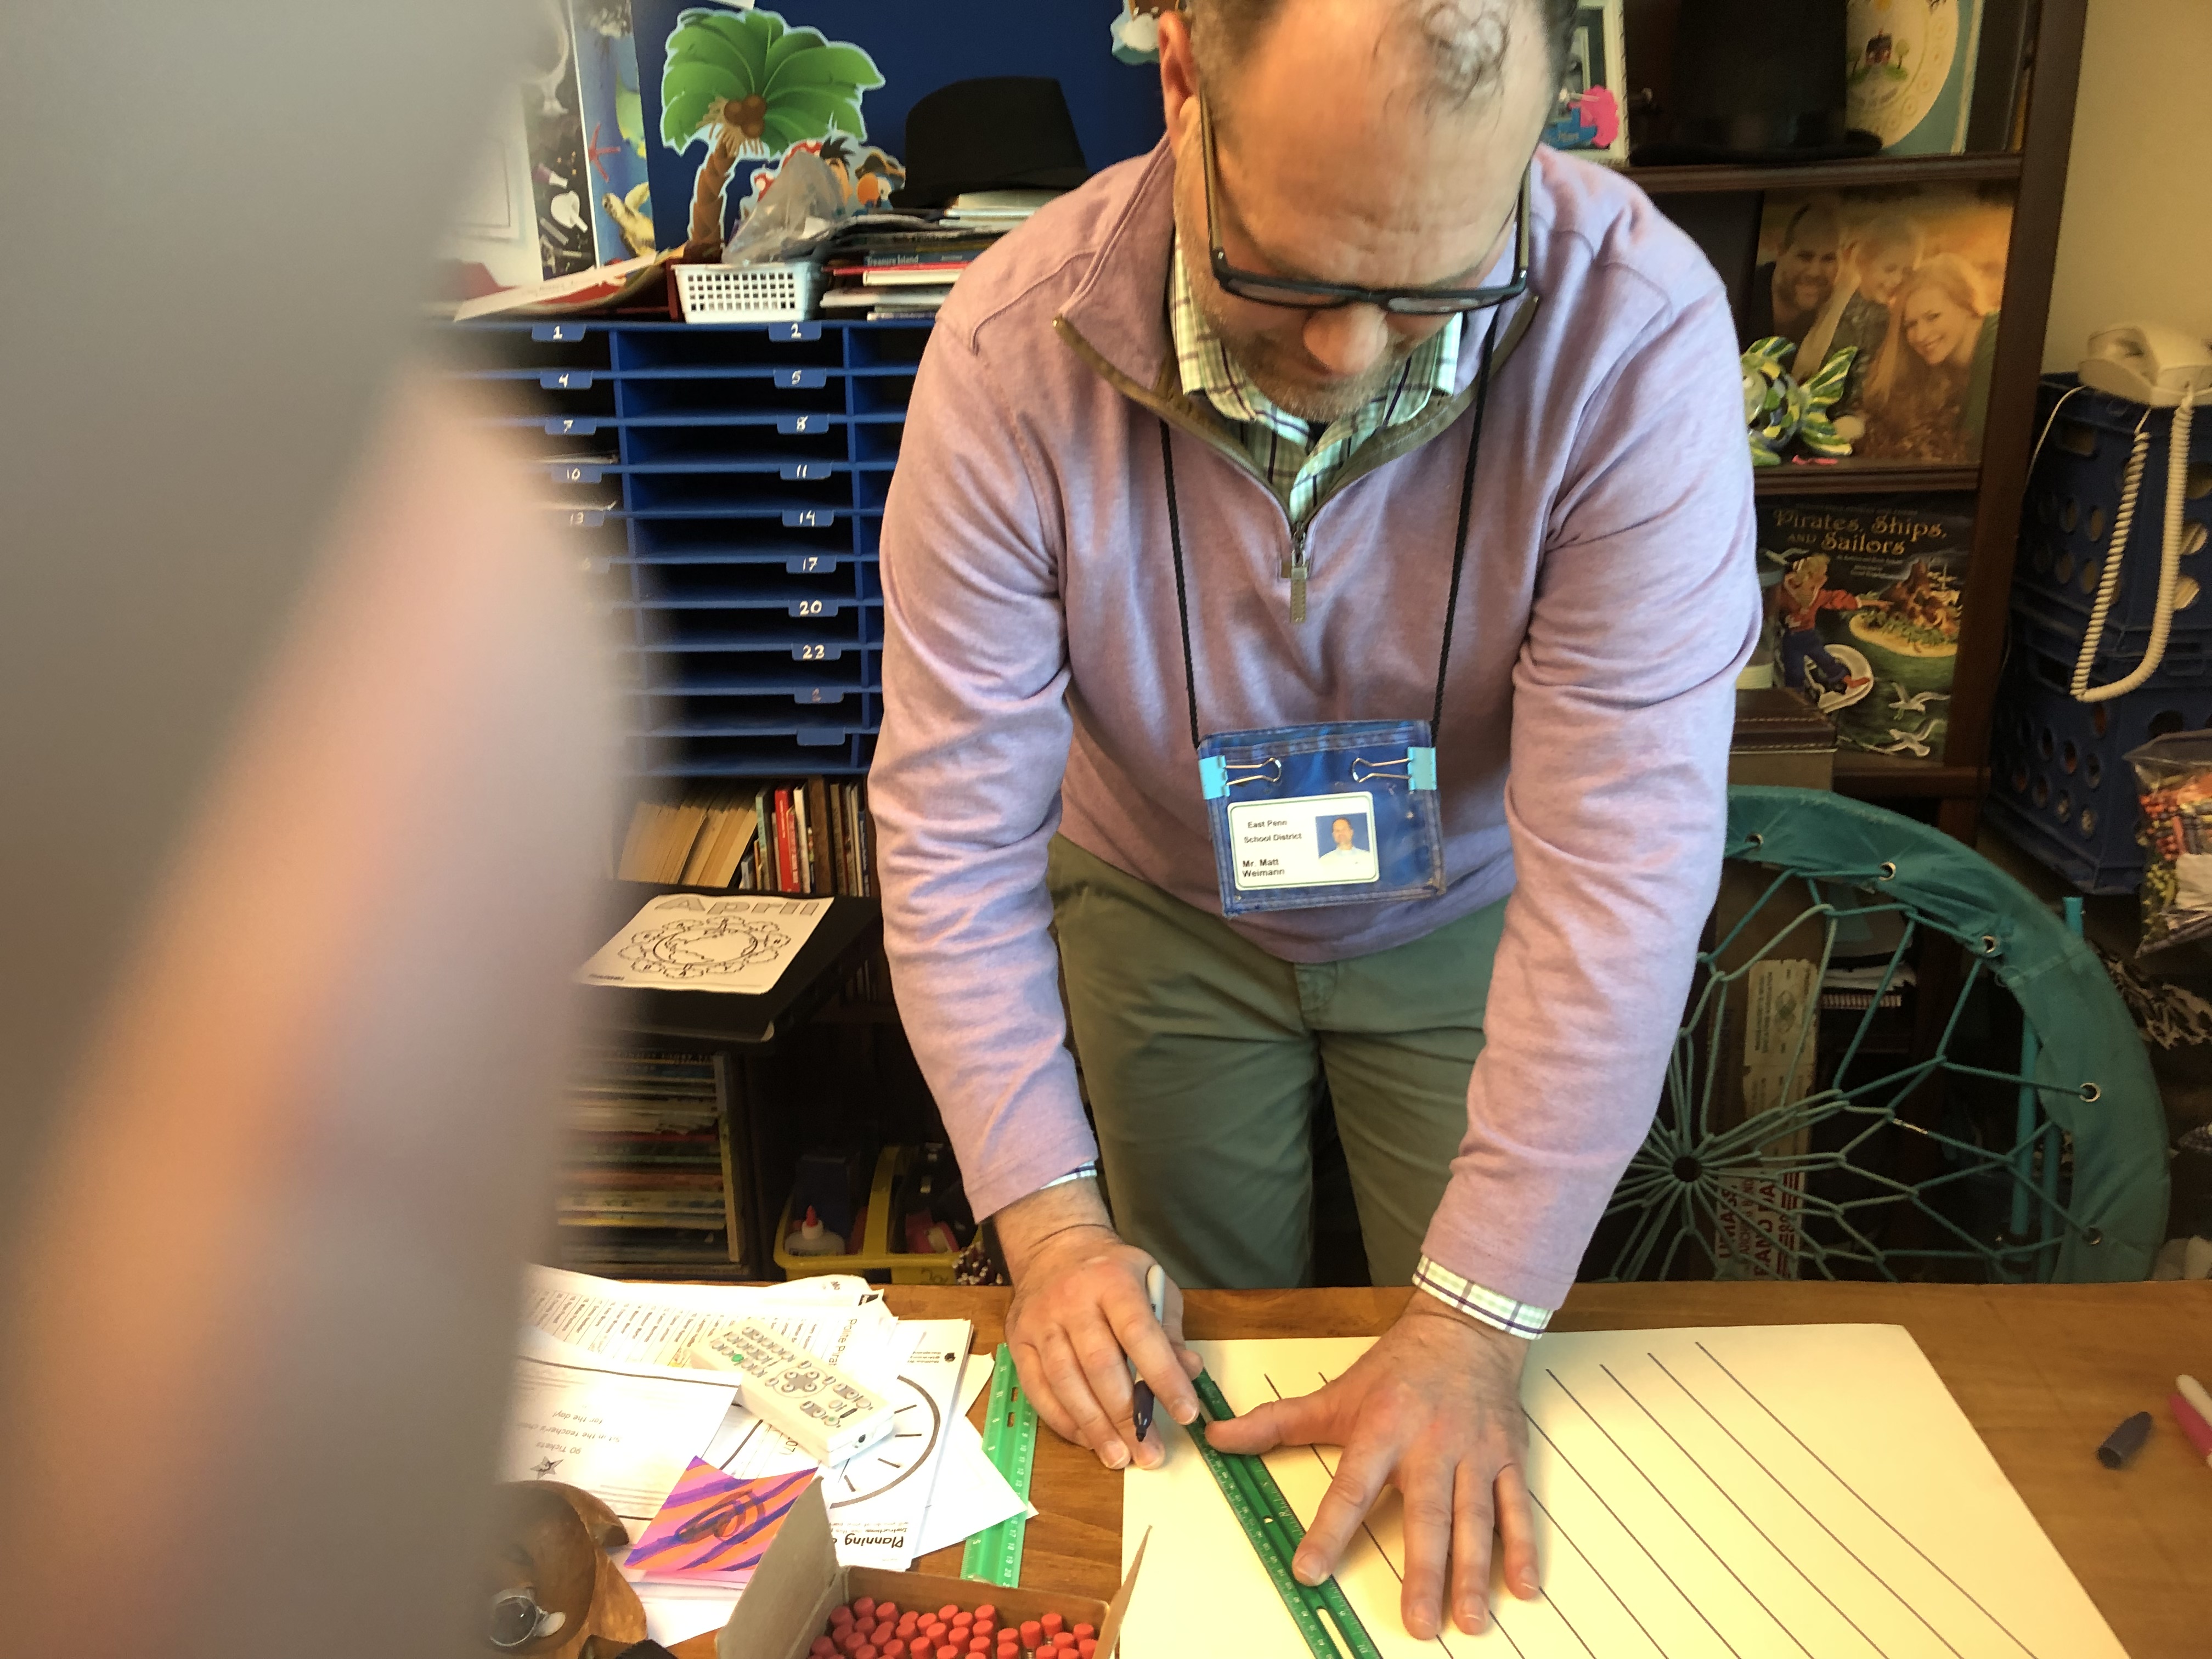
Monday morning, I was getting ready for the day and week, when an idea hit me: Have students learn time through using it to plan a party. We have been working on elapsed time for a couple days, and there are lots of ways to use real-life scenarios, but are any of them more fun than planning a party? Definitely not. I’m pretty good at hook-development, but it certainly didn’t hurt me to hear Burgess talk about it in “Teach Like a Pirate”! No more hook was necessary than “Today we will be planning a party.” I didn’t have to count to get kids on the carpet. They came ready to contribute… to their own learning!
When Math Time = Party Time
Through discussion, I let the hook sink deeper and deeper, so that the students were mesmerized with math. I refused to answer the question, “Are we actually going to do this party?” I upped the ante when a student suggested that rather than include “Set Up/Clean Up” in our 60 minute time window, “We should just set up before the party and clean up when it is all over.” This sounded perfectly reasonable to everyone, but I told the class that “We will be renting a ballroom that costs $250 an hour. We don’t get the room until noon, and if we go over our time, the price doubles. So, we have to squeeze all of our activities within this 60 minute window.” And then I added, “Also, we have to include plenty of time for clean up, because the hotel will charge us extra if we leave it a mess… plus, that wouldn’t be classy.”
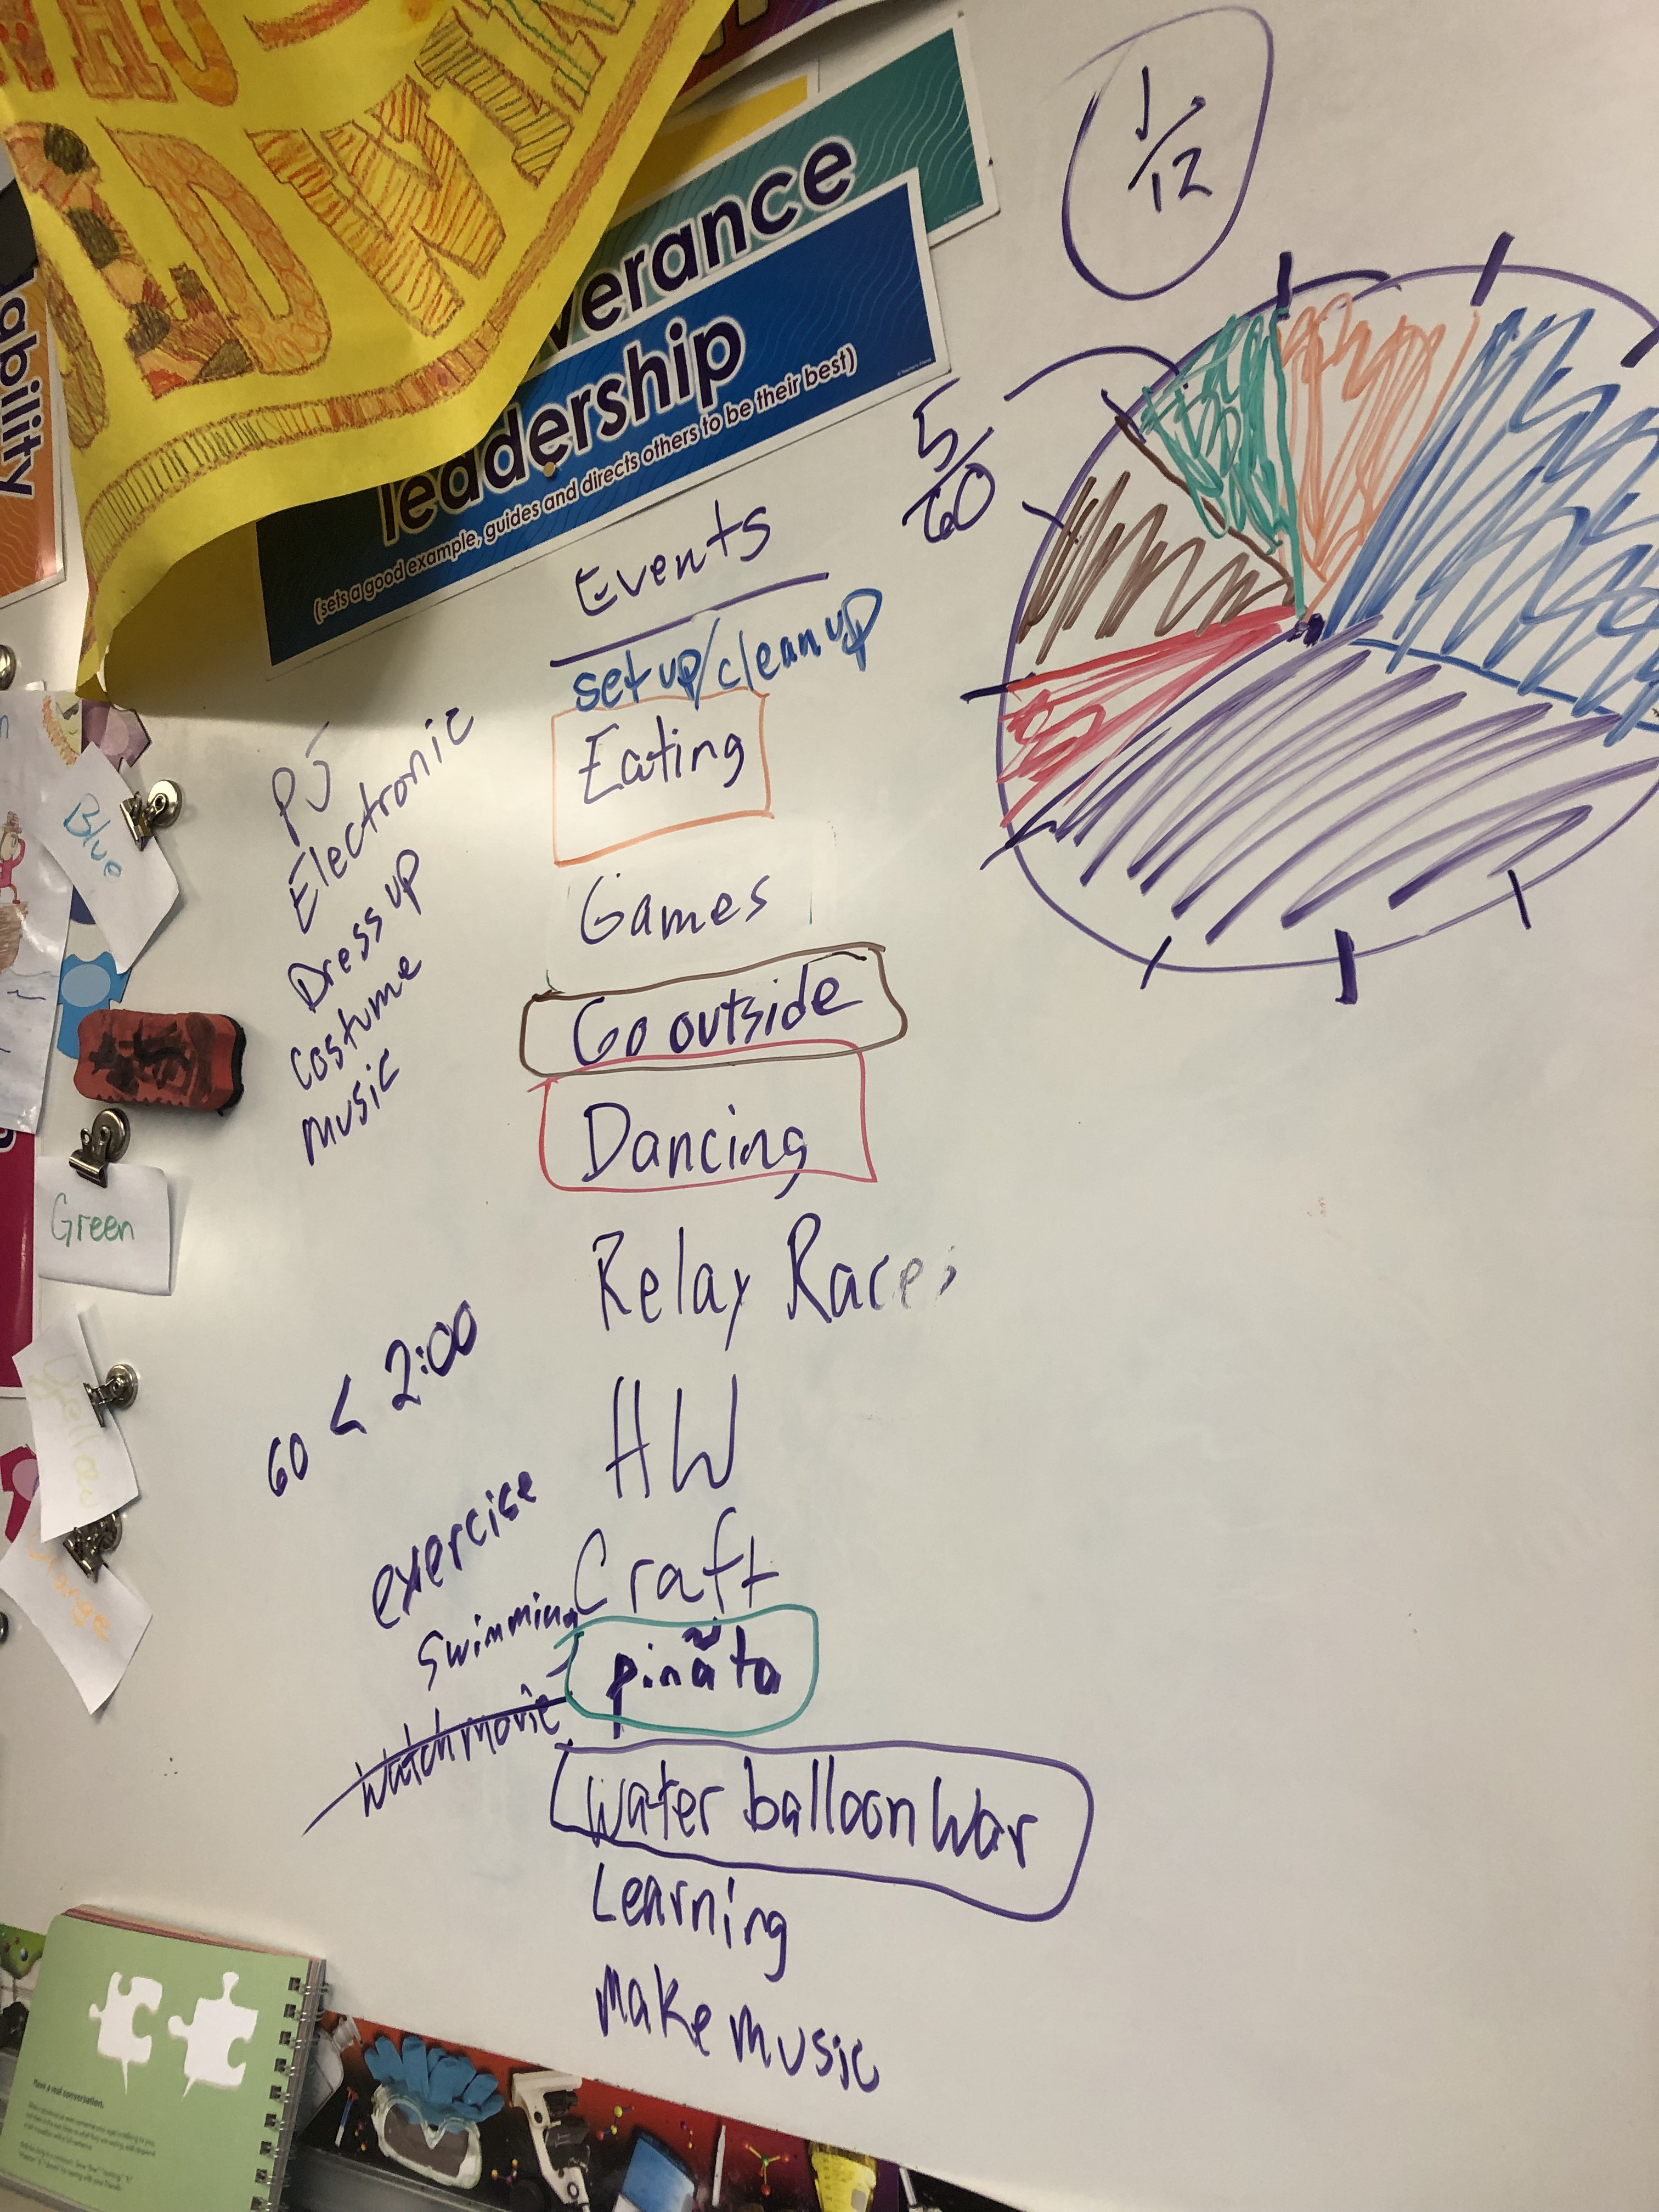
Boy, were they hooked. I mean I have never seen a group of students more engaged in discussion and riveted to each utterance! Every hand was shooting up with ideas. Who doesn’t want a party? The first thing I did was facilitate brainstorming of ideas of things to do at our “Math Party”–That’s what I called it; This wasn’t just any ol’ party; It was math-time, and that’s what we are doing; Make no mistake about it; You will learn math by the end of this. Many students were sharing themes. I praised “Pajama Day” and “Electronic Day”, but redirected to coming up with events that actually take up time. “We can make crafts wearing pajamas or with electronics, but it is the building-of-the-craft that takes up time,” I explained. So that the students felt heard, I wrote the theme ideas on the side.
During the brainstorming time I was building rapport. Not between myself and the students–that happened in September, and I had plenty of it–but between my students and the subject matter. Remember, I am teaching them math through all of this! The way I see brainstorming, it is like student ability: Every kid can do the math, some faster, some easier, some needing patience, help, and additional explaining. In my brainstorming sessions, every idea is acceptable. This makes it fun and funny, also. When a kid suggests a water event, I say, “Did you just say No-holds-bar-water-balloon-war!?” The classroom erupted… and the ideas poured in like the water filling those metaphorical balloons. Just as a teacher needs to redirect thought to shape learning, I rephrased student ideas to write a list of potential party events on the whiteboard.
Next, I drew a circle with ticks or lines that made the circle look like a clock. But, I didn’t write any numbers. I pointed out that there were 12 increments. Students mentioned that it resembled a clock. I agreed, but told them that this was a measurement tool, instead. I asked how much each segment was worth, reviewing our fraction sense: one increment was a unit fraction of 1/12. “If the circle represented 60 minutes, how much was each segment worth?”
“Five minutes.”
That being established, we worked together, discussing how long the events might take. Students made suggestions as to which events we would want to have in our party. As students shared ideas, I filled in the pie graph. (I didn’t tell them that this is what the circle was, until afterward.) “Wait a minute, we have a lot of fun things planned, but what about set up/clean up time?” I inquired. “It’ll take some time to fill up enough water balloons to have a 20 minute war! And, we better plan on cleaning up all of the debris.”
As I filled the pie graph I asked questions like, “How much time do we have left?” And, “What fraction of all of our time have we used up?” Here is a tough one: “Of the time that we have planned, what fraction is eating?” This forced them to come up with a new denominator. You better believe we reduced our fractions to their simplest form each time, as well!
When done, I had students analyze our pie chart with questions like “Which two events equal the same amount of time as Water Balloon War?” After several of these, and Turn & Talk partner sharing, I modeled taking the information and turning it into a bar graph. First, I asked, “Why don’t we have to bring the (y axis) all the way up to 60 minutes?” Students knew to only go as high as the greatest amount of the events. After making the graph we did some more analysis: “How much more time will we be soaking each other with water balloons than eating?”
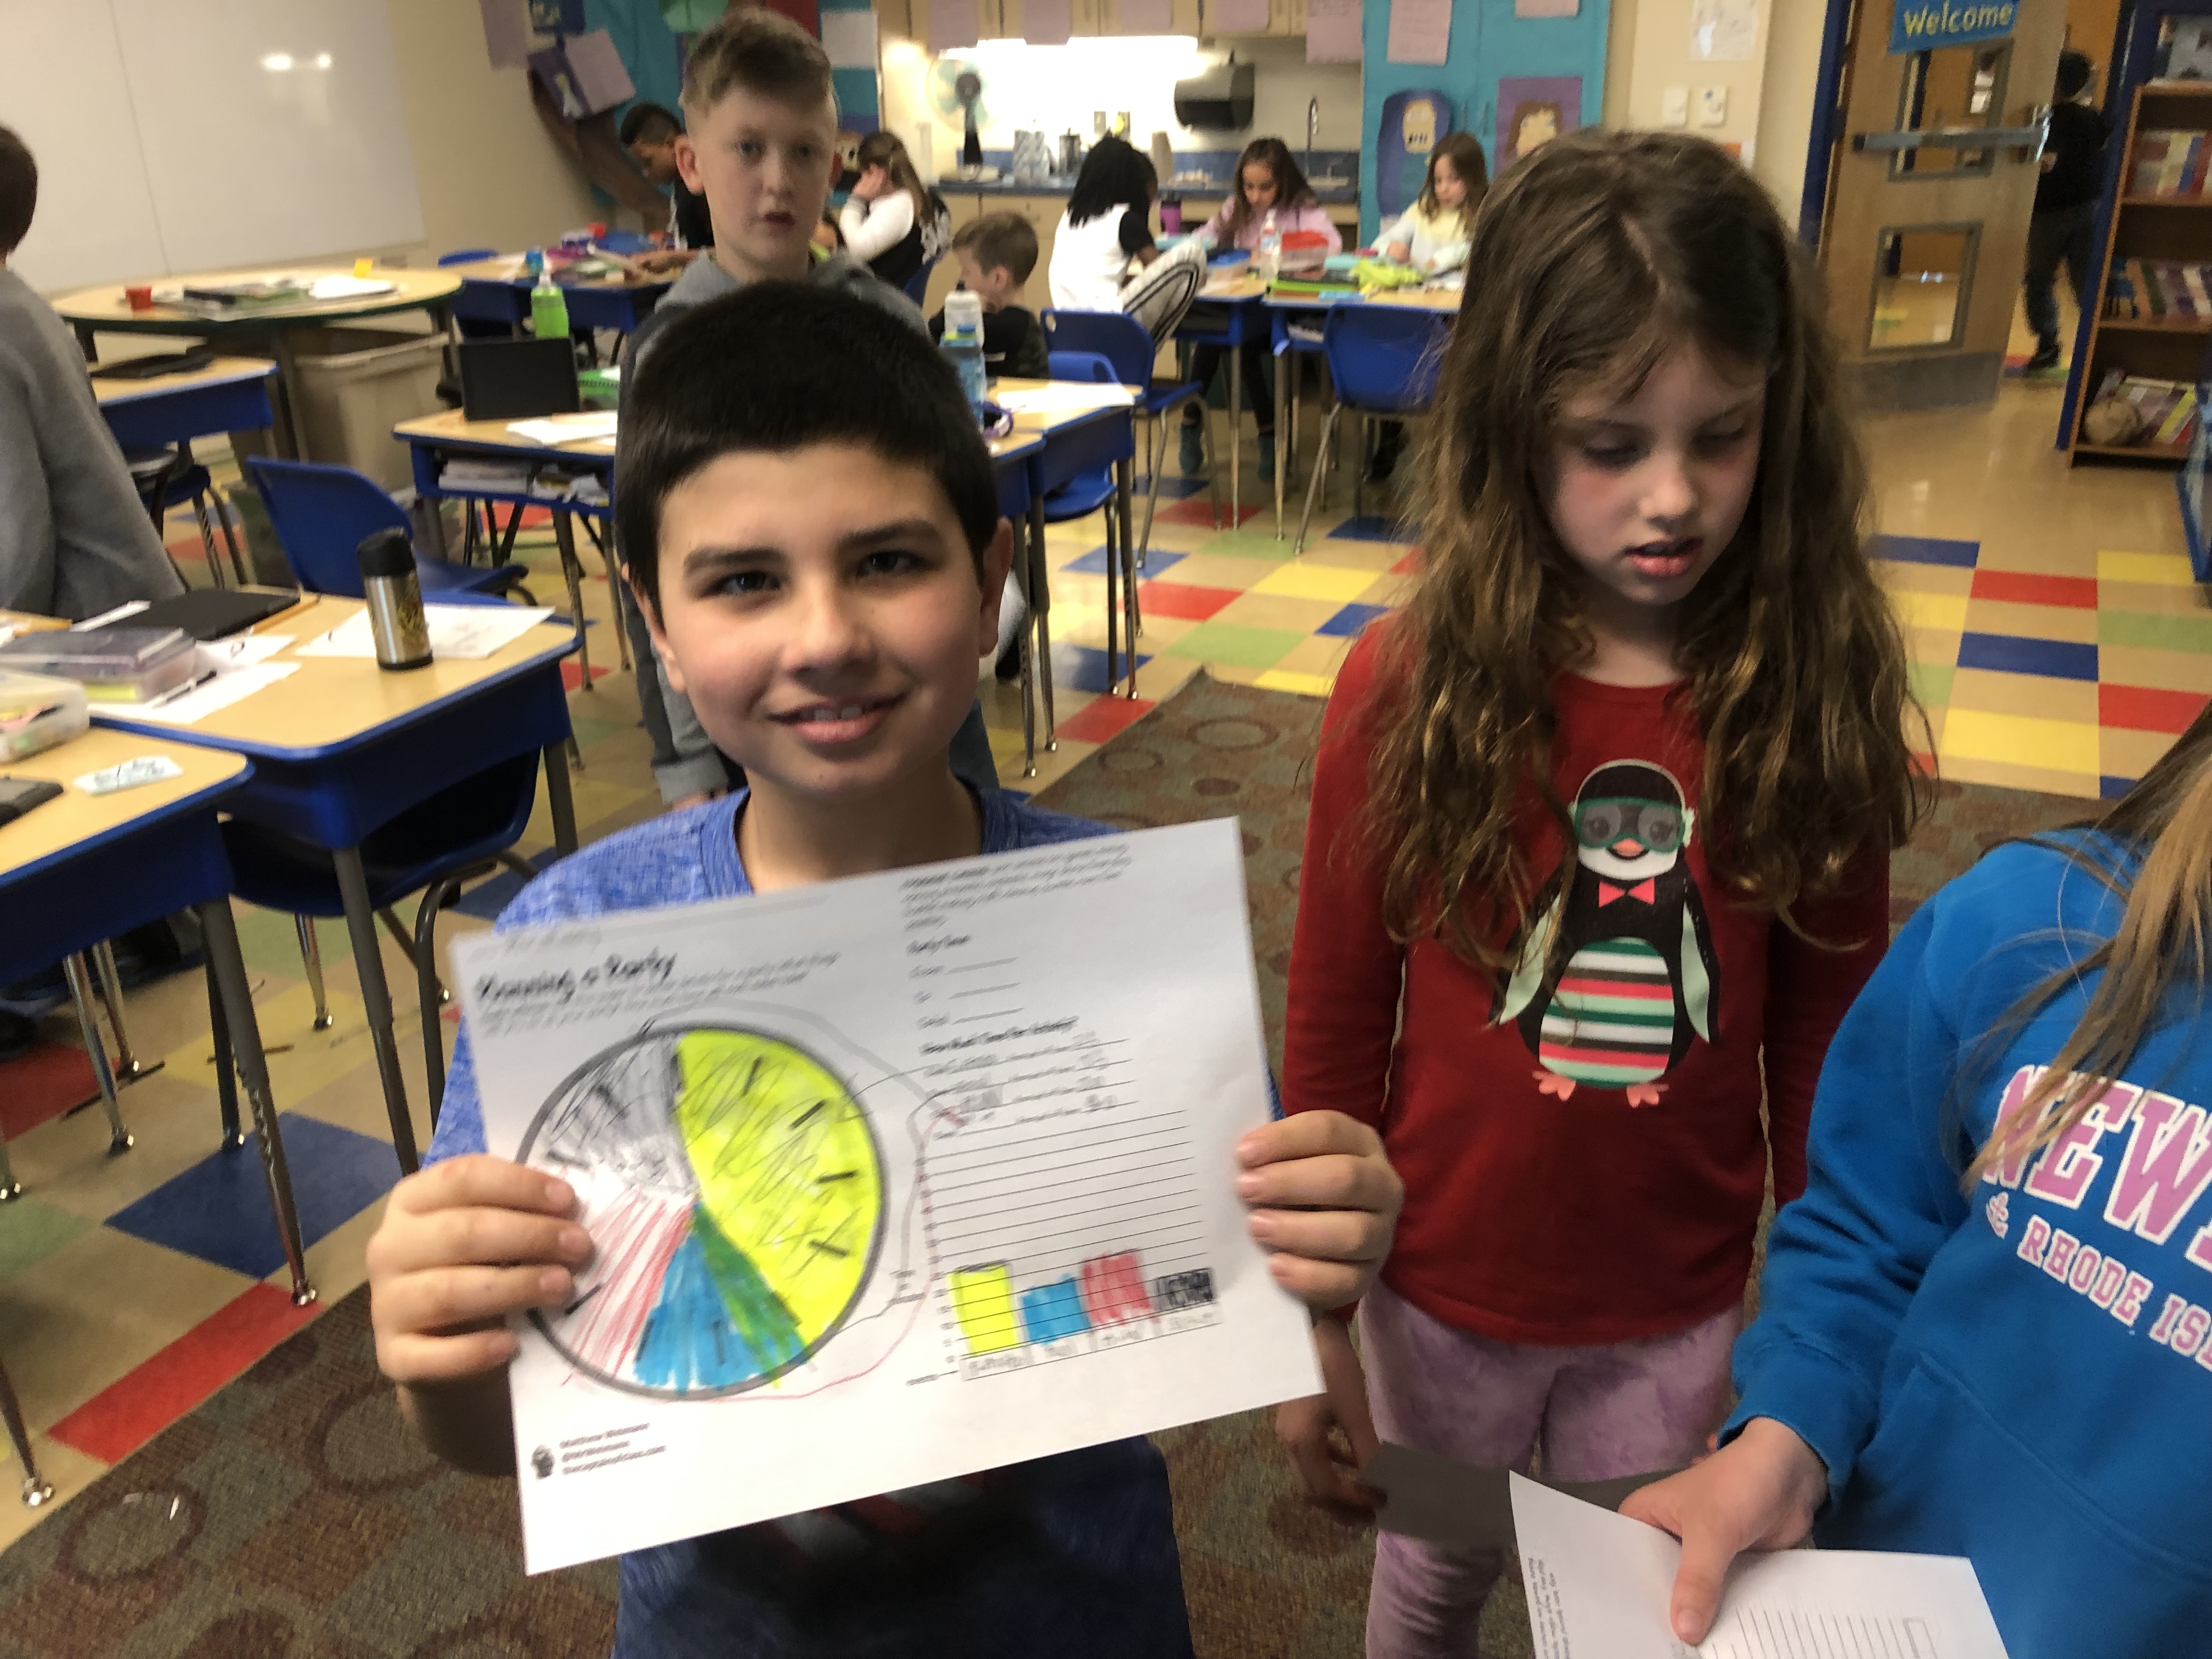
Finally, it was their turn. I showed the class the graphic organizer that I had made for them. They gasped when they saw that it was exactly like what we had just made. Because I presented it screen mirroring my iPad, I could quickly draw all over it. I showed them how they would plan events, fill in the pie graph, and make a bar graph. I told them that they weren’t allowed to use the same exact ideas that we had come up with together. They could have “eating”, but not the same amount of time. In other words, don’t copy, create. They were all cool with that. I stimulated this by writing crazy ideas on the graphic shown on the board: “Picking nose for 5 minutes, followed by washing hands for 20 minutes… because that was gross!” They loved it.
When everyone had their paper the room was abuzz with feaverish creativity. No one, not even my “I can’t think of anything to write” students, was stumped for ideas of things to do at a party, albeit “Math Party.” As students brought me their papers, they continued to ask, “Are we really going to do this?” All I did was raise my piraty eyebrows.
Proud Work
Google slide with graphic organizer for convenient printing and reproduction. Please pirate this to use as much as you like:)
Burgess, Dave. (2012) Teach like a pirate :increase student engagement, boost your creativity, and transform your life as an educator San Diego, Calif. : Dave Burgess Consulting, Inc.,


 I was going to title this blog “The Building Blocks of Math Construction” because I liked the play on building/constructing learning from material things. Really, though, I think the most important thing about this lesson was plain old ACTION. Yes, it was creative and fun, but rather than teachers reproducing the exact lesson, I want to share the philosophy behind it. It is a difference between building a beautiful, popular burger joint that everyone in a region admires and franchising the concept all over the world.
  This is what I did. In thinking about teaching money, I was imagining setting up some kind of store in the classroom. In stead, I brought my daughter’s old school, wooden building blocks into the classroom. I thought I would have the students compete to construct the tallest structure while using the least amount of supply: They would stack blocks of value to create vertical towers and add up what it cost them.
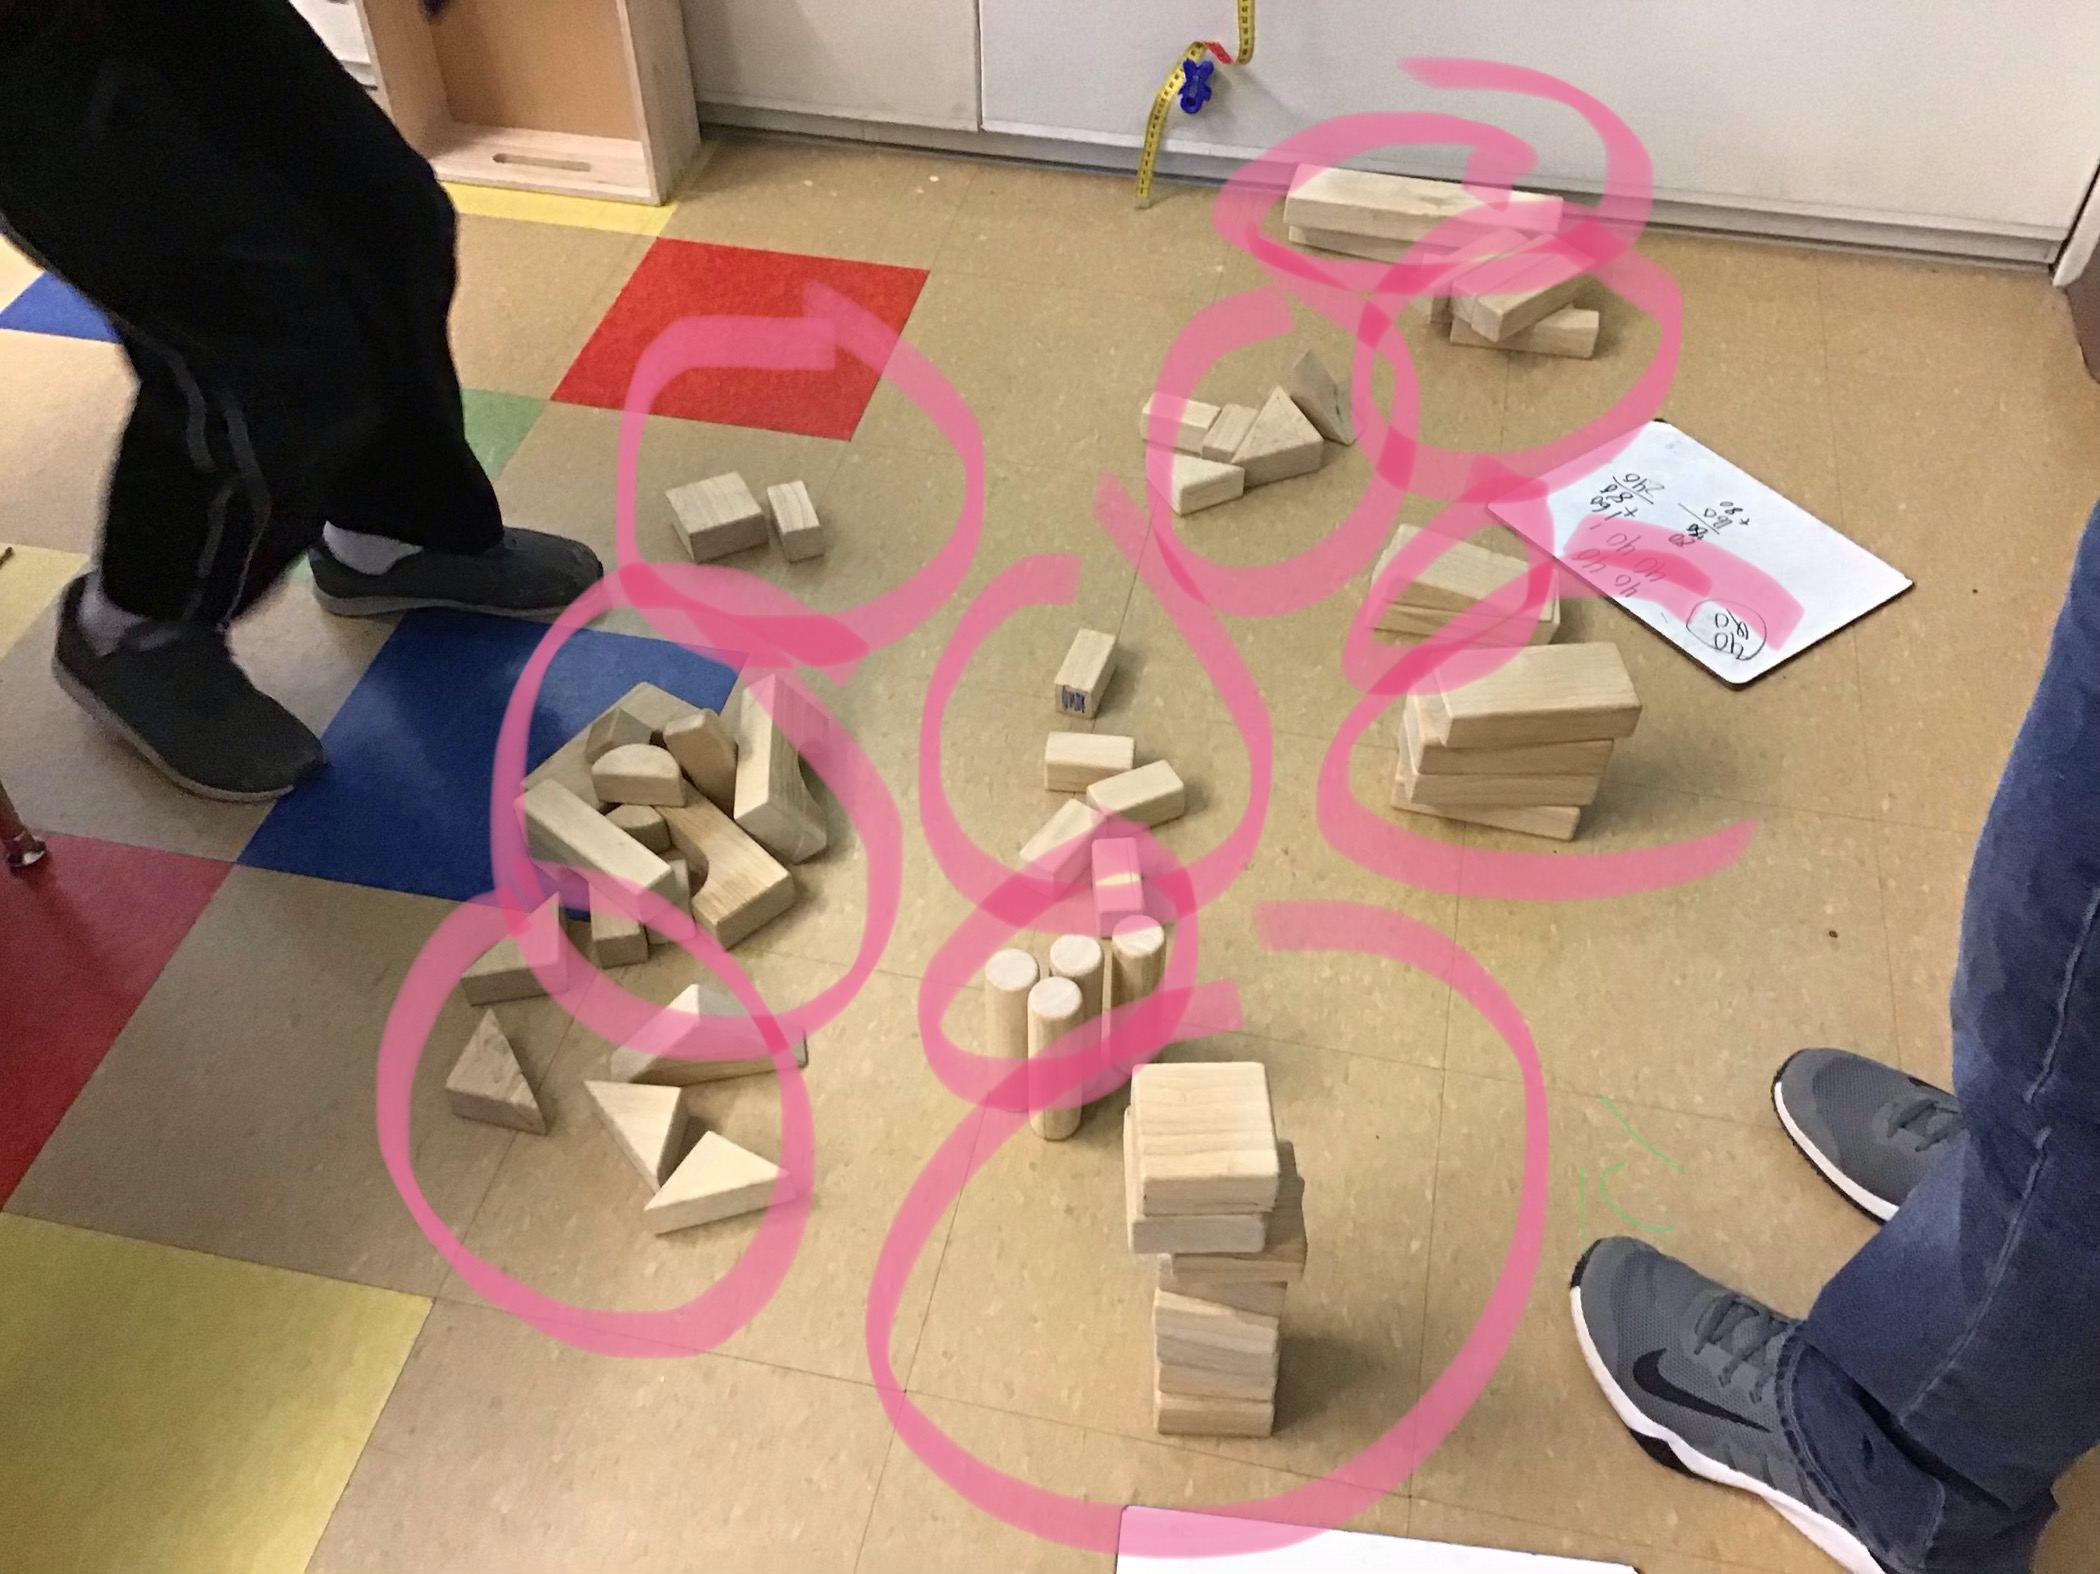


 After this experience I realized that the rest of the groups would probably need some guidance with this project. I decided to use math time to teach how to evaluate constructions. While students did some online work, I brought groups over to the construction corner of the room. I went over the prices of each of the four styles of block. We analyzed similar blocks and categorized them according to cost. Then I built a simple structure with one of each price. Students used dry erase boards to add up the cost. I also had manipulatives (plastic coins) there to help. It took a few tries, and as students showed success, I let them build a four block building. They had to add up the cost before moving on. With each success, they were able to build more.


 Over the weekend I finally experienced “Teach Like a Pirate”. I listened to the recently produced (Jan. 2019) audio book, read by the author,
 During the brainstorming time I was building rapport. Not between myself and the students–that happened in September, and I had plenty of it–but between my students and the subject matter. Remember, I am teaching them math through all of this! The way I see brainstorming, it is like student ability: Every kid can do the math, some faster, some easier, some needing patience, help, and additional explaining. In my brainstorming sessions, every idea is acceptable. This makes it fun and funny, also. When a kid suggests a water event, I say, “Did you just say No-holds-bar-water-balloon-war!?” The classroom erupted… and the ideas poured in like the water filling those metaphorical balloons. Just as a teacher needs to redirect thought to shape learning, I rephrased student ideas to write a list of potential party events on the whiteboard.
 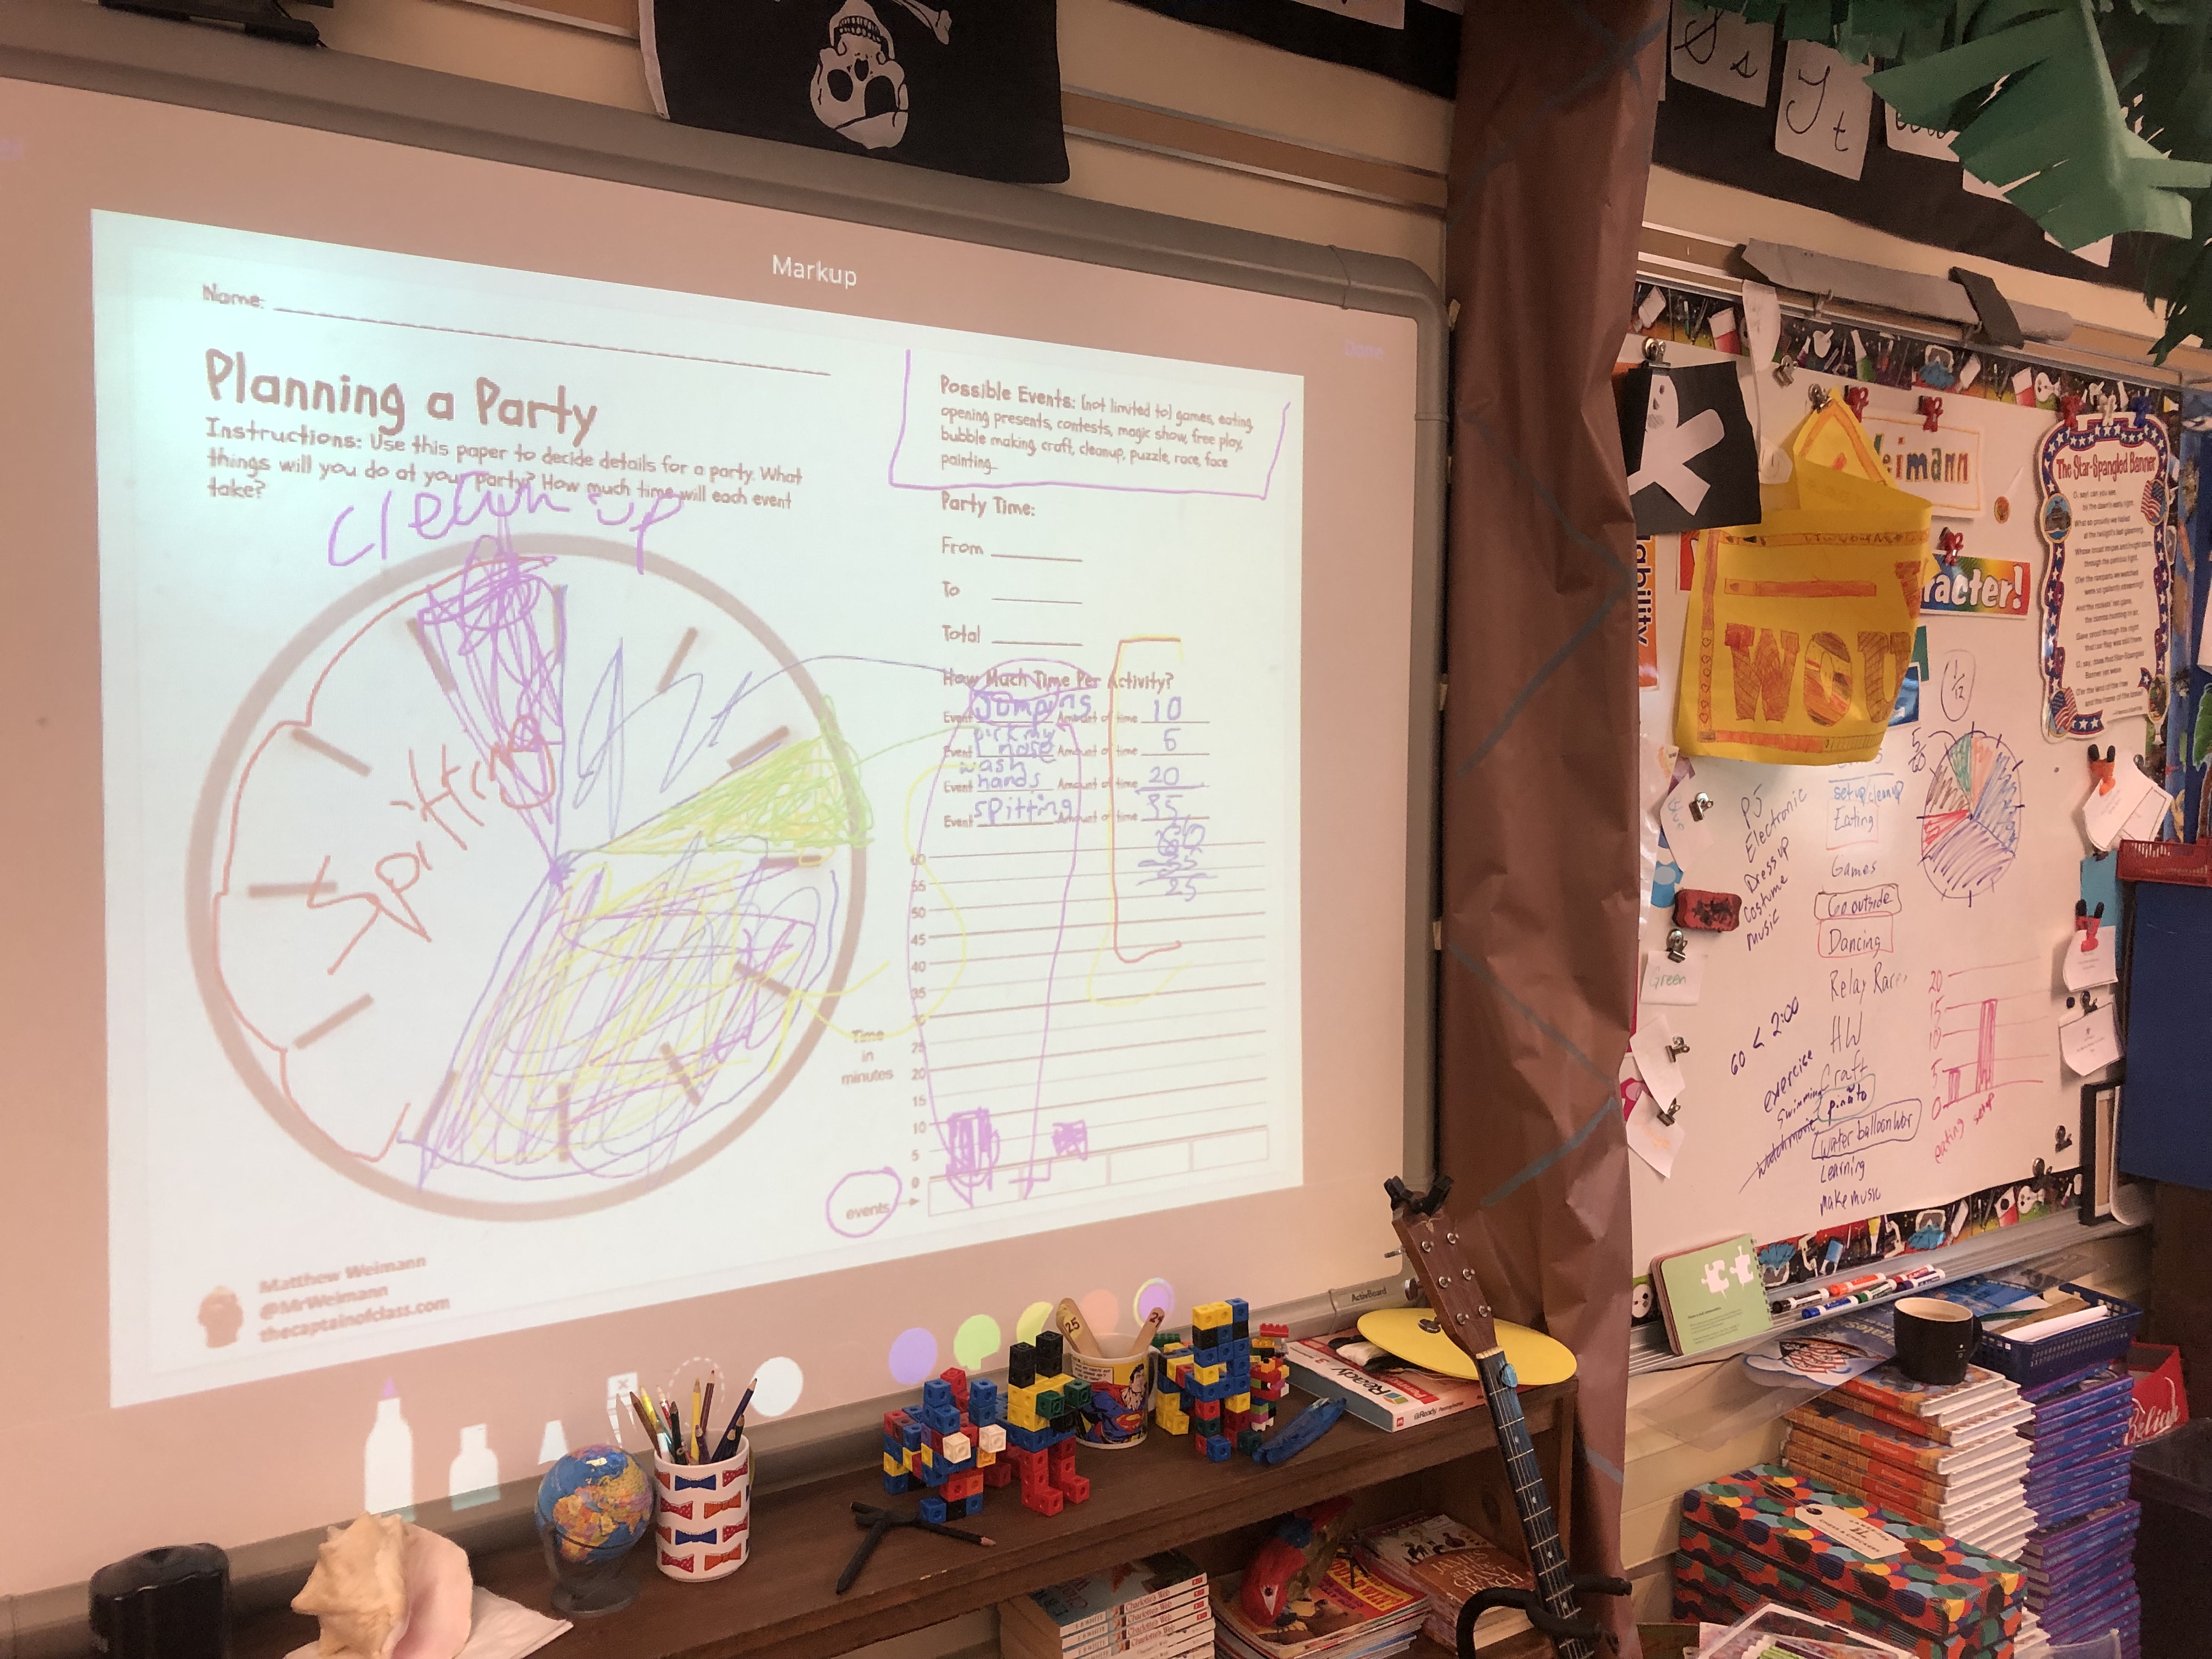 Finally, it was their turn. I showed the class the graphic organizer that I had made for them. They gasped when they saw that it was exactly like what we had just made. Because I presented it screen mirroring my iPad, I could quickly draw all over it. I showed them how they would plan events, fill in the pie graph, and make a bar graph. I told them that they weren’t allowed to use the same exact ideas that we had come up with together. They could have “eating”, but not the same amount of time. In other words, don’t copy, create. They were all cool with that. I stimulated this by writing crazy ideas on the graphic shown on the board: “Picking nose for 5 minutes, followed by washing hands for 20 minutes… because that was gross!” They loved it.