Balderdash: Gamify Vocabulary

We all know that selective word-choice can enrich writing (Academy, 2021). It will lend clarity to a story, deepen emotional attachment to a character, and broaden the understanding of a topic. Contrastingly, misused vocabulary can harm the message of a text. And, weak words will water down its substance. Therefore, building a thorough understanding of a wide array of words will prepare students for increasingly effective communication. As it turns out, I have a game that will make your learners crave vocabulary-building. 

Would you like your students to beg you to learn new robust vocabulary? Try Balderdash.

I call the game “Balderdash.” (There is a board game version, but I’ve never used it. From the description, it seems to contain the gist of what I present here.) The name is unique enough to spark interest and be memorable. It also lends itself to the core of the game; Playing with unknown words. 

I’ve used Balderdash to introduce vocabulary, deepen background knowledge, and explore literature concepts for years.

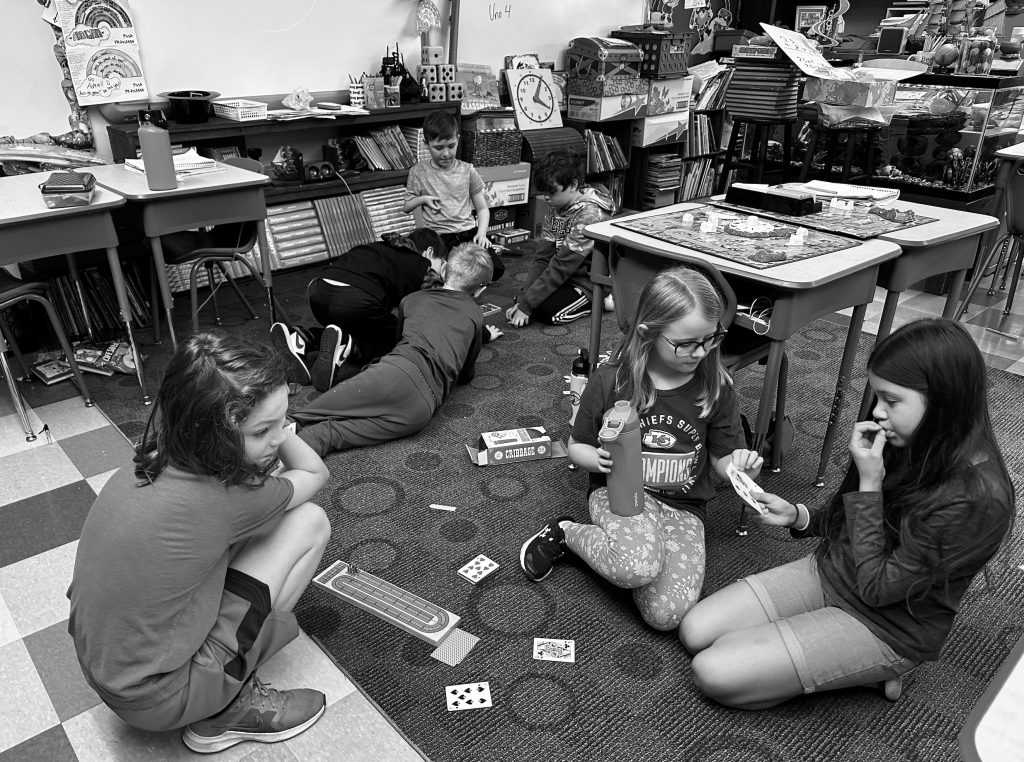
This is how I introduce the game to my students. I start off by explaining that this is a game of definitions

“How many times have you been reading an entertaining story, and really enjoying yourself; Then you come across a word that trips you up? All of a sudden, you don’t know what is happening. Why are the characters acting so weird? What did you miss? They aren’t always big words, but misinterpreting the meaning of a word can turn a heretofore simple tale on its head (irony in italics;)

“In this game, you will be presented with a word that you probably don’t know. That is okay. You aren’t supposed to know what the word means. If you DO know what it means, or if you think you know what it means, that is okay, too. But, don’t tell anyone. You can earn points by writing down a definition that is really close to accurate.”

Here’s how it works

Sometimes, the game originates organically. In the middle of conversation with my students, I might use a word that they don’t know. Rather than simply telling the Polite Pirates what it means, we break out Balderdash to have fun learning its definition.
  1. Have a list of your students handy.
  2. Hand out index cards or sticky notes. Tell students to keep the papers UNFOLDED. Also, do not write on the cards until instructed. (They must look the same.)
  3. Have your students write their names on the top. Everyone should use pencil, and don’t do anything to your card to make it appear unique. (You will understand why in a minute.)
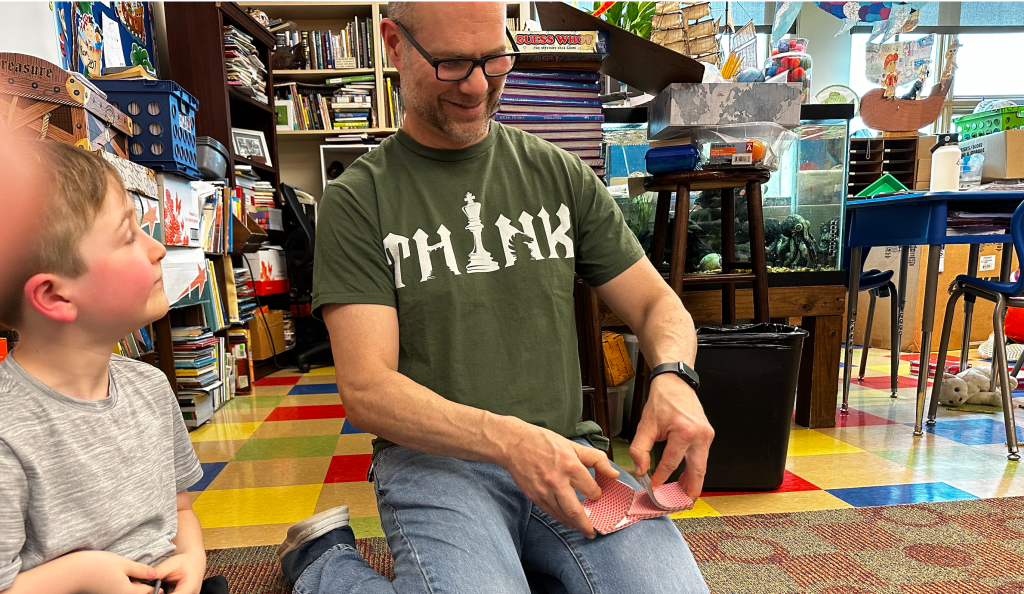
  4. Next, come up with a word that students will not know. You could begin with “balderdash.” This would make the game that much more memorable! You could use a vocabulary word from a list of words you want the class to learn. You could even flip through the dictionary, looking for tough words.
  5. Write the word on the board, so that everyone spells it correctly. You may want to write down some phonetic tips. I will sometimes explain what part of speech it is; perhaps even a hint. (i.e. This is a noun; and although this game might be named “Balderdash,” that isn’t what it means.)
  6. Tell the students to make up a definition for the word. Explain to them that their peers are going to vote on which definition sounds most likely to be true or accurate. 
  7. While the students are writing their definitions, you look up the true definition of the word. (I don’t recommend relying on your own interpretation. Even if you do understand the word, it is best to deliver the scholarly definition first.) You will need to put the definition into kid-friendly language. Your definition will need to match the ones that students hand in.
  8. Walk around and collect everyone’s index card. I recommend using a bucket or top hat for this. 
  9. Read through the definitions to yourself, making sure that you understand what they say and are able to read them fluidly. You don’t want to supply any “tells” that one is NOT the accurate definition. If there are any that are similar to the actual definition, provide that student a point and remove the definition from the pile. (Reading 2 of the same definitions would let them know they are the true definition.)
  10. Next, place them back into the hat or bucket. Pull one at a time and read it. Do this once through without any voting. 
  11. Then, repeat the process, but after each reading, have students raise their hands if they think it is the correct definition. You can only vote once, and you can’t vote for your own definition. 
  12. Give the pupil who produced the phony definition a point for each vote. Whoever votes for the true definition also gets a point. 
  13. After each round, share who earned the most points and the real definition.

In the same way a serious athlete might take creatine supplements to boost muscle-building ability in the body during intense exercise (Creatine, 2021), using games to increase enthusiasm for definition development can motivate kids to grow their vocabularies. Rather than get fatigued when faced with unknown words in texts, your students will view these as opportunities for growth. 

An athlete takes creatine supplements to prepare their body for doing a little bit extra in each exercise, making the workout that much more beneficial. Balderdash is a reason for collecting large, complex, unfamiliar words, and tucking their meanings into memory banks for future use. Plus, it’s a lot of fun! game

Sources

Academy, E. (2021, November 12). Word Choice in Academic Writing: Tips to Avoid Common Problems. Enago Academy. https://www.enago.com/academy/word-choice-in-academic-writing-tips-to-avoid-common-problems/ 

Balderdash Board Game – the Game Of Twisting Truths. (n.d.). Mattel Shop. https://shop.mattel.com/products/balderdash-cfx43 

Creatine. (2021, February 9). Mayo Clinic. https://www.mayoclinic.org/drugs-supplements-creatine/art-20347591 

This 4th grader got to wear the “Balderdash hat” for our photo as prize for collecting the most tally marks.

Paper Football Field Goal Line Plot Lesson

Driving question: What is the perfect length of a paper football field? We are talking, one that allows some paper footballs to score goals, but not every “kick.”

Goal: Students will create and use a line plot to categorize data in a way that makes it easy to interpret. They will analyze the data to determine the best measurement for flicking a paper football accurately.

Prep: I folded a paper football out of an ordinary,letter-sized piece of paper (8 ½ by 11 inches). You fold it the same way you fold an American Flag. Have one pre-folded, but this could be part of the lesson, if you have time. (I didn’t have X.) 

I placed two tables end to end, creating a lengthy runway for measuring. Before students arrived, I taped rulers to the table top the entire length of the two tables, about 3 inches away from the center. I put pieces of tape at each foot so that it would be faster and easier to locate the increment. 

Lesson: I told the students the object of the lesson was to determine the “goldilocks length” of a paper football field for this group of students. Another group may be better or worse at flicking the paper football. We are going to collect data that will help us tailor our “field” to our group. 

“We don’t want the field goal too close, or every single flick will score a point. We also don’t want the field goal too far away. Then no one will score! There will be a window where some will score, but some won’t. We will use data to find that sweet spot. And, we will use a line plot to help us read the data.” 

The first thing we did was figure out the width of the field goal, so that we could finish constructing our mock field. I had each student form right angles with their thumbs and index fingers. Then, touching thumb-tips, they placed their finger field goals on the measuring tape (ruler) I had already taped to the tables. As students shared the measurements of their finger field goals, I wrote them on the dry erase board. We had 6, 6, 5, 5 inches. 

I had taught my students how to average numbers earlier in the year. They were bouncing with the information, now. “It’s 5.5,” a girl offered. 

“How do you know?” I queried.

A boy suggested that it was right in the middle of the numbers. I affirmed this by circling the middle four and five. The girl who had provided the original answer shared what she did to get it, and what one should do to find the average of several numbers. “You add all of the numbers, and then divide by the number of numbers.” We discussed dividing 22 by four in order to review fractions and decimals, and to double-check our answer.

Next, we used mini (six inch) rulers to measure five and a half inches distance between the already taped down ruler and a new one. I had the students tape it down. Now, we had a runway that was the average field goal width, running about ten feet long. 

I demonstrated how to flick the paper football. Each student got three tries. If any of them were duds (didn’t fly), we conducted a retry. There were a few very short flicks, but all in all we collected some valuable data. 

This line plot is not great because the line is not accurate. There ought to be measurements that do not have Xs. Every 1/3 foot should be labeled.

About half of the flicks landed between the two rulers; within the field goal range. These measurements were written on the board in one color. The flicks that did not land between the rulers were recorded in a different color. All of the measurements were recorded to the nearest ⅓ of a foot, in order to use mixed numbers on our line plot. 

Once the line plot was finished, it was easy to see the window where the field goal ought to be erected. There was a collection of accurately-flicked colored Xs up to a point. Then the other color, the color of missed flicks began to move in. At a certain point there were no longer any accurate flicks. The brackish space containing both colors contained the available distances. 

Some students wanted to place the field goal at the first measurement that recorded a miss. I explained that, were we to place it there, nearly every flick would score a point. Even the misses that went far could pass between the goal posts before veering off to the side. I drew a picture illustrating what I meant. 

We drew lines at measurements that we thought the field goal would work best. Then we discussed pros and cons referencing the data.

One student wanted the goal posts erected right before the very last successful data point; The last one to land between the two rulers. I told him that “This would guarantee that only one person would get one point for one flick out of… How many did we do? That might be too frustrating, and not very fun.” 

We ended the lesson without deciding on the perfect distance. Basically, the thing to do was to use the data that we collected to try out some reasonable distances, and see which ones were more fun. The beauty of the paper football field goal game is that the field is so malleable. It is all about fun, and that’s what I hoped the line plot lesson would generate. If nothing else, it was memorable. 

Building Strategic Thinking with Dominoes

My 5th grade gifted class revisited the game of Dominoes last week. It took some review, but they enjoyed playing the game. I told them that one of the reasons I had taught them the game was because it is a classic that they could play with grandparents and other elderly people, bridging the gap between generations. The game has been in existence for over 900 years! 

In addition to the game being old, it also presents an opportunity to practice strategic thinking. In an effort to prove this to my 5th graders, I have begun dreaming up scenarios where a player might use analytic skills to make a counter-intuitive move that would benefit them in the long run. 

There are times during a game when you have more than one Bone (Domino) that you can play, but none of the plays will give you points. Sometimes, it does not matter which one you put down, but other times you can plan ahead. Much like you would in chess, you can set up future moves by arranging the Bones to meet your needs. Playing them in a particular order would benefit you more. 

I planned on showing my 5th graders what I meant by setting up scenarios of games and taking pictures. I have done that many times to teach the problem-solving aspect of Dominoes. 

Using photos as teaching tools works great on interactive devices.

Then I thought, Why not have my gifted students make up the puzzles themselves? I will give them the parameters, and they have to try to figure out how to show the need for strategic thinking through constructing an image of a hypothetical game. 

The puzzle would be an image showing Bones (Dominoes) already played, Bones available to a player (standing up so Pips or dots were showing), blank sides of the opponent’s Bones, and maybe a Boneyard (unused Dominoes). 

If you are a novice Dominoes player, some of this vocabulary might be new to you. Bones are the game pieces, named after what they were originally made out of; Ivory or elephant tusks (bones). The Boneyard is made up of the unused Bones lying face down. Face down means that the Pips or dots on the bones are not showing. All you can see is a blank Bone or the uniform design that is printed/carved on every one of the 28 Bones of the set. Bones often have something decorative on the side without Pips, so that players can identify the 0-0 Bone more easily. Every Bone has two numbers on it. There are two ends of the number side of a Bone. No two Bones have the same combination of numbers. Beginning at 0-0, the Bones go up to 6-6. 

The Plan: In order to demonstrate strategies for play, I am going to have my 5th graders come up with puzzles that point to weighted plays. In other words there will be better moves than others. People trying to solve the puzzles will have to analyze the potential moves. Which one is better and why? Puzzle-solvers will be required to explain the move they chose. 

This is from the beginning of the year.

The Work: Arrange Bones as though they had been played in a game. This means matching the ends of Bones; Six is connected to six, three to three, etc. There ought to be four lines of play that a player can connect a Bone to.

Each player has Bones left to play. One set of Bones is standing up, with the number of Pips showing. These are the Bones that the puzzle-solver has to work with. (Normally, when I am teaching Dominoes to students, I have them lay all of the Bones down, so that every student can see all of the Pips. This is so that every single play is a lesson on problem-solving. When one plays a real game, you do not show your Bones to your opponent.)

The Bones that the puzzle-solver has to work with (the ones showing Pips in the image) should have numbers that can be played. They contain the number that is present at the ends of the lines of play. One of the Bones that can be played would cause the sum of all four ends of the lines of play to add up to a multiple of five, which is how one acquires points in Dominoes. This would seem like the best choice to complete the puzzle. 

Because we want this to be a puzzle that causes Domino players to grow in their understanding of the game and not just an illustration modeling how to play, we aren’t going to make the correct answer to our puzzle be an obvious choice. A good head-scratcher will require a player to look beyond the obvious play. 

If four Bones with the same number have already been played, and the puzzle-solver has two of the remaining Bones with that same number, how likely is it that the opponent of the puzzle-solver has any Bones with that number

Here is your task: Make it so that playing the Bone that does NOT create a multiple of five is the better play. 

I’ll have to share this lesson with my 4th graders, as well!

How could this happen? If the opponent of the puzzle-solver is forced to draw a Bone from the Boneyard, rather than playing a Bone, not only will they not earn any points, but they will be growing the number of points that the puzzle-solver will get at the end of the round; The round that the puzzle-solver is now more likely to win because they have fewer Bones left than their opponent. 

At the end of each round the player who uses up all of their Bones first gets points from the Pips that are on their opponent’s remaining Bones. In order for the play that did not make a multiple of five in the first place (at the beginning of the puzzle-solving exercise) to be the better play, the final play must provide more points than the potential multiple of five. 

If the multiple of five would have been fifteen, and there is no way, given the Bones that are left, for the puzzle-solver’s opponent to have a total of Pips greater than fifteen (you always round up, so sixteen would go up to twenty), then not playing the multiple of five during play would not necessarily be a winning strategy. Typically, you would play the multiple of five, get the points, and hope for the best. This exercise is designed to show my 5th graders that if you plan ahead, the delay of point acquisition could very well bring a windfall of greater point tallies. Not only is this a good life lesson, but it can help them play the game better in the future. 

Now, if you want to try to figure out how to create a puzzle that fulfills these requirements on your own, without any help, go for it. You can return to this writing when/if you get stuck and need some guidance. The next section provides some helpful hints. 

If you aren’t sure where to start, or you have hit a mental block, check out these ideas.


Some Helpful Hints: 

Limit the available Bones. You can do this several different ways. One is to only give the puzzle-solver two bones to choose from. 

Another way to limit the potential outcomes is to make the lines of play long. Have most of the Bones from the set showing in the lines of play, so that the potential Bones of the opponent is narrowed to only a few possible numbers. The puzzle-solver can reverse-engineer the game to figure out what Bones are left to be played. It’s like “card-counting,” but legal;)

A very effective strategy for creating a doable puzzle is to limit the numbers in play. Idea: Make the ends of the line of play all the same number, and the puzzle-solver has the remaining Bones that contain that number. For example, there is a one at the end of all four lines of play. There are only seven Bones that have a one in them. If four of these are played, and the puzzle-solver has the remaining three, then the opponent cannot possibly play any of their Bones. 

But, the puzzle has the puzzle-solver making the next play. How can the puzzle-solver cause their opponent to have to draw from the Boneyard? See if you can figure it out.

There are a couple of ways to solve this problem. One answer is to provide the puzzle-solver with a double. A double has the same number on both sides. When this is played at the end of a line of play, it keeps that number going! 

Another solution requires more work, and could therefore be trickier for the puzzle-solver to find. Make it so that all of the Bones that the puzzle-solver possesses have numbers on them that can’t be played. You have to position every bone that has any of the other numbers on them within the lines of play. No need to worry about your puzzle-solver using up their Bones because every one of theirs contains the same number as the ends of the lines of play. 

Stack the Pips. Create lines of play that have low numbers, thus ensuring that the Bones that the opponent possesses are more likely to have higher Pip counts. In this way, even if the puzzle-solver would make a fifteen or twenty with the false-solution-Bone (the one that would make a multiple of five and seems to be the better choice for the puzzle-solver to choose), the total Pips that the opponent would have must be greater than the multiple of five. This number work is truly statistical thinking. Out of all of the Bones still available, how likely is it for the opponent to have a high enough number of Pips for the counterintuitive play to benefit the puzzle-solver more? 

This puzzle would allow for the opponent to make a play or two before the puzzle-solver is out of Bones. My student would have to work through all of the possible outcomes to ensure that the puzzle-solver would come out on top. 

3rd graders learn to play Dominoes

Try it out, and make the puzzle fool-proof. When making the puzzle, turn all of the Bones over so that the Pips are showing. Create a model of lines of play. Give the puzzle-solver the Bones they will work with. Now, look at the Bones that the opponent could have. Adjust the lines of play, so that there is no possible way for the opponent to have a way of winning. You also have to double-check that there are only Bones that would cause the opponent to have more Pips than the false-solution. Then turn over the Bones that form the Boneyard, and stand up a couple that represent the unknown opponent’s Bones. 


Conclusion:

Normally, I will do a lesson like this, and then write a blog about it. This is different. I have used my writing to think through what I want to have my 5th graders do. 

My aim is to have them build their understanding of the game of Dominoes and learn statistical analysis through the process of constructing their own puzzles, rather than just solving mine. Hopefully it will be successful, and I can write a follow up blog about how wonderful it went… or the lessons I learned through its execution, pun intended;) 

If you try this idea or one like it, please share your results. I’d love to learn feedback and improve future teaching. 

Sources:

Marcus, M. (2020). How to Play Dominoes . Cool Math Games. https://www.coolmathgames.com/blog/how-to-play-dominoes

Box O’ Blocks: Math Enrichment

Looking for a fast math lesson to extend learning and use critical thinking? You’ve come to the right place. Because I only get to see my gifted students for 40 minutes a day; and that includes walking in the door, settling down, packing up, and exiting; I must make my lessons quick. Recently, I built onto a lesson that I loved in the past: “Box O’ Blocks.” 

Prep: Take those classic, little-kid, wooden blocks and stick 3-digit numbers on the sides. Put them in a box. You are ready to go! 

If you don’t have access to blocks, you could draw, color and cut out different shapes on card stock or index cards. Basically, simulate the classic building blocks, but 2 dimensional. Have the kids make them for ownership of the game. (Instead of “Box O’ Blocks,” it could be “Construction Cards.”) This would be easier to store, lend to other classrooms, as well as quieter;)

I began with a game so simple my 3rd graders could learn and play without use of any writing materials. Pull three blocks out of the box. Round them to the nearest hundred. Add them together. Closest to a 1000 wins.

Our first round had two teams get 700 and the third sum was 1300. At first they thought that thirteen hundred won. “Wait a minute,” I warned. “Are you sure?” Upon revisiting the numbers after I wrote them on the board, my students realized it was a tie! 

After a few rounds of this, I introduced the idea of trading a block. “If you could trade a block to make your total closer to a 1000, which one would you eliminate?” They hadn’t seen all of the numbers but enough to make an educated guess. “If you have three blocks, and they are the numbers 513, 522, and 346, you might want to trade the largest. It puts you way over 1000. This would make room for a block closer to 200.” 

Another fun variation that you could try; I didn’t, so I don’t know how well it would work, but it seems fun; is to let teams trade with each other. 

Here’s some easy-to-use enrichment: Rather than round to the nearest hundred, have students round to the nearest ten. Or, you could do what I did in my original lesson; Don’t have them round at all. They will need paper, dry-erase boards, or iPads to write on for this. 

What I did with my gifted students is I had them actually construct towers that they measured to use an additional 3-digit number for lowering or raising the sum of the original three blocks as necessary. Here’s how it worked. Pull three blocks from the Box O’ Blocks. Round to the nearest ten. Add the three numbers. Evaluate how close you are to 1000. The difference is what you want to make up. If you are over a 1000, you want to take away from your sum. If you’re shy of a 1000, add. Next, you get to build! 

Students construct towers with their three blocks. They then use rulers or yardsticks to measure from the base of the structure to its highest point. Round to the nearest inch. Multiply that number by ten, and either add or take it away from your original sum. The trick is that the students can reconfigure the structure to be taller or shorter. 

This lesson incorporates an idea I had several years ago: Action. I wrote a blog all about an elaborate lesson involving purchasing blocks, constructing castles, homes, structures and renting them to make back their initial investment (purchase price). It was fun, but long; Great week-long project. 

Looking at the Jamboard images in Google Classroom makes it super easy to assess.

The way that I assessed the success of each group/student and the lesson was through the use of Google Jamboard. I made a Jamboard with the instructions on the initial board, leaving plenty of blank space. This was pushed out through the Google classroom, “mak(ing) a copy for each student.” I modeled how to use the Jamboard to take pictures of the blocks, showing the numbers. Then I used the writing tools in Jamboard to write the rounded amounts of each block. I added them all together for a total that could be evaluated next to a thousand. We discovered that I was over one thousand, so I will want to subtract. Once we got the blocks to reach the perfect height, where the number of inches times ten would lessen my original number just right, I used Jamboard to take a final picture and show my last computations. 

It is very easy to create a new board by pressing an arrow at the top of the screen. Then you start over. Pull three new blocks…

One group was 380 more than 1000. They were trying to make their tower 38 inches high, so that they could take 38X10 away from 1380. I told them to trade one of their blocks for another from our Box O’ Blocks. When they went to trade a teeny tiny one, I questioned them. “That block is only 300 (It was actually 296). The other two are both over 500. If you traded one of the blocks that was worth a lot, you might not need to construct as tall a structure.” They were interested in trading the tiny block because they were aiming for height, but was that the best strategy

I summarized this story to close our class time. And, it was off to collect some more gifted students from a different grade to teach a different lesson. 

Dominoes Word Problem: Math Enrichment

I used to use a giant set of Dominoes to introduce the game to The Polite Pirates (my 3rd graders).

Playing the game of Dominoes is an excellent way to introduce and practice problem solving. I’ve used this game for several years in my 3rd grade classroom, and now I am introducing it to my gifted students. 

This past week was the first week that I met with my elementary (K-5) gifted students. Obviously, the various grade levels were in different places when it came to math concepts. Second grade is working with word problems. Third grade will be tackling multiplication soon. Fourth grade is focused on geometry right now. And, 5th grade is preparing to use formulas to solve for volume. 

Dominoes can be used to introduce multiplication, using cumulative property, strengthening mental math, not to mention strategic thinking.

Tuesday morning’s second grade gifted lesson began with my typical introduction to Dominoes. I told the students that each tile is called a “Bone” and the pile of unused tiles is the “Boneyard.” They learned that there are always 28 Bones in a game, and that every single Bone is different. Each one has two numbers on it, even the ones that look empty! “What number is on this side?” I asked holding up a Bone with a six on one side while the opposite was blank. They didn’t skip a beat in guessing “Zero.” 

It took a little longer to explain adding the ends of each Line of Play. “You add up any number that is at the tip of an arm, no matter how long or short the line is,” I told them. We practiced some play. The adding wasn’t a problem. We discussed using the cumulative property to switch up the order of numbers, so that the mental math was easier. “Look for combinations that create ten,” I told them. “Rather than adding 4 + 5 + 4 +2 equals fifteen, combine the 4, 4, 2, first. Then you instantly know that the five makes fifteen.” 

I let students draw and write on the Google Jamboard to show and explain their thinking.

“Points are only awarded when the sum is a multiple of five. The ends of all of the lines of play add up to ten. Is that a multiple of five?” They knew that ten was made up of two fives. “How many fives are in 15? 20? 50? 500?” Flawless computation… Multiplication, here we come!

“Whenever you earn points, you say, ‘Give me ten…’ or however many points you earned.” I learned this from a fun video that taught me how to play ages ago, and elementary students LOVE this aphorism. 

“Give me ten!” one of my second graders beckoned. I put 10 on the board, and we played a couple more sets before moving on to our Self Portrait project. Even though I only have my gifted students for 40 minutes at a time, I found doing more than one mini lesson to be helpful in keeping their interest. 

After school, I came up with a word problem for Wednesday using Dominoes. I typed it into a Jamboard. Even though I tried to word it in such a way that you could visualize the game in your mind, I went ahead and used Domino tiles (Bones;) to make a model of the hypothetical game on a table and took a photo. I imported the picture on the Jamboard slide with the word problem text. 

I snapped this pic, so that I could show my students the thinking behind their word problem. I am hoping to inspire them to use their “Gifted Journals” to jot down ideas through drawing diagrams and writing notes just like this.

When Wednesday arrived I was excited to try out my word problem. The first group of students that I met with was 5th graders. Because I do car duty, I get to my room at the same time as my students. This morning I had placed a note on the open door, instructing them to try to work out the answer to this problem while they waited for me to show up. The word problem was presented on a giant Google Jamboard that I’d rolled in front of the entrance to the room. 

The group was crowded around the screen when I got to my room. I enjoyed listening to their discussion of possible moves. From what I heard, a couple students were aware of the general concept of matching numbers. They didn’t quite understand adding all of the numbers from the end of each line of play, but that was okay.

When one of the students decided the trick to solving the problem was to simply take a new Bone from the Boneyard, I invited the 5th graders into the room. Before talking Dominoes, I praised their persistence and told them that I was proud of how hard they worked. I purposefully pointed out the failure to solve the problem as an example that not everything will come easily to them. It is my job to come up with challenges that stretch their thinking, and I intend to make not only their intellects but also grit grow. 

As I explained the solution to the puzzle, I used it as a teaching tool. When I informed them on how the points work, they noticed that placing the Bone with the two on one side at the end of one of the lines of play would bring the total sum of all of the arms to 20, a multiple of five, and thereby an opportunity to earn points. “Good. But, there is a third and less obvious option,” I told them. “This one,” I said, pointing to the Double that had a six on both sides, “Is a Double. It is special. Not only can you play it with one six touching the line of play (also a six), but you can set it perpendicular to the line, thereby creating an extra arm.” I waited for someone in the group to notice the new sum. 

It didn’t take long for a fifth grader to notice that all of the sixes add up to 30 points. “Turning the Double on its side, created a fifth number to add. Since all of the numbers were the same, you can’t help but have a multiple of five! It is literally five of the same number.” 

I tried the word problem on my daughter Scarlet who had a brilliant reason for using the Double instead of the 2-6. In addition to the points, you would cause your opponent to have to take from the Boneyard, because chances are they won’t have a six. Limiting their options was very strategic thinking. I shared this strategy with my 4th graders who already knew the game well.

Next, it was 2nd grade’s turn. These kiddos had just learned how to play the game for the first time the day before. I used the word problem to reteach some of the ideas. More than focusing on problem-solving, I walked my second graders through the mechanics of writing a word problem. We discussed the details of Dominoes that I included in my little story. “Why did I mention multiples of five?” I prompted. “The goal is to earn points.” 

I had toyed around with the idea of only having words. When I originally crafted the word problem, I didn’t have the Dominoes laid out on a table. I tried to provide just the right amount of text for students to be able to visualize all of the details necessary for solving the problem in their heads. At the last minute I decided to include a photo with the problem. This was only the third day I was teaching these students! Watch out, though. Word problems, here we come! 

Pride flooded my person when fourth grade arrived in my room and crushed this problem within seconds. I’d taught all but two of these students how to play Dominoes last year. When I saw how quickly they solved the puzzle, I wished I’d hidden the photo. 

I pointed out the verbiage at the end of the word problem. “Why is it okay that I didn’t say what numbers were on the Double in the word problem?” I asked them. I had left out this vital information on purpose, and I wanted to see if they could find the puzzle within the puzzle. I did this kind of trick with them all last year. They understood that it had to be two sixes because the word problem stated that “You have two bones that you can play.” If the double were any number other than six, you couldn’t play it.

Here’s a question I failed to float: “Is it possible that the player has more than two Bones?” And, this is where a photo is limiting. Because you can see only two Bones on the table, it is difficult to imagine there being more than two. But, yes, the parameters of the problem leave that detail open. You have two that are “able to play,” but you may have more. I’ll have to work that riddle into a future problem!

My last group of the day was third grade. Here, I used the word problem differently. After exploring the numbers and solving the puzzle, plus revisiting how to play the game, I drew their attention to the structure of the word problem. It was a story, providing characters (you and a friend), a setting (a game of Dominoes), and a conflict. “This word problem has a plot,” I pointed out. (Plot is the language arts concept that third graders are learning right now.) 

The problem of which Bone to play is the climax of our story. The resolution is a mystery. You could use either Bone. Which one is better? What is the third, less obvious option? How will the story end? 

And, this is the end of my blog about this amazing word problem. But, is it? Through the process of fleshing out the many lessons that coated these Bones, I have come up with some additional puzzles. Here is a taste: “What is the highest score that can be collected in one play of Dominoes? What would the Bones look like at the ends of each line of play?” I think I’ll provide manipulatives; Bones; for pupils to push around when solving this. Good luck!

Beyond the Crib… Playing the Game of Cribbage

At the beginning of each school year I introduce a few fun games that encourage number sense and problem solving. Dominoes are great for mental math, recognizing patterns, and teaching multiples of five (Playification). Another favorite is Cribbage (First “How-To” on Cribbage).

Polite Pirates problem-solve in pairs

Cribbage is a card game that has two parts. I’ve written about the first part, the one that requires players to analyze their hands and decide which cards to keep and which to place into a crib.

During Math Centers, I have students work in teams of two or three to figure out which four cards of a six-card hand will generate the most points. Every student is very attentive, because if a team misses any combinations that provide points, and a student from another team can articulate the potential point-producing combination, this other student gets to claim the points, virtually stealing points from one another. They love that!

The “Starter” is placed face up on top of the deck and shared by everyone.

After a little practice with this, I explain cutting the deck to provide a “Starter” card. This card gets placed face up on top of the reassembled deck and is also used for making point-producing combinations at the end of each round. The Starter is shared by every team and the crib. Now, when students decide which cards to “lay away” for the crib, they should keep in mind the idea of collecting those points later, if the crib is theirs, or potentially providing points for opponents. Students practice mental math and problem solving for a few more Math Centers.

Once my students are well-versed in how to choose the best cards to keep, it is time to learn how to actually “Play” the game. There are loads of rules to learn and remember, but what makes it fun is that nearly everything you do gets you points! When teaching the Play, be sure to peg points. The kids get super excited with each and every point.

Polite Pirates help one another count points. The holes are marked in increments of five, so math can be used even while pegging your points!

The first thing I show students is how to hold their Hand. This is new to some nine-year-olds. They have to hold the cards they’ve kept because we place one down on the table or floor at a time, and you don’t want to get them mixed up.

Something unique to cribbage is that players (teams) will recollect their cards in order to calculate the points their hand is worth when Play is over. For this reason, have students place the cards that they are playing right in front of them; separate from other players/teams. 

Next, I explain that, during Play, we add up a running tally of “Pips.” Pips are the symbols on the playing cards. A “Five of Hearts” has five pips or hearts on it. Each face card (Jack, Queen, and King) are worth ten pips in cribbage. An Ace is valued at only one pip in this game. It is very useful; Hang on to those! (Here is a very interesting blog explaining pips and the symbolism of cards.) As students place one of their cards face up on the table or floor, they don’t say the number on the card. They announce the new sum of all of the face up cards. So, if a King had already been played, and that player (team) voiced “Ten,” and then I play a Two, I will say “Twelve” out loud. If the next player (team) places a Three face up, they will say “Fifteen” out loud, keeping a running tab on the growing tally of pips. 

The player or team that plays the Fifteen is rewarded Two Points on the cribbage board. You get points during Play whenever you form a combination of Fifteen, a pair, three or four of a kind, and/or a run. These point-producing combinations are similar to what students were looking for when deciding which cards to place in the crib and which to keep. But now, students are forming them with the help of their opponents’ cards. 

Let’s say two Queens have been played. The player who placed the second Queen on the table or floor will be rewarded two points. If a third Queen gets played, the person (team) that played it will get six points, because it forms three pairs. 

Similarly, when a run of three or more cards in consecutive ascending order are played in a row, the player (team) gets the number of points that represents the number of cards. In other words, if a Ten, then a Jack, and lastly a Queen were played in a row, the person (team) that played the Queen would get three points. 

During “Play” the pips can never exceed 31. This is the magic number of cribbage play. As players are placing cards face up and voicing the running sum of pips, they are mindful of what cards they have left to play. The closest to 31, without going over, gets a point. If you can play a card to make the Play value exactly 31 pips, you get two points. As the Play gets close to 31, if a player (team) does not have any card to play that would keep the play under 31, they say “Go.” This is when the other team gets a point. That team must play any cards that they can, keeping the tally under 31. They can collect points from pairs, runs, and even score two points for making exactly 31. 

At this point, all of the cards that have been played get turned over (facedown), so that they don’t confuse the players during the next Play. The player (team) who said “Go” during the last play starts off the new play. 

Once all of the cards have been played, and a point was awarded to the player (team) who plays the “Last Card,” it is time for each player (team) to gather up all four of their cards and get points for their individual hands. (Here is a website to reference for points.

This we do one team at a time. The dealer goes last. The crib is counted separately, and that is the very last thing to be tallied. It’s important to count in this order, because whoever reaches the end of the cribbage board first, regardless of how many points are in a hand, wins. In this way, you may not want to be the dealer if a tight game is nearing the end! 

I hope this blog is helpful for learning how to teach cribbage to students. One of the many benefits of  learning this game is the cross-generational play it opens up. It was one of the first games that I was able to play with the “grownups” during holiday celebrations and vacations. My dad told me about a league he played at his Senior Center in Massachusetts. One thing that he complained about was how fast those games were. It was too much pressure.

That being said, you might want to put timers on for students, in order to keep the game moving. Also, you could have a timer for the whole game; Whoever has the most points when the timer goes off wins! Have fun!

Sources:

https://bicyclecards.com/how-to-play/cribbage (Simple how-to-play site)

https://mvhm.org/wp-content/uploads/2020/04/THE-HISTORY-OF-CRIBBAGE-Latest-1.pdf (Simple, kid-friendly read)

https://www.artofmanliness.com/living/games-tricks/the-manly-history-of-cribbage-and-how-to-play-the-game/ (Thorough, interesting, includes “how-to”)

Popularly played by seniors (my dad loved to play, and I was taught by my mom), here’s an article from a Senior Center introducing Cribbage to the game repertoire: https://cornwallmanor.org/blog/cribbage-makes-way-cornwall-manor/