Comparing Fractions Through Arch… itecture

Humans love to construct (Lorek, 2018). Is it in our instinct? Sarah Lorek (2018) contrasts the idea that beavers building a dam would be considered “natural” versus humans constructing a dam being “man-made.” The structures look different, and have slightly different purposes, but the reason for construction may not be as disparate as assumed. 

[I searched the web for articles that speak to the (my) hypothesis that constructing things might be a human natural instinct and came up short. This would most likely be a very difficult thing to prove, but I’d love to read about it. If anyone knows of any literature or can point me in the direction of a good source, please share.] 

From my own personal experience, I can say that I have witnessed students come to life when building blocks are made available, and some of my favorite activities involve construction. I have fond memories of sitting in the middle of a mess of Legos, Lincoln Logs, and Robotix when I was a kid. I spent hours building spaceships, cities, and robots. Now, I remodel my house (recent bathroom project), labor on landscaping, and generally enjoy working with my hands (famously failed pirate ship project).

I’ve written about the unique and exciting experience of putting building materials in front of my students. From Building Bridges, using Blocks to teach measurement, Adding Blocks, Purchasing Blocks to use in business plans, constructing Bridges as Object Lessons to teach SEL, and creative Playtime, my students are no strangers to building materials and hands-on lessons. Even during this past lesson, I heard students professing this to be the best Math Enrichment lesson, yet! 

Purpose

Students have been introduced to fractions in their regular math classes. I was planning to enrich a lesson about comparing fractions. Our math curriculum had a nice worksheet that would have students create quilts with limited colored squares, and then compare the fraction of each color. Students can still do that lesson, but independently in the classroom. I created a lesson that was hands-on and interactive.

Students would use colorful connecting blocks to construct an arch. I had a picture of the arch in Washington Square, NYC on the board when they entered the room. We discussed the idea of arches for a few seconds before I shared the parameters of the project. 

Arches are symbolic, letting in light and allowing people to walk through walls. They are old; developed during the second century B.C. They are also timeless, in that they are still used today. They have even been known to hold magical properties! Vampires must receive permission or an invitation before entering someone’s home (through an arch), and the arch makes an appearance in Harry Potter as a passageway between this life and the beyond.

A memory that popped into my head that will definitely date me is that of the movie “Ernest Goes to Camp” (1987). The image on the cover of the movie shows the arch that Ernest is working on at the very beginning of the movie, surrounded by several scenes from the flick.

Parameters

As per a recent lesson that I learned about setting tight parameters, I constructed very strict limits on student creations. Students were allowed exactly 24 cubes. I chose this number because we have been learning and playing Math 24 a lot recently, and because the number 24 is divisible by many numbers. The lesson could include reducing fractions, making common denominators, and more through starting with 24 for a denominator.

The blocks could only be red, green, blue, and/or yellow. At least three different colors were to be used. This ensured that there would be some comparisons between fractions. 

Students could work independently or with a partner, but no groups larger than two. Each student, whether working with a partner or alone, would be responsible for putting information about their project into a Google classroom assignment. 

Activity

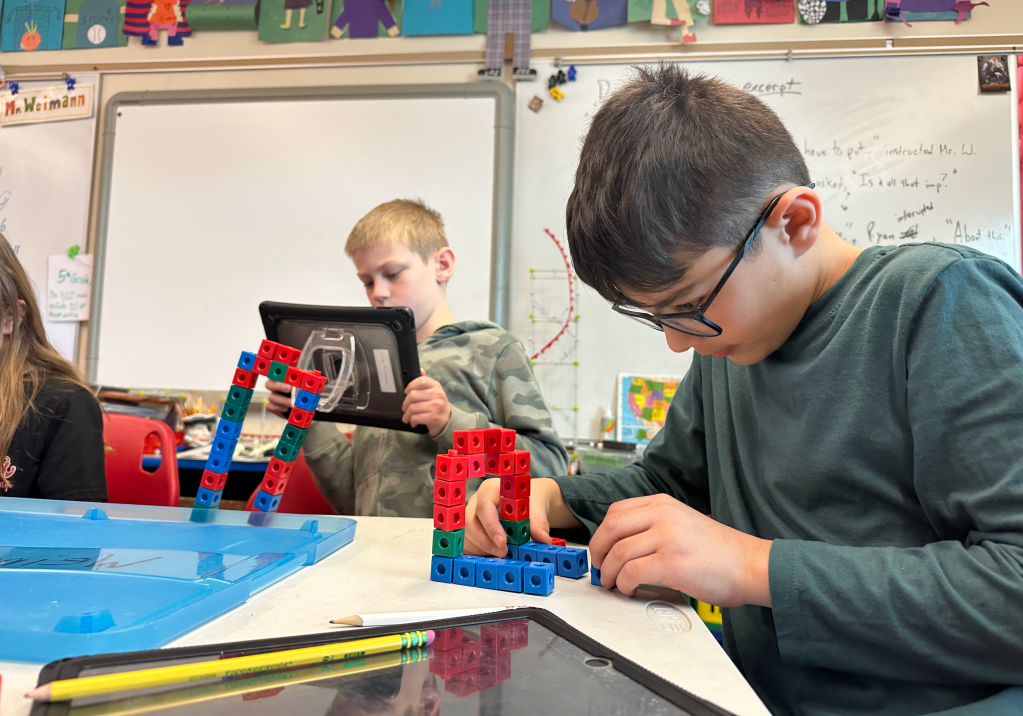
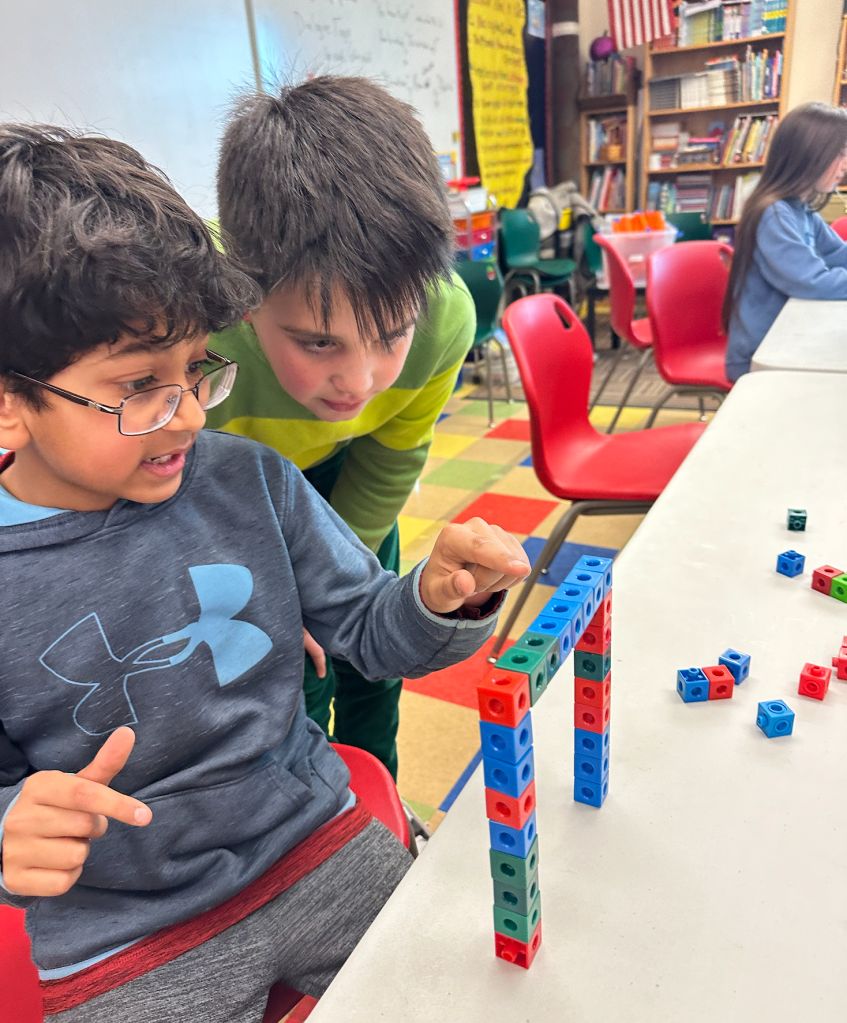
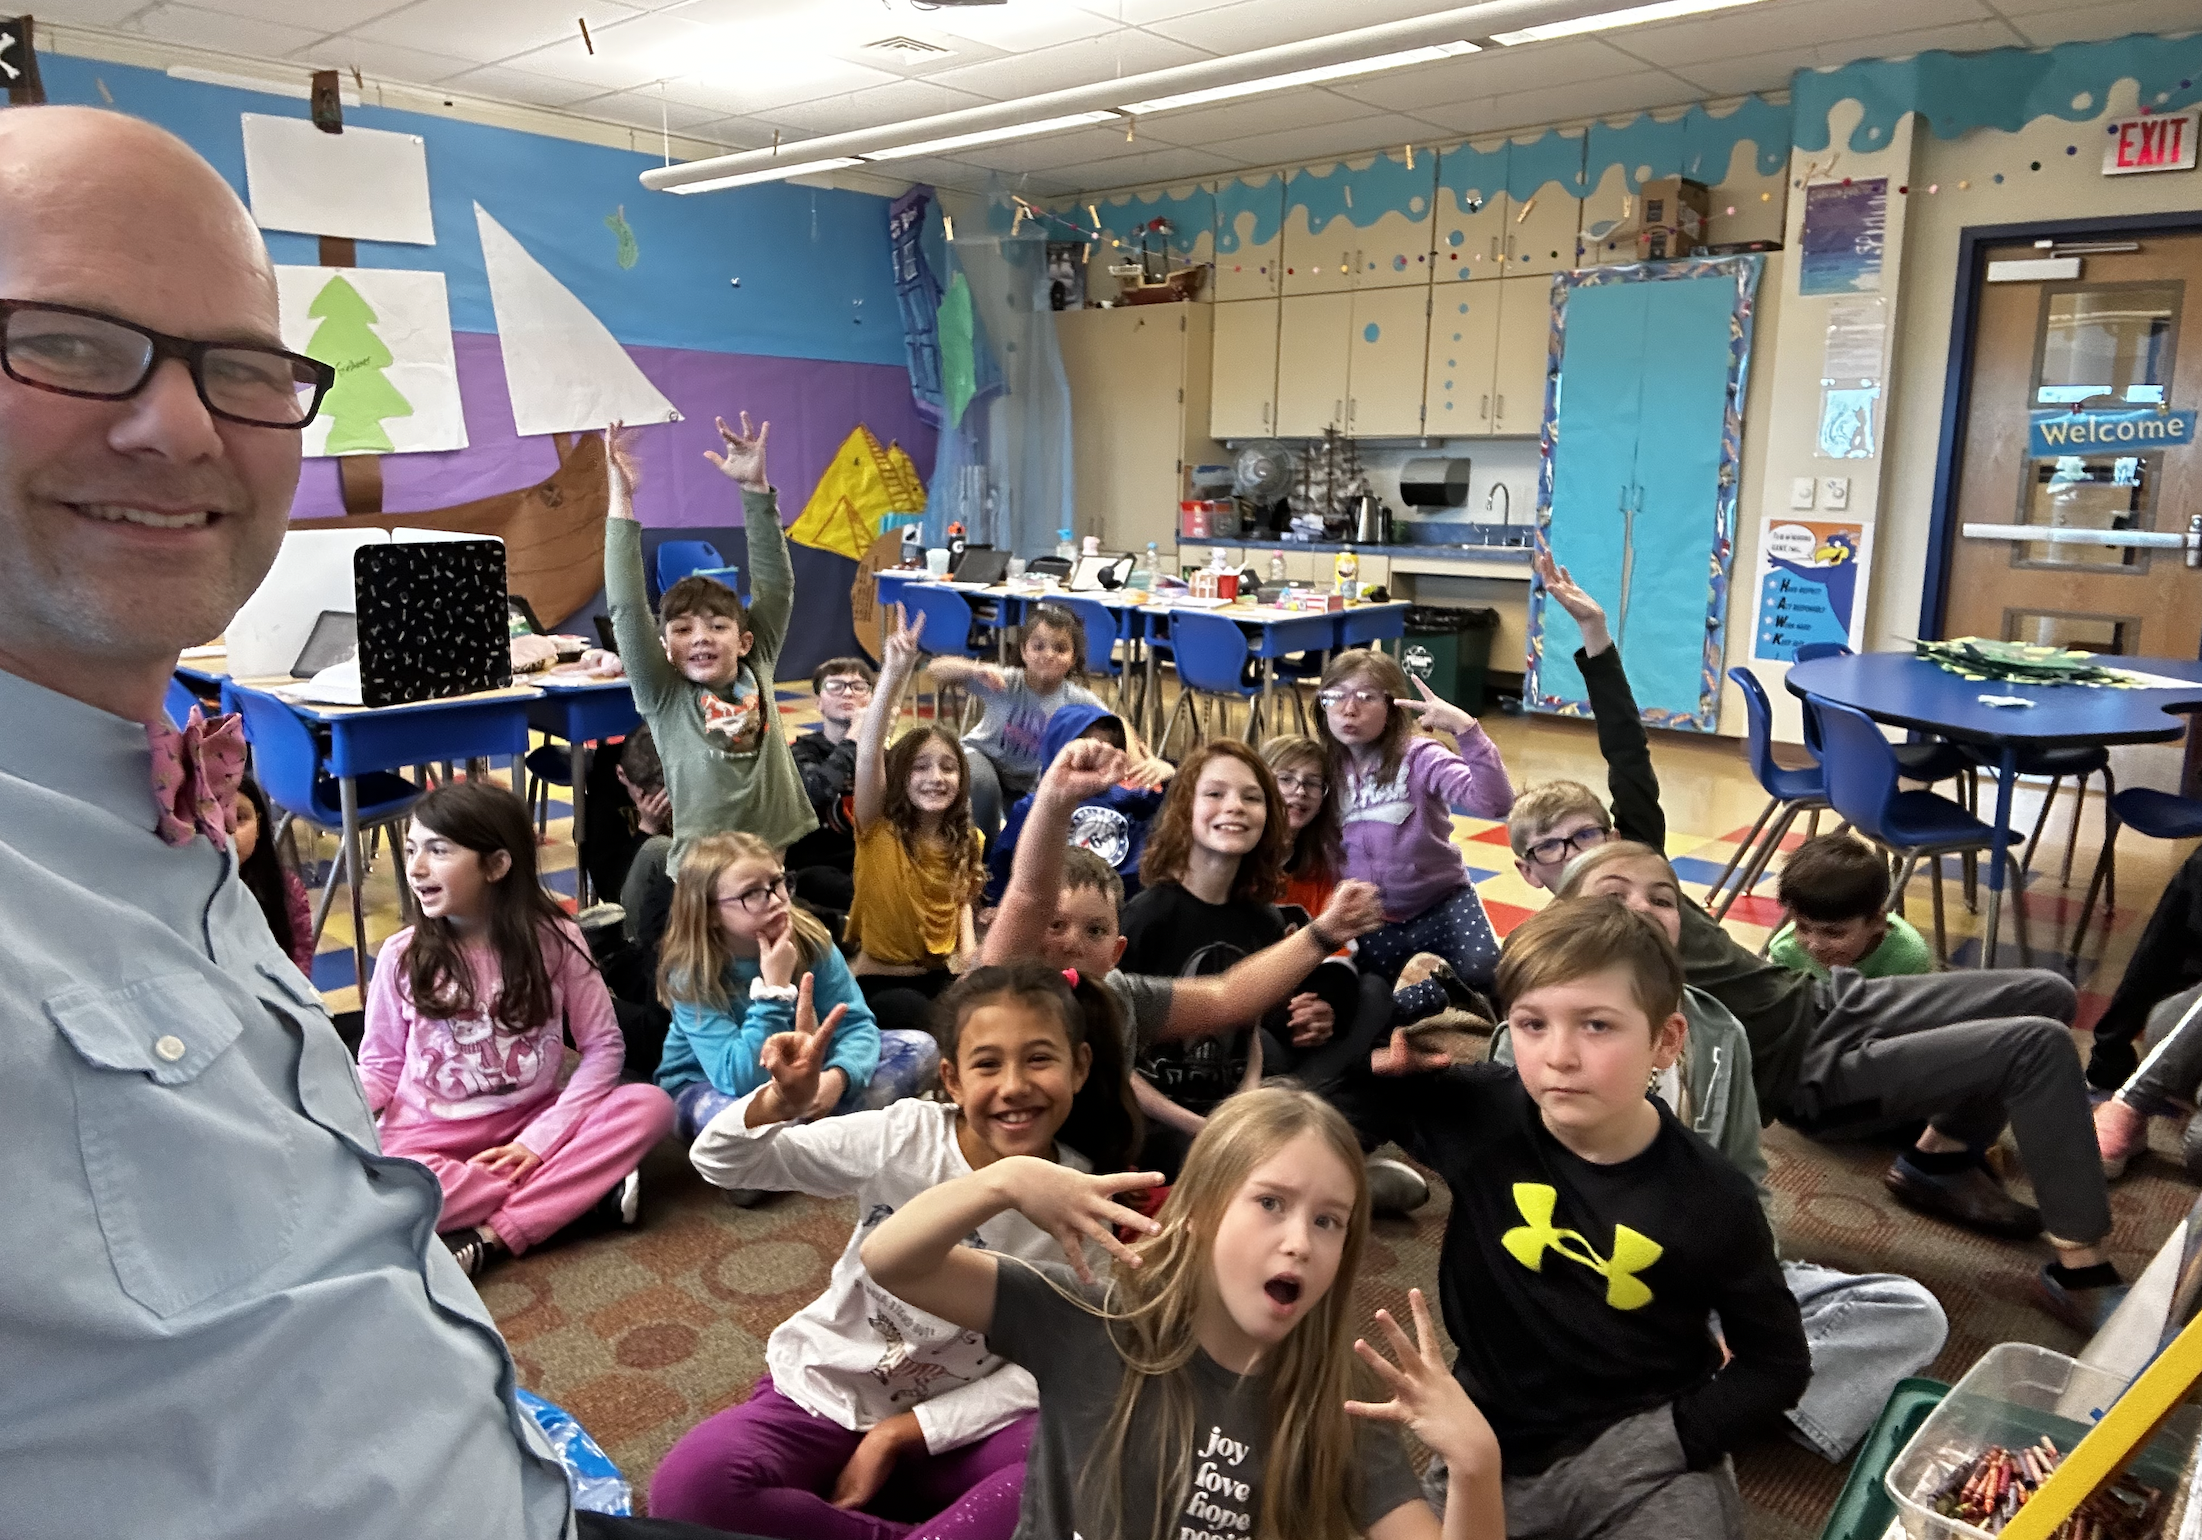
Once the assignment was explained, I set them loose. They were busy bees, buzzing around the blocks, loving the building. Creativity bubbled in the classroom. There was a purposefully leaning arch, decorative arches, symmetrical aches, one was made as short as possible while still fulfilling the definition of “arch,” and one even mimicked the pointed style of the Gothic Arch. So impressive! 

I stopped the students when some of the first arches were being completed, so that I could instruct them on what to do next. I had a couple of girls hold up their arch for an example. We took a photo of it, which is what I wanted everyone to do. This way, I could assess the accuracy of the numbers. It demonstrated to students that they must provide evidence.

I model taking a photo of the photo I just took after teaching what to do.

Next, we counted the number of different colored blocks. The girls had made their arch symmetrical and used the same number of colors for each of the three colors. (This is something I fixed the next time I taught the lesson, that afternoon; “None of the colors can be the same number.”) 

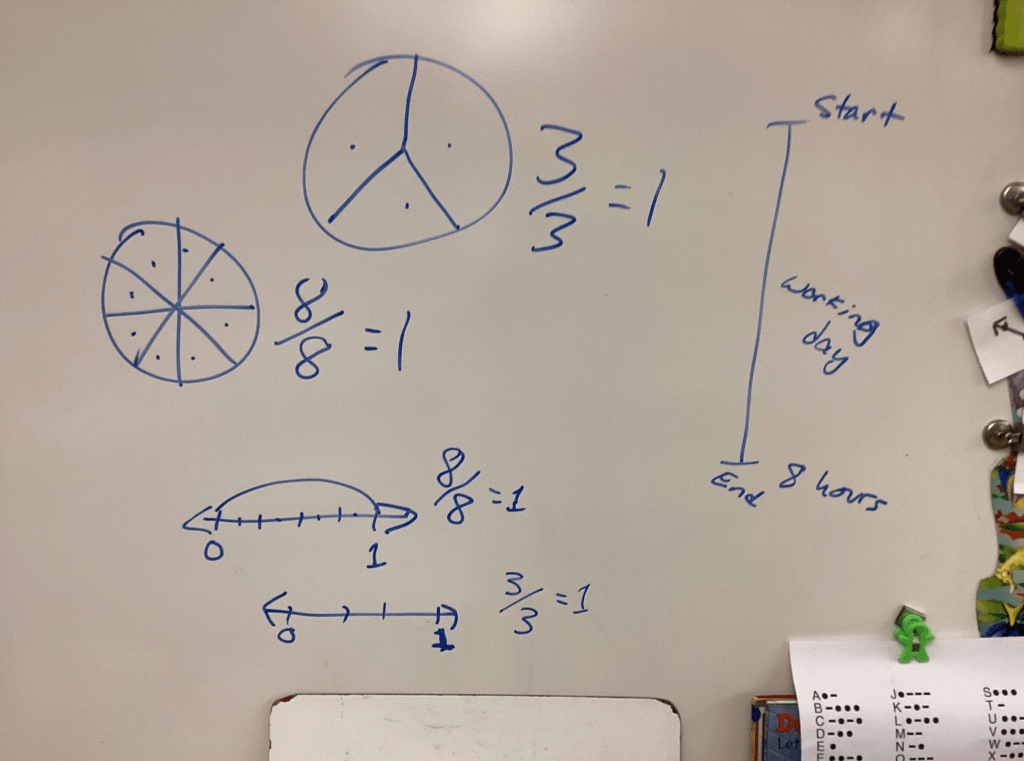
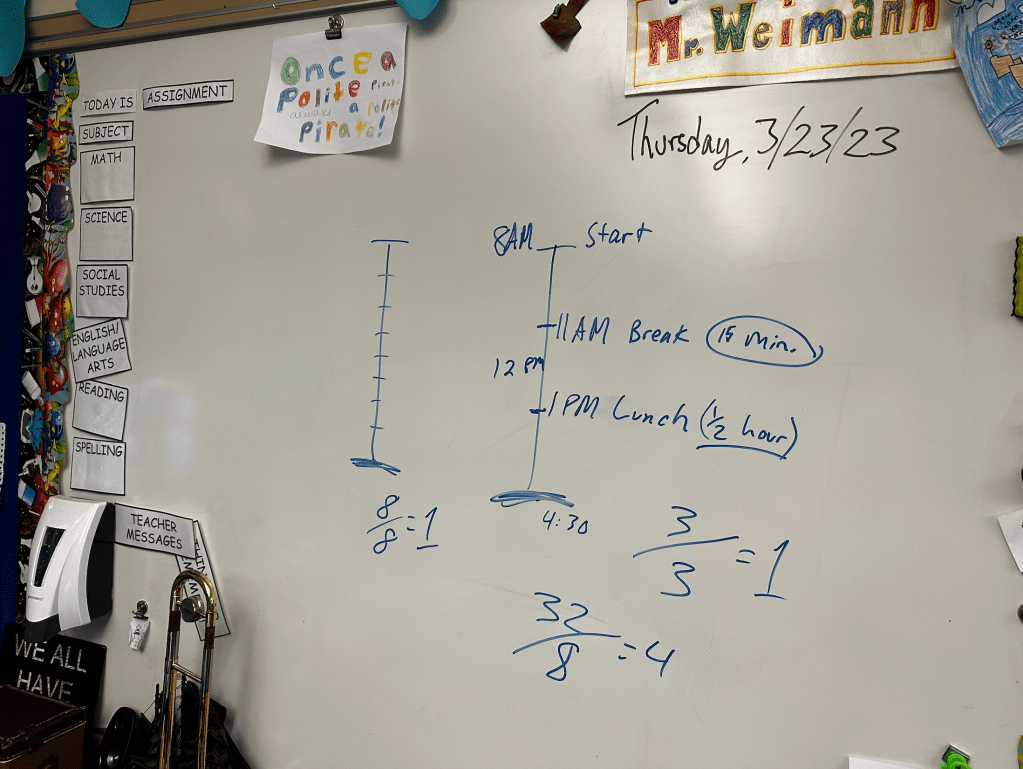
I showed the students how to write the fractions next to the color of blocks that I had provided for them in the software that they were manipulating. Then, we wrote an equal sign between the two fractions. The way I got the girls to include “greater than” and “less than” in their project was by combining colors. “The fraction of cool color blocks was greater than the fraction of warm color blocks.” 

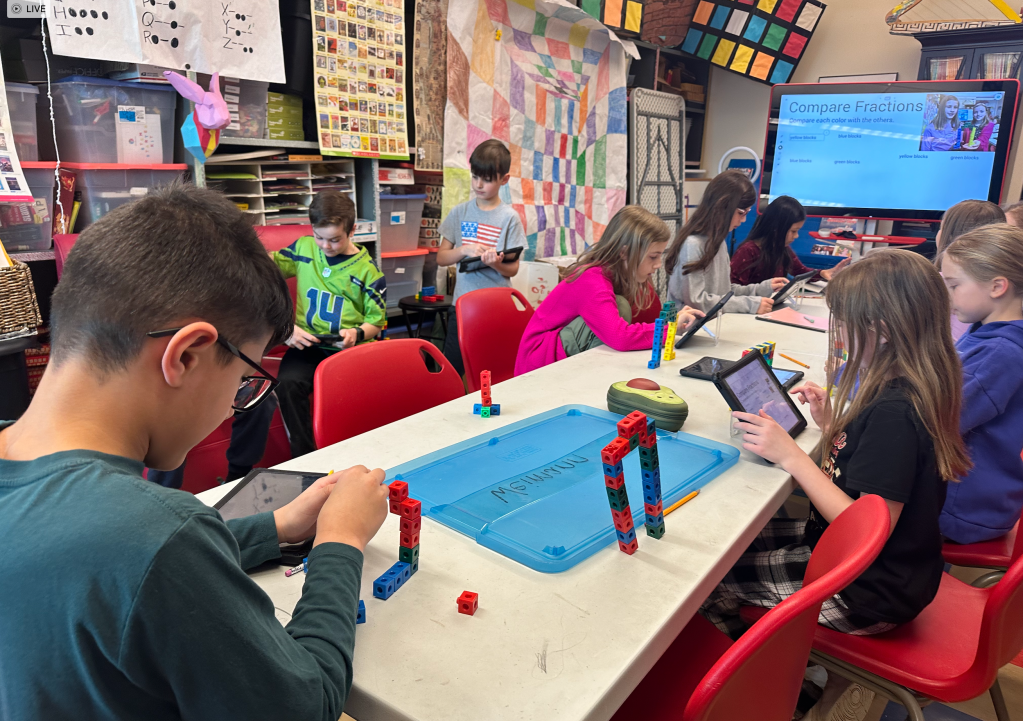
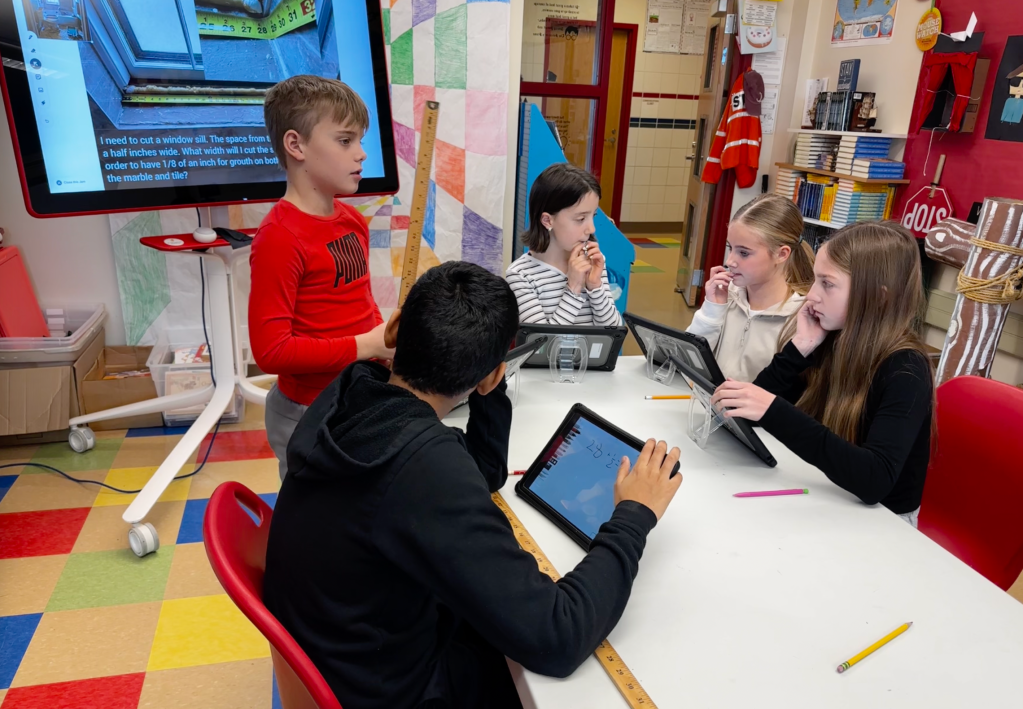
Time was allotted for producing fractions and making comparisons on iPads. In order to do even more comparing of fractions, I then had students take pictures of a neighboring team’s arch. They then imported that photo into their Google Jamboard project so that both their arch and their neighbor’s arch were side by side on a slide. Now, they got to compare the fraction of red blocks from their arch with the fraction of the other arch that was constructed with red blocks. This exercise involved talking about the math, sharing out, and self assessing. 

In the end, students enjoyed not only comparing fractions, but constructing them, building knowledge, and cementing learning into a fun and memorable experience. 

Sources

Azzarito, A. (2021, August 19). From Architectural to Artistic, Arches Are Trending. SemiStories. https://semistories.semihandmade.com/design-history-arches/

Lorek, S. (2018). Ancient Architecture and the Human Need to Construct. Trimble Construction. https://constructible.trimble.com/construction-industry/ancient-architecture-and-the-human-need-to-construct  

Sinclair, L. (2014, December 19). The History of Architecture in Eleven Arches. The Architectural Review. https://www.architectural-review.com/essays/the-history-of-architecture-in-eleven-arches

The Top 10 Construction Toys of All Time. Michigan Construction. (2017, December). https://blog.michiganconstruction.com/the-top-10-construction-toys-of-all-time

Buttery Batch of Math Cookies

This is the introduction that I used on my fifth graders.

In preparation for teaching a math enrichment lesson to my fifth graders, I looked at the iReady “Extension” activities in the Ready Math “Teacher Toolbox,” and I found a problem that I liked a lot. (iReady and Ready Math are products of Curriculum Associates. My district has been using it for several years, and I like it a lot.) This lesson (14) is all about using fractions to solve word problems.

Here’s an image of the worksheet that a teacher could photocopy or share via Google classroom. Because I have the luxury of actually teaching enrichment lessons, I decided to do some explaining before handing over the problem. Also, I opted to make a few tweaks, too. In my experience recipes usually call for specific measurements of butter, not a number of “sticks.” Therefore, I covered up the word sticks in the problem and wrote in “cups.”

This changed the outcome of the answer quite a lot. Now, students would not have enough butter to complete the recipe. They could access new sticks of butter, but if they did that, then solving the problem wouldn’t require wrestling with all of the fractions presented in the partial sticks. That’s when I imagined the real-life experience of baking cookies after having worked all day at making a big meal, like Thanksgiving.

Needing soft butter for recipes is a real thing. Also, who doesn’t love consolidating? We can clean up all of those partial sticks of butter and make cookies at the same time!

I shared what a typical day of cooking in preparation for a large Thanksgiving meal looks like at my home with my fifth grade students, setting the stage for having several fractions of sticks hanging around. With the instruction to use up the warm butter first, and then dip into the cold butter from the new package, I set my students loose to calculate how much butter would be left.

Many students jumped on adding up all of the fractions. They began figuring out compatible denominators, so that they could combine every partial stick and find out what they had in all. “But, do you have to do that?” I asked them. No one wanted to venture a guess.

“What are you asked to find?” I pressed.

“Two and half cups of butter,” someone accurately answered. Without saying anything, I drew two of the worst cups ever drawn on an interactive board, followed by half of a third. I made fun of my drawings, which everyone helped with, pitching in their own digs. Once that settled down, I pointed out the lines I’d drawn through the middle of each measuring cup.

“Why’d I do that?” Earlier, we had discussed that fact that one entire stick of butter was the equivalent of half a cup. The students understood better than they could put it into words, so I articulated the concept for them, “Each half of a cup was one stick of butter.”

Then, we looked back at the fractions. It was easy to see that 1 2/3 + 1/3 would be able to fill one whole measuring cup. That leaves us with three fractions with differing denominators. “Before working out a common denominator to add up all three, think about what you are trying to do,” I instructed. “What is your aim?”

I showed the students that 1/2 a stick of butter + two of the 3/4 would equal one whole. “That would take care of half of a measuring cup,” I told them. Also, I should mention that I crossed out halves of measuring cups, as we discovered combinations of partial sticks of butter that would fill them.

“If we used up two of the quarters to combine with the 1/2 a stick and create a whole stick, how many quarters are left?” One quarter. “And then, we have 5/8 of different stick left.”

They instantly got it. We were 1/8 short of a whole stick of butter. In the end we needed one whole cold stick of butter, plus 1/8 of an additional stick to add to all of our warm butter fragmented sticks to fill our two and a half measuring cups.

The Ready Math extension lesson (14) has a second question that I left as is. The catch is that my students used our additional left over cold butter (2 7/8 sticks) from my adapted first problem to solve it. I let them struggle with this one for a few minutes before I showed them the short cut of drawing pictures.

“You might think it childish to draw pictures,” I began. Fifth grade is the oldest grade in my school, so these were the seniors of the place. “…But, I find it easier to manage some problems when I sketch what is happening.” I had been watching them crunching numbers, making common denominators again, and subtracting fractions. Now, within a handful of seconds, I showed them how many quarters could be made from two sticks of butter! I pointed out the idea of labeling the quarters in order to keep track of my thinking. I wrote a B above each “batch” of cookies. Sure, I could just count the quarters, but when it came to the last stick, it will be important to identify what portions of butter will complete a batch.

As I divided the last rectangle into eighths, I asked, “What am I doing to this last stick of butter?”

Rather than answering my question, they were chomping at the bit to be the first to spew the solution to the problem. “Eleven and 1/8!” more than one fifth grader shouted at the same time.

“No, that’s incorrect,” I casually, but cautiously counseled. Rewording what they had yelled in order to make plain the problem with their answer, I said, “You cannot make 11 AND 1/8 batches.” The emphasis on the word “and” did the trick.

“You can make eleven batches, and you’ll have 1/8 of a stick left over,” a student corrected.

“Perfect,” I affirmed. “Drawing pictures might seem silly, but look at how simple it is to see the answer. We didn’t do any denominator work past doubling up the number of sections in the last stick. I hardly did any math, beyond simply counting!

“When you are taking standardized tests, you get scrap paper. Use it. Draw pictures. Illustrate word problems. Take the time to label parts of your illustrations. Make sure that you understand what you are being asked. What is your goal? What are you supposed to find? It’s not just a number. It is the solution to a problem. In real life, it is a key that will unlock a problem. Be a problem-solver; Not a human-calculator,” I told them.

Photo by Elliot Fais on Pexels.com

In conclusion, my aim is to turn these advanced math performers into problem-solvers. With this goal in mind, I try to make lessons that force students to use what they have learned in their regular math class in a way that is not only compatible with what they would find in the “real world,” but forces them to understand how to use the skills. I often allow my students to use calculators because the problems I prepare for them require more knowing what to do with the numbers than practicing running through algorithms. AI can learn how to crunch numbers, but will it be able to successfully manage a kitchen full of amateur chefs laughing, telling stories, and making meaningful memories, all the while measuring butter for cookies after already cooking and eating a Thanksgiving dinner?

To combat the threat of AI, don’t try to make humans better than machines. That just makes them more like machines. I say, grow the human-ness of students. This is getting pretty deep, so I’m going to go eat a buttery cookie while I chew on these ideas for a future blog;)

Give Your Teaching Life by Using Real-Life Situations to Teach

It’s math enrichment time again. The pacing guide has the fifth graders learning to add and subtract fractions. Our curriculum has an enrichment lesson that students can work on independently. It’s a grid that has empty spaces that need to be filled in order to help every row and column add up to the same sum. I like these types of exercises because they are puzzles and make the practice feel like a game

This is the enrichment activity provided by iReady. It’s a good tool for independent practice, but I wanted to provide a “Math Experience.”

I view my job as a math enrichment educator as deepening the understanding of already mastered math skills. Puzzles and games are a great way to make the skills easier to access, faster to use, and more accurate. They are excellent tools for regular ed teachers to provide for those students who have demonstrated competency in a math concept. This style of enrichment activity is good for keeping the advanced students busy while the teacher catches everyone else up to speed. For my part, I aim at helping students see the math from a different perspective, though. 

I cut all of the tiles for the ceiling before attaching them.

It makes a grid of mixed numbers!

Diamonds are beautiful, rare, and expensive gems used to make jewelry, but did you know that they are also the hardest substance on Earth? In fact, the fragments that are cut away from a diamond when it is shaped for a piece of jewelry were used to make saws and drill-bits that can cut through rock (2023). I’ve had the experience recently of using a diamond-studded saw blade to cut through ceramic tile and marble to make a new shower in my house. Just like adding and subtracting fractions can be used to complete a pretty grid, they are also very useful in everyday life. I hoped to make my students’ understanding of fractions more rich (enriched) by having them use their skills to help me measure tile precisely. 

This was one of the most difficult home remodeling projects I’ve tackled. I should use it to teach my students, I thought to myself. So I did.

Welcome to math-enrichment, real-world experience-mode. This project was full of fractions–really! I was excited to share it with my students. 

The first thing I did was think about the different ways I had to work with fractions in order to make the ceramic tiles fit my shower walls. I came up with a math problem that involved quite a lot of fraction work. This will be good, I thought, but perhaps there’s a simpler one to begin with. Even though it’s not the first part of tiling, I decided to have my students measure the window sill, a piece of white marble that had to be exact because the sides of the frame were already tiled. 

I put a photo of my window, minus the sill, into a Google jamboard. The photo shows my tape measure. “I took this picture, so that I would remember the exact measurement when I was at the granite store ordering my marble. I don’t want the gap to be too big on either side of the marble, or it will look weird,” I tell my students. “What I want is for the gap to be the same size as all of the other gaps between tile in the shower, ⅛ of an inch.” After explaining the parameters of the problem, my students have a goal: Make the marble look nice. It will look nice if the measurement is just right. “The space we have to fill is exactly 28 ½ inches wide,” I informed my students. “What width will the marble be cut in order to leave ⅛ of an inch on either side? Go!”

Anyone with experience measuring with rulers and tape measures for cutting materials will understand that you can simply back up your finger or the material on the tool to find the answer. Fifth graders have not had this experience, yet. Also, we were sitting in a classroom, instead of holding a tape measure up to the empty window frame.

After letting my students wrestle with the fractions for a few minutes with a couple of them finding success, I showed the class how to look at the problem, by holding up a yardstick. I placed my finger at the 28 ½ inch mark. I slid my finger over a fraction (⅛) of an inch and asked them how much I just “cut” off of the marble. They saw that it shrank by ⅛ of an inch. “Now, we need to take ⅛ of an inch off of the other side, but do we move our finger ⅛ of an inch from the beginning of the yardstick?” I paused to let them imagine what would happen if we did that. “No, we include the subtraction of that ⅛ of an inch right here,” and I slid my finger over another fraction (⅛) of an inch. “Now, how wide is our marble?” 

Some of my students had written 28 and 2/8 on their papers. When we looked at the yardstick together, we discussed that it is better to say 28 and ¼ of an inch… “Not just because you are supposed to reduce your fractions! But, because one is easier and faster to count than two; plain and simple.” This set us up for our next problem, the one I had come up with originally, but put off until after having practiced some measuring, first. 

Time for some tiling!

“Now, we need to cut some ceramic tile to fit my shower wall,” I pitched. “Remember, we want to keep gaps of ⅛ of an inch between everything; between the tile, between the corner of the wall and the tile, between the tile and the metal edging; everything.” (This isn’t just easy for students to forget. It is easy for someone measuring for actually tiling a shower to forget. I should know! I can’t tell you how many times I had to re-measure or recalculate because I forgot to account for the grout!) 

“Okay, so our wall is exactly 30 and ¾ inches wide, from the corner of the shower to the metal edging. I’ve already tiled the window wall,” I explained. “This 30 and ¾ inches is the space that we need to fill with tile and grout.” I showed them a tile and told them that it is two feet by one foot, rectangular. There was a photo of my shower wall in the Jamboard, too. I wanted them to visualize the final product. While I had written the entire problem into a Google jamboard, I shared the problem with them orally, also. It was easy for me to communicate, because I just did this! It was fresh on my brain. 

“We will be alternating the tile,” I told them. “We begin at the bottom of the shower wall and work our way up. The first row will begin with a whole piece of tile placed in the corner. The next row will begin with half of a tile starting at the corner, and so on.”

“Guess what,” I exclaimed. “I have a treat for you: The tile that you thought (I thought;) was two feet wide isn’t! Like everything else in life, it is a little short; a quarter of an inch short to be precise. It’s your job to figure out exactly how wide to cut the tile that will fill the gap that is left within the 30 ¾ inches space. Don’t forget about the ⅛ inch grout between everything! Go.” 

Student mouths hung slack-jawed. I used the Jamboard to demonstrate the math. I drew lines that represented the sides of the shower wall. “This is the corner,” I told them, pointing to the line on the right. “And, this is the metal edging that is the end of our tiling.” I pointed at the line on the left when I said this. “Now, how wide is the space between the two lines?” I prompted. 

It took some waiting, but finally one of the students ventured, “Thirty inches?” 

“Thirty and what?” I reminded them.

“Three quarters of an inch,” they completed. I told my students that this was the width of my tub (30 ¾ inches).

“Okay,” and I wrote the complete distance in the space between the two lines. “Now, let’s begin by allocating ⅛ of an inch over here.” I drew a little circle next to the line that represented the corner. “What comes after the ⅛ inch of grout?” Pause. Wait. Patiently persist in waiting. “Look back at the problem.”

“A tile,” someone says out loud.

“Yes,” I affirm the correct answer. “We put a whole tile on the wall. How much distance does that take up?” I went ahead and wrote on the Jamboard while they were thinking: 24” – ¼ of an inch.

“23 and ¾ of an inch,” a student answered before I was done writing. Pleased, I put the length into the designated space in our row of tile. 

“Now what?” I asked.

“We figure out how wide the remaining space is,” a student said in a half statement/half question.

“Yes, but…” I wanted to provide positivity, but needed to help them toward accuracy. “Don’t forget about the ⅛ of an inch on either side of the remaining tile. You have to leave space (⅛”) between the two pieces of tile and also a space (⅛”) over here.” I drew tiny circles and labeled them on the Jamboard. “Use all of these measurements to figure out where I will cut my tile to place on the wall,” I told them. “Be careful!” I warned. “I don’t want to waste any tile. I have just enough.”

There were a few ways to figure out the answer. You could add up all of the fractions. And then, subtract the mixed number from 30 ¾ inches. You could also subtract each individual “space” away from 30 ¾ inches to see what is left. This method is like sliding your finger down the yardstick. After letting the students try the math on their own, we discussed. 

If you thought that the previous problems were difficult, buckle up. “Now, I have a real treat for you,” I told my students. “That first whole tile; The almost two feet wide tile; We have to cut a hole in it. The spout for my tub has to go through it.” Groans. “That’s right! I want the pipe, which is exactly one inch in diameter, to be in the center of my wall. What does that mean?”

“Halfway,” someone says. 

“Yes.” I let that sink in. “How far from the corner is the pipe?”

One of my fraction experts quickly tells me that it ought to be placed 15 ⅜ inches from the corner. I was pretty impressed, and had the student explain how he had converted ¾ into 6/8 in order to divide the fraction in half. 

“That’s right, but that is the center of the pipe,” I tell them. After explaining the term diameter, I point out that half of an inch will be on one side of 15 and ⅜ and half an inch on the other. “Where do we cut the hole for the pipe? …Don’t mess up! We don’t want to waste a great big whole tile!!”

After they fight with fractions for a minute, I remind them of the ⅛ inch of grout that precedes the beginning of the whole tile. Many groans follow this reminder. 

The whole lesson ends with me warning the students that, “After all of that measuring and math, you better be sure to cut the tile on the correct side of the line you draw, because your diamond blade will shave 1/16 of an inch off of whatever you’re cutting. In other words, you could figure out that the hole for your pipe has to be cut 14 ⅞ from the edge. Mark that measurement on your tile. And then, when you go to make the cut, slice the tile on the wrong side of the mark, which would make the distance from the hole to the edge of the tile 1/16 of an inch short. What would that be?” I posed the question, but didn’t actually expect them to figure it out. They knew I was messing with them, and they all gathered their things to leave. 

“Wait! What about our next row of tile?” I laughed as they left shaking their heads. 

Tony Wagner, the author of “Creating Innovators: The making of young people who will change the world” (2012), describes the practices of some highly effective schools. One of them is Olin College, a small engineering school that is pioneering hands-on learning.

“In classes at Olin, the primary goal is not the acquisition of knowledge. The goal is to develop a set of skills–or, in Jon Stolk’s terms, competencies–by solving a problem, creating a product, or generating a new understanding. Knowledge is important, but it is acquired on an “as needed” basis. It is a means to an end. Traditional academics often criticize this approach for being too utilitarian and lacking an appreciation of learning for its own sake, but the evidence is that Olin students are very well prepared for graduate school and better prepared for work, with managers who have been surveyed by the college reporting that Olin students who’ve just graduated act as if they’ve had three to five years of experience. Learning research shows that students understand and retain much more of what they learn when they have studied and used the knowledge in an applied context.” (Wagner, p. 175)

“When will we ever use this in real life?” is a question many math students will utter when trudging through seemingly pointless pedagogy. Infuse life into your teaching by showing how the lessons are used in real-life.  

Sources:

Development History of the Notched Rim Lapidary Diamond Blade. Barranca Diamond. (2023). https://www.barrancadiamond.com/home/history.html#:~:text=Richard%20Felker%2C%20a%20pharmacist%20develops,natural%20and%20manmade%20stone%20products.  

Wagner T. & Compton R. A. (2012). Creating innovators : the making of young people who will change the world (1st Scribner hardcover). Scribner. 

Deep Teaching with Story Telling

“All of that, just to teach this little lesson?”

How deep does your teaching go? One way to help students understand a concept and remember the lesson is to share a story. On Thursday I was teaching an idea about fractions that was difficult to grasp. We had been working on understanding this concept all week. I had drawn models on the board and number lines on students’ papers. A few simply were not getting it. I was at a loss. 

The lesson had to do with the fact that whenever the numerator is the same as the denominator, a fraction is equal to one whole. It doesn’t matter if it is 365 over 365 or 5/5, they both equal one whole. How? While I could stop at providing the rule, I like to explain the “why” of math. The following story ensued. 


This is my dad, well past his book-binding days.

When I was in high school, I had the worst job! (This got everyone’s attention.) At least it was my least favorite job. I worked in a factory. What we did was kind of cool. This factory bound books. It was a book bindery. My dad worked there. He was a manager, so he was in charge of a team of people who operated different machines. He got the jobs, planned out how to complete them, gave people orders, made sure things ran smoothly, fixed machines, and was responsible for shipping out completed jobs to happy customers. 

The book bindery had two parts. My dad’s part worked on orders of new books. The other part of the business would repair or re-bind old books. This part would get a shipment of books from university and school libraries in the summer. Workers would use a huge cutting machine to slice the spine of a book away. Then the front and back cover would be removed. A new cover would be made and glued onto the old pages that had been either glued or sometimes sewn together. The new cover would get stamped with the name of the book, author, and publisher. There was a different gigantic machine for each part of this process. This is where I worked for a summer right after graduating from high school. 

846-06111912 © ClassicStock / Masterfile Model Release: Yes Property Release: No 1930s ELDERLY FACTORY WORKER IN OVERALLS SMOKING PIPE PUNCHING TIME CARD

What was so bad about it? Sounds kind of neat, right? There was NO freedom. You had to “clock in” at 8 AM, sharp. It was best to do it a couple of minutes before eight. If you were late, you’d get a “talking to.” A manager would come by and tell you that you had clocked in late too many times. One more and you were gone; You’d be fired. The manager might allow you to explain yourself, but there was no empathy. The clock was unforgiving, and you need to be on time. “Clocking in” meant getting your stiff paper card from a metal sleeve holding many cards, pushing it through a slot on the top of a metal machine displaying the time on the front. You’d push your card down until a cha-gump was heard. At the same time the sound happened, you would feel something grab your card. When you pulled it out, a time would be stamped on it. 

One more thing. It wasn’t a good idea to stamp your card more than a couple of minutes early, unless you had permission. The owners of the bindery did not want to pay anyone more than they had to, and if your card had any extra time on it, they would be responsible to give you money for that time. 

A book with the cover removed, you can see the stitching.

After clocking in, I would get to my workstation to pick up where I left off the day before. I was lucky. Whether it was because my dad worked in the other part of the bindery or I was good at it, I don’t know, but I got to operate “The Blade.” This was the gigantic cutting machine that sliced the spines off of old books. I also used it to trim the edges of pages, so that they were clean and straight for rebinding.

In order to work the machine, you would place the book onto a metal surface and push it against the back wall with the spine facing you. I would adjust the depth of the cut by turning a knob to move the book closer or farther away. When I had it just right, I would press a petal down with my foot. This lowered a metal wall that clamped the book down and held it in place. At this point I could see whether I had lined up the book just right or not. I might need to fine-tune the settings before making my cut. [I had to be careful, because if I cut off too much, the book will not have enough space on the inside of the pages for anyone to read it. If that happened, I’d just wasted an old book. You would get into big trouble if that were to happen. There are no do overs! If you didn’t cut enough off, then you could do it again, but you are wasting valuable time.] With the book held tight by the big clamp, I would push two buttons on either side of the front of the machine with the thumb of each hand, and a giant guillotine of a blade would swoosh down right in front of the clamp, slicing the spine away from the book.

Why the TWO thumb buttons? Let’s say you wanted to push a book against the back with one hand while slicing the binding away. You could accidentally cut every finger off of your hand with one fatal swish of that blade! Forcing you to use both hands at the same time ensures zero accidents. 

Unfortunately, other machines had work-arounds; ways to bypass the safety procedures; and even the cutting machine could be fooled. You could tape a piece of cardboard over one button, tricking the machine into thinking that one of your thumbs was pushing it in. Basically, there were opportunities to become seriously injured on the job. While management might give someone a hard time for doing something dangerous, they would also heap tons of pressure on everyone to achieve inhuman amounts of productivity. You constantly felt like you weren’t getting enough done fast enough. If only there was a way to quicken what you were doing. What if you eliminated one of the timely safety precautions…?

At 10AM a bell would ring, and we could take a fifteen-minute break. The workers would pile into a break room in the middle of the factory where picnic (ironic name) tables were set up. We did this even if it was a gorgeous summer day. It was probably better to NOT know how beautiful it was outside! At the tables we ate snacks, drank coffee, and chatted. There wasn’t any talking on the factory floor; chatting would slow down production, so this was a time for finding out what coworkers had done the night before. We read newspapers to find out what was happening in the world outside of the book bindery. 

10:15AM did not find us exiting the break room. We had better already be out of there and at our stations when the next bell rang. Anyone found lingering would get a talking to

Another bell would ring at noon. [While I was sharing all of this information with my students, I was drawing a timeline of my prison-like day on the dry-erase board.] You would go back to the break room. You better have a packed lunch, because there’s no running to McD’s, even though it was only 2 miles away. I tried it once and the stress of making it back to work on time equaled more indigestion than it was worth!

The factory floor was cement, which caused your feet to hurt. I piled up cardboard boxes to stand on, and I wore sneakers with thick soles, but once your feet hurt, there was no fixing them. Additionally, even though there wasn’t much of a dress code, we did have to wear pants. It was summer time when I worked at the book bindery. Even though the place had air conditioning, the owners were constantly adjusting the temperature to use as little power as possible. It always seemed a little too hot. 

It was difficult to avoid counting the hours between breaks and leading up to quitting time. When would the final bell ring?


Now, we get to the math of the story. I look to my students for an answer. Who can help me get out of here? What time did the final bell ring? I began my eight-hour day at 8AM. One student guessed, “6PM.”

“Was that a guess, or did you work that out?” I query. “Come on. Think. Eight to Noon would be how many hours?”

Another student half-guessed, “5PM.”

“You’re getting closer,” I hint.

You can probably imagine that someone figured out that eight hours would take me from 8AM to 4PM, but we have to account for the half hour of lunch. The owners aren’t going to pay me to eat. That was my time. The 15 minute coffee break in the morning was included in my work day. (Probably, this was meant to fuel productivity with a caffeine jolt, not to mention relieve the tension of not being able to talk all morning.)


Let’s say a guy has a medical condition that requires him to drink some medicine on the hour, every hour. If he takes a drink each hour of an eight-hour work day, his day is split into 8 parts; 8 hours = 8 parts. He doesn’t miss a dose, so he has had 8/8 drinks per day. The 8/8 is one day. 

I didn’t need to stop and take a drink. I only stopped during the allocated break times. With only two breaks, my day was split up into three parts. I work all three parts, so I work three out of my three parts. My 3/3 day is only one day, also. My friend and I both work a full eight-hour day, but mine is simply divided up differently. 

8/8 = 1

3/3 = 1

8/8 = 3/3

I’ve drawn timelines (number lines) on the board. It is easy to see that the same amount of time is broken up differently. 

If my friend keeps his medicinal drink in a 32 ounce water bottle, and his dosage is one ounce per hour, how many days will he be able to use the bottle before he has to refill it? 

How many doses will one day be? With each day broken up into eight equal parts (hours), the denominator will be 8. The total number of ounces (32) will be the numerator. The improper fraction will look like this: 32/8. Is there enough medicine for more than one day? A lot more. How much more?

How many eights go into 32? Or, how many eight-hour days can the 32 ounces be stretched over? You could do repeated subtraction. The water bottle will last four days. 


This Polite Pirate would be celebrating her birthday over the weekend. She got all dressed up on Friday to celebrate. I told her that she looked like a “boss.”

Before leaving this story and transitioning to a different lesson, my students had to know why on earth ANYONE would work at such a horrible place. I told them that there are pros and cons to nearly everything. First of all, this could very well be the only job that some of the workers could get. The book bindery employed many people who did not speak English. Once they were trained on how to operate a machine, they could do their job efficiently, and it didn’t matter that they could not communicate via the same language as the owners. Occupations that require more communicating might require people to know English. 

But, I knew English, so why did I work there? It was a summer job, and although the hourly wage was not very high, it was the only place that offered a full 40-hour work week to a temporary employee. Other businesses weren’t interested in investing training in a worker who would only be there for a few weeks. Also, if I worked over 40 hours, which the boss wasn’t too keen about, I’d get “time and a half.” Ooooh, I feel more math coming on… Groans. 

Many businesses only offer benefits, which include health insurance, to “full-time” employees. This title belongs to people who contract or agree to work a 40-hour week. Sometimes it is worth working a less attractive job, so that you can keep your family safe by having health insurance. This is the American way. 


I’ve told the Polite Pirates (my students) all about running my own painting business before becoming a teacher; There’s lots of math in those conversations! At this point in my explanation I point out that while running your own business means you are the boss, and you have freedom, it is a lot of work! Had the stress of making sure that I had future painting projects to do, because if my work dried up… Then what? There’s no money coming in! So, I had to do a lot of marketing, and that costs money. Then I had the pressure of finishing projects on time. Sometimes I had to work more than 40 hours in a week. Because I set prices with customers before beginning the projects, I didn’t make any extra money if I worked longer hours! And, what if I priced it badly? What if I thought that a job would be lucrative if I charged 300 dollars, only to find out that the product needed to complete the job would cost me $250? Don’t even get me started on spilled paint…! How much of that profit would be left if I had to buy a customer a new carpet? 

Working at a factory is, believe it or not, liberating from the stress of all of that responsibility. You punch in your time clock, put in your hours, punch out, and leave all of the thoughts of work at work. What you didn’t complete will be waiting for you to finish tomorrow. Let the manager stress out about how a job is going to get done. 

Finally, although this all sounds kind of awful, I am glad that I had the experience of working in the book bindery. I learned all about how books are put together, which was interesting. But, more importantly, I got to see first-hand a type of life that I may not have known had I not worked there. 

As I rose from my chair to erase my notes from the board, my students understood that all of that was to teach a simple lesson on fractions. “All of that, just to teach us about whole numbers…?” a few students said in surprise. Yup.

Planning a Party, Pirate-Style

IMG_3446Over the weekend I finally experienced “Teach Like a Pirate”. I listened to the recently produced (Jan. 2019) audio book, read by the author, Dave Burgess. There were tons of great take aways, some of which immediately developed in the first math lesson, Monday morning!

First of all, if you haven’t already gathered, I am one of the “freaks” that Dave mentions at the outset of his book: I bubble with passion, naturally and eternally. I live for teaching and love “bringing it” every day in every way. In addition to this, possibly because of this–There is definitely some cause and effect, here–I am quite creative find it easy to come up with new, innovative ideas. I left my accidental slip of type in the last sentence because it reminded me of one of my favorite points from “Teach Like a Pirate”: The six worst words that Dave Burgess has ever heard (loved that chapter!)

Monday morning, I was getting ready for the day and week, when an idea hit me: Have students learn time through using it to plan a party. We have been working on elapsed time for a couple days, and there are lots of ways to use real-life scenarios, but are any of them more fun than planning a party? Definitely not. I’m pretty good at hook-development, but it certainly didn’t hurt me to hear Burgess talk about it in “Teach Like a Pirate”! No more hook was necessary than “Today we will be planning a party.” I didn’t have to count to get kids on the carpet. They came ready to contribute… to their own learning!

IMG_3456
When Math Time = Party Time

Through discussion, I let the hook sink deeper and deeper, so that the students were mesmerized with math. I refused to answer the question, “Are we actually going to do this party?” I upped the ante when a student suggested that rather than include “Set Up/Clean Up” in our 60 minute time window, “We should just set up before the party and clean up when it is all over.” This sounded perfectly reasonable to everyone, but I told the class that “We will be renting a ballroom that costs $250 an hour. We don’t get the room until noon, and if we go over our time, the price doubles. So, we have to squeeze all of our activities within this 60 minute window.” And then I added, “Also, we have to include plenty of time for clean up, because the hotel will charge us extra if we leave it a mess… plus, that wouldn’t be classy.”

Boy, were they hooked. I mean I have never seen a group of students more engaged in discussion and riveted to each utterance! Every hand was shooting up with ideas. Who doesn’t want a party? The first thing I did was facilitate brainstorming of ideas of things to do at our “Math Party”–That’s what I called it; This wasn’t just any ol’ party; It was math-time, and that’s what we are doing; Make no mistake about it; You will learn math by the end of this. Many students were sharing themes. I praised “Pajama Day” and “Electronic Day”, but redirected to coming up with events that actually take up time. “We can make crafts wearing pajamas or with electronics, but it is the building-of-the-craft that takes up time,” I explained. So that the students felt heard, I wrote the theme ideas on the side.

IMG_3458
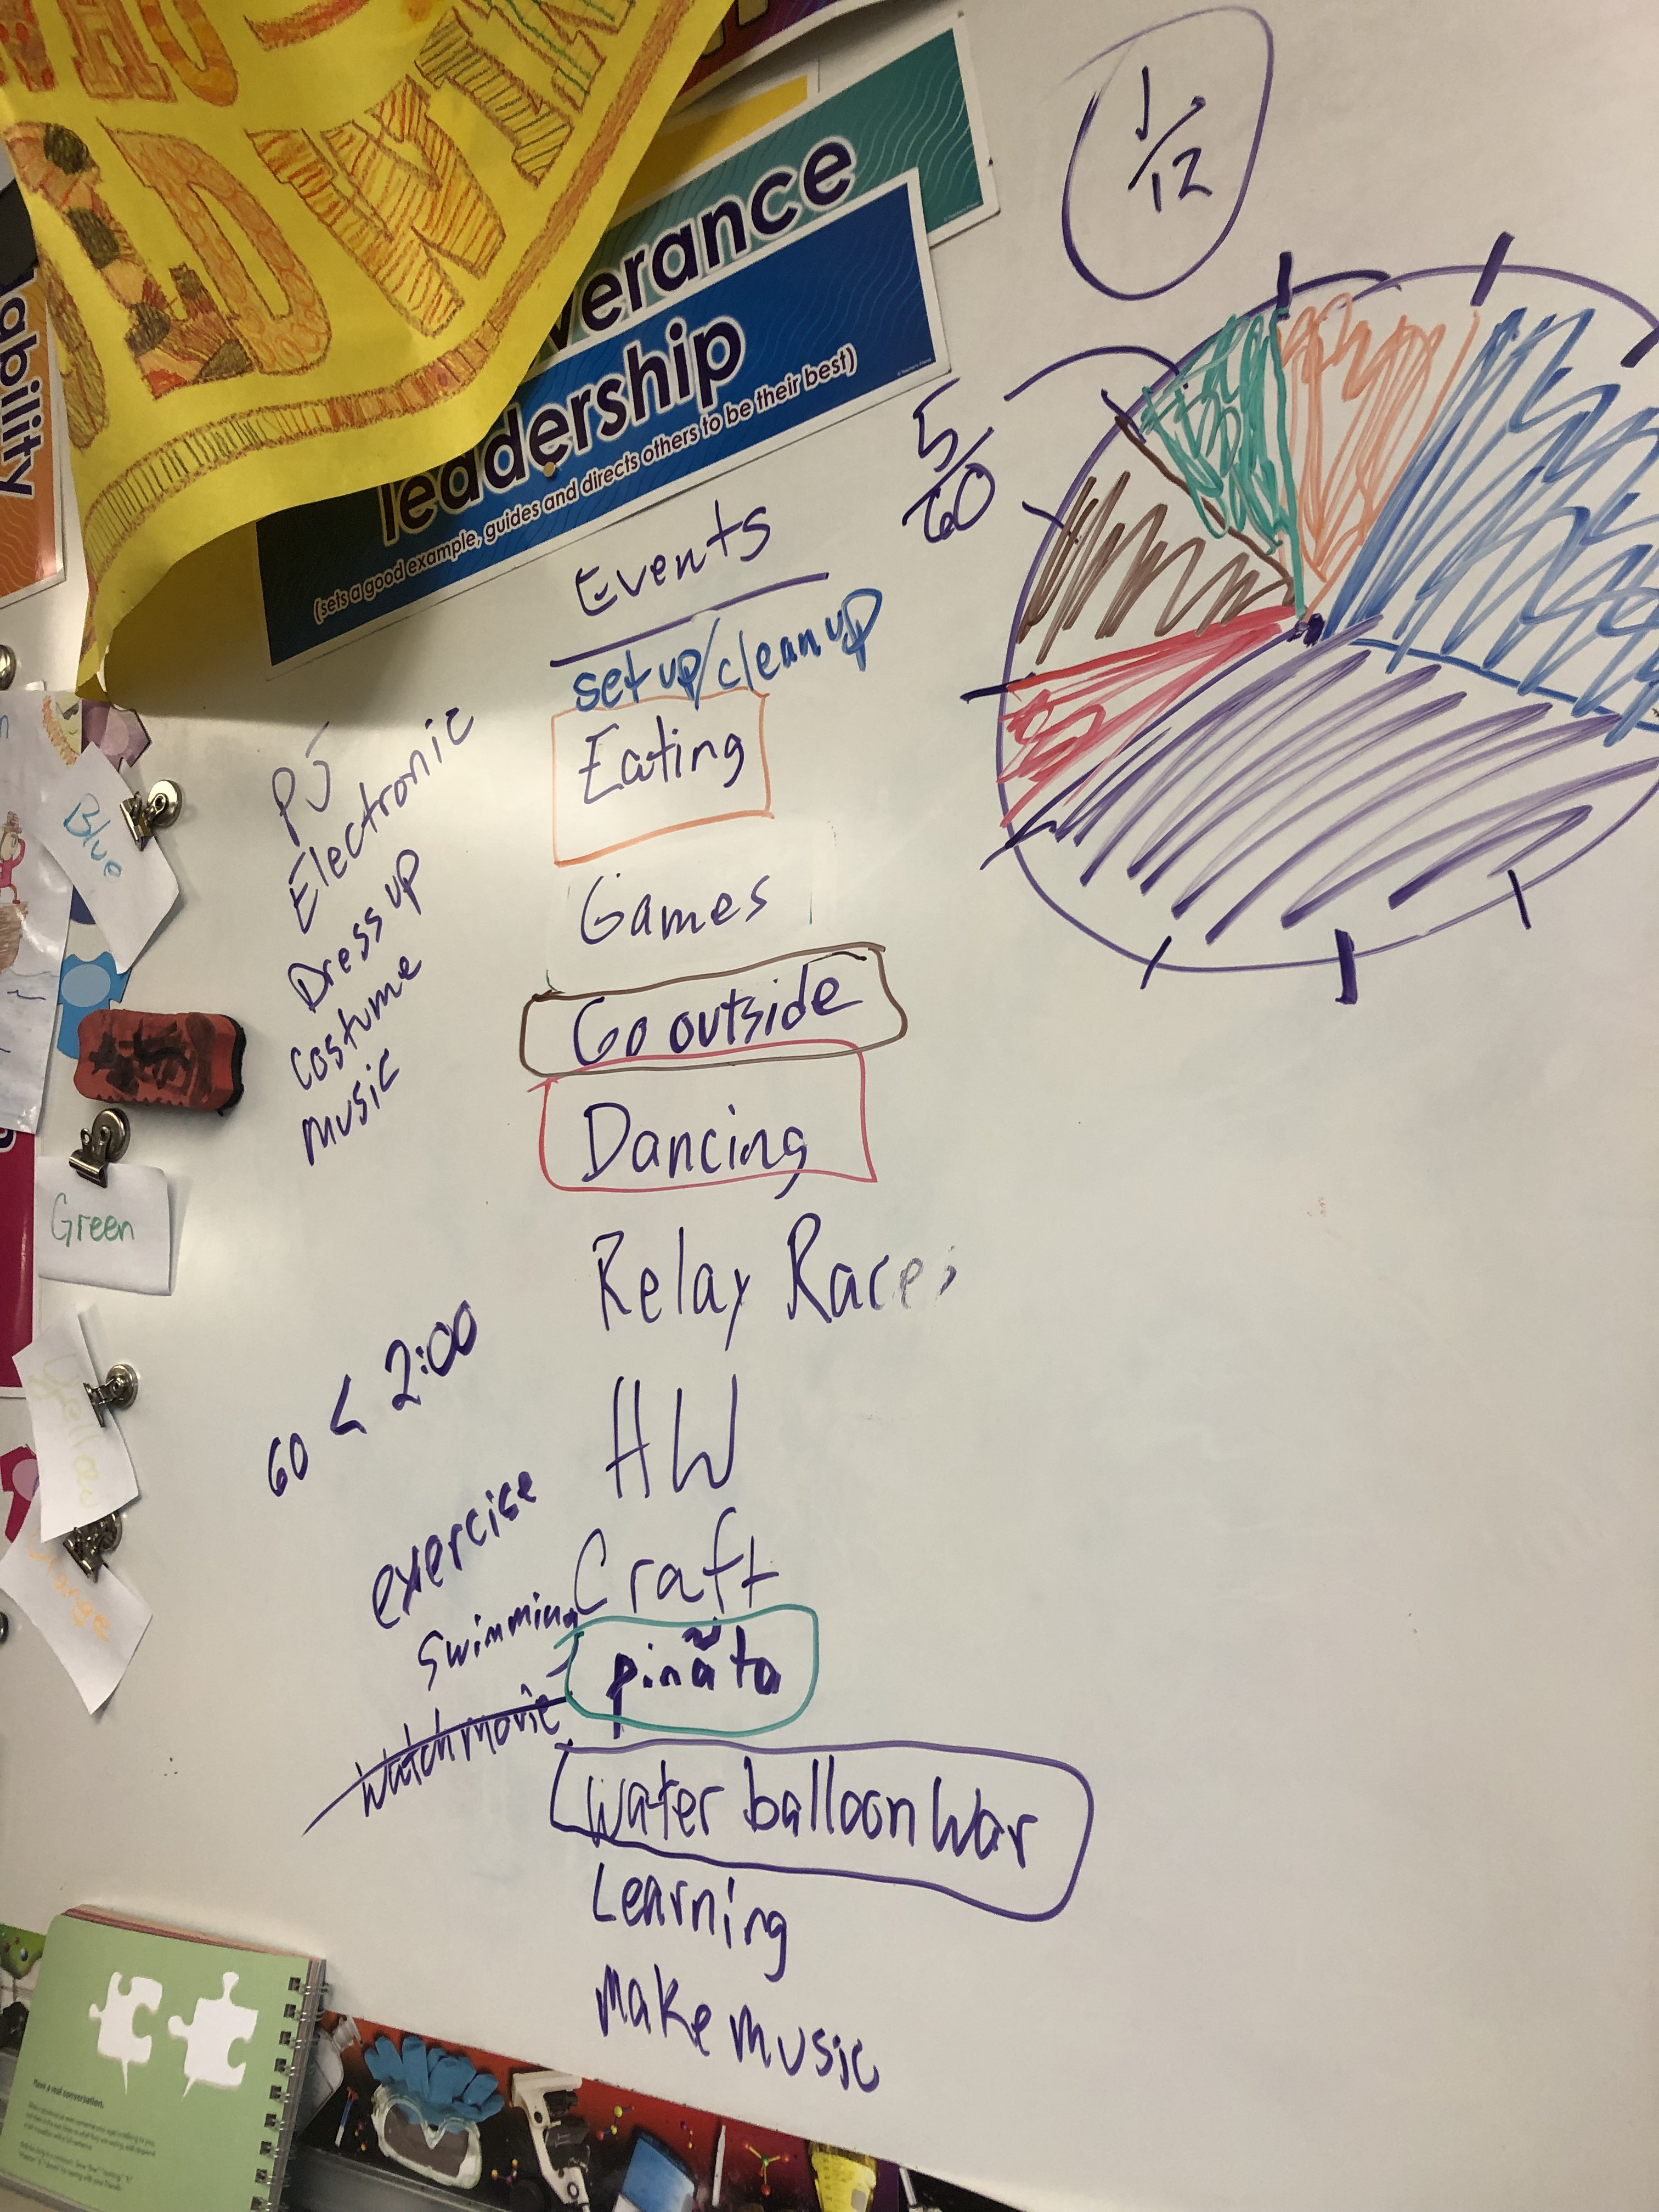
During the brainstorming time I was building rapport. Not between myself and the students–that happened in September, and I had plenty of it–but between my students and the subject matter. Remember, I am teaching them math through all of this! The way I see brainstorming, it is like student ability: Every kid can do the math, some faster, some easier, some needing patience, help, and additional explaining. In my brainstorming sessions, every idea is acceptable. This makes it fun and funny, also. When a kid suggests a water event, I say, “Did you just say No-holds-bar-water-balloon-war!?” The classroom erupted… and the ideas poured in like the water filling those metaphorical balloons. Just as a teacher needs to redirect thought to shape learning, I rephrased student ideas to write a list of potential party events on the whiteboard.

Next, I drew a circle with ticks or lines that made the circle look like a clock. But, I didn’t write any numbers. I pointed out that there were 12 increments. Students mentioned that it resembled a clock. I agreed, but told them that this was a measurement tool, instead. I asked how much each segment was worth, reviewing our fraction sense: one increment was a unit fraction of 1/12. “If the circle represented 60 minutes, how much was each segment worth?”

“Five minutes.”

That being established, we worked together, discussing how long the events might take. Students made suggestions as to which events we would want to have in our party. As students shared ideas, I filled in the pie graph. (I didn’t tell them that this is what the circle was, until afterward.) “Wait a minute, we have a lot of fun things planned, but what about set up/clean up time?” I inquired. “It’ll take some time to fill up enough water balloons to have a 20 minute war! And, we better plan on cleaning up all of the debris.”

As I filled the pie graph I asked questions like, “How much time do we have left?” And, “What fraction of all of our time have we used up?” Here is a tough one: “Of the time that we have planned, what fraction is eating?” This forced them to come up with a new denominator. You better believe we reduced our fractions to their simplest form each time, as well!

When done, I had students analyze our pie chart with questions like “Which two events equal the same amount of time as Water Balloon War?” After several of these, and Turn & Talk partner sharing, I modeled taking the information and turning it into a bar graph. First, I asked, “Why don’t we have to bring the (y axis) all the way up to 60 minutes?” Students knew to only go as high as the greatest amount of the events. After making the graph we did some more analysis: “How much more time will we be soaking each other with water balloons than eating?”

IMG_3459
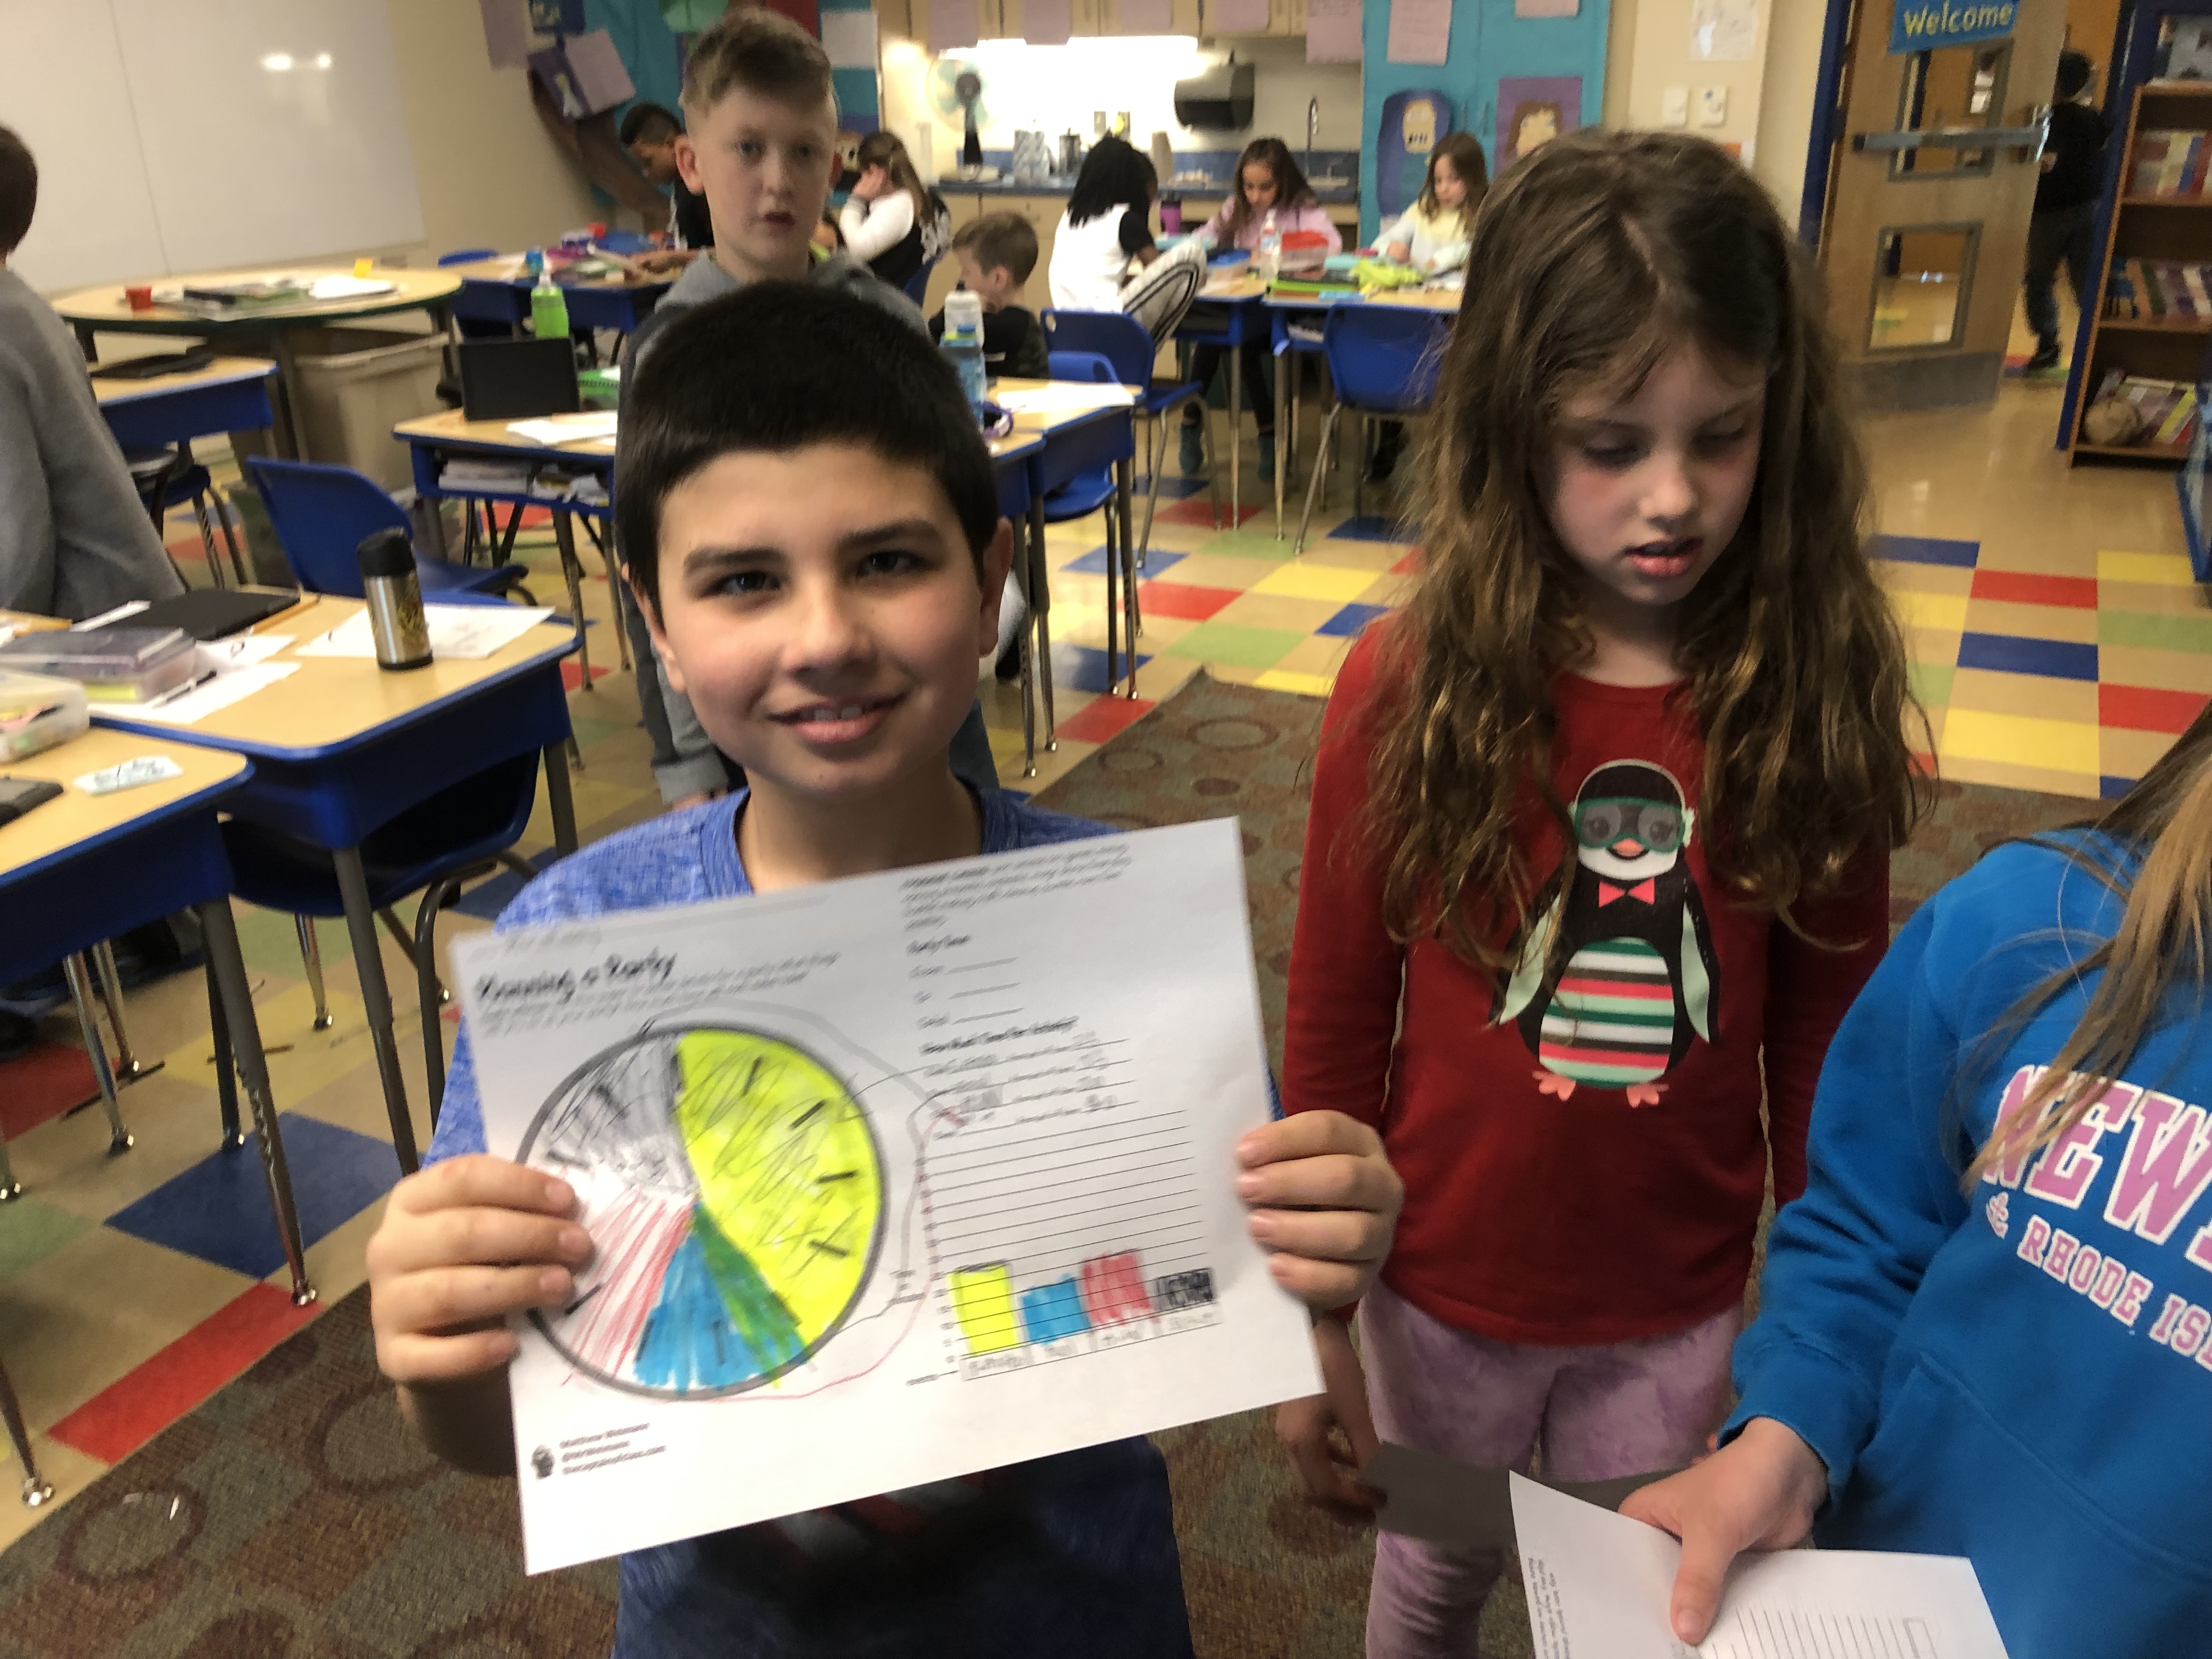
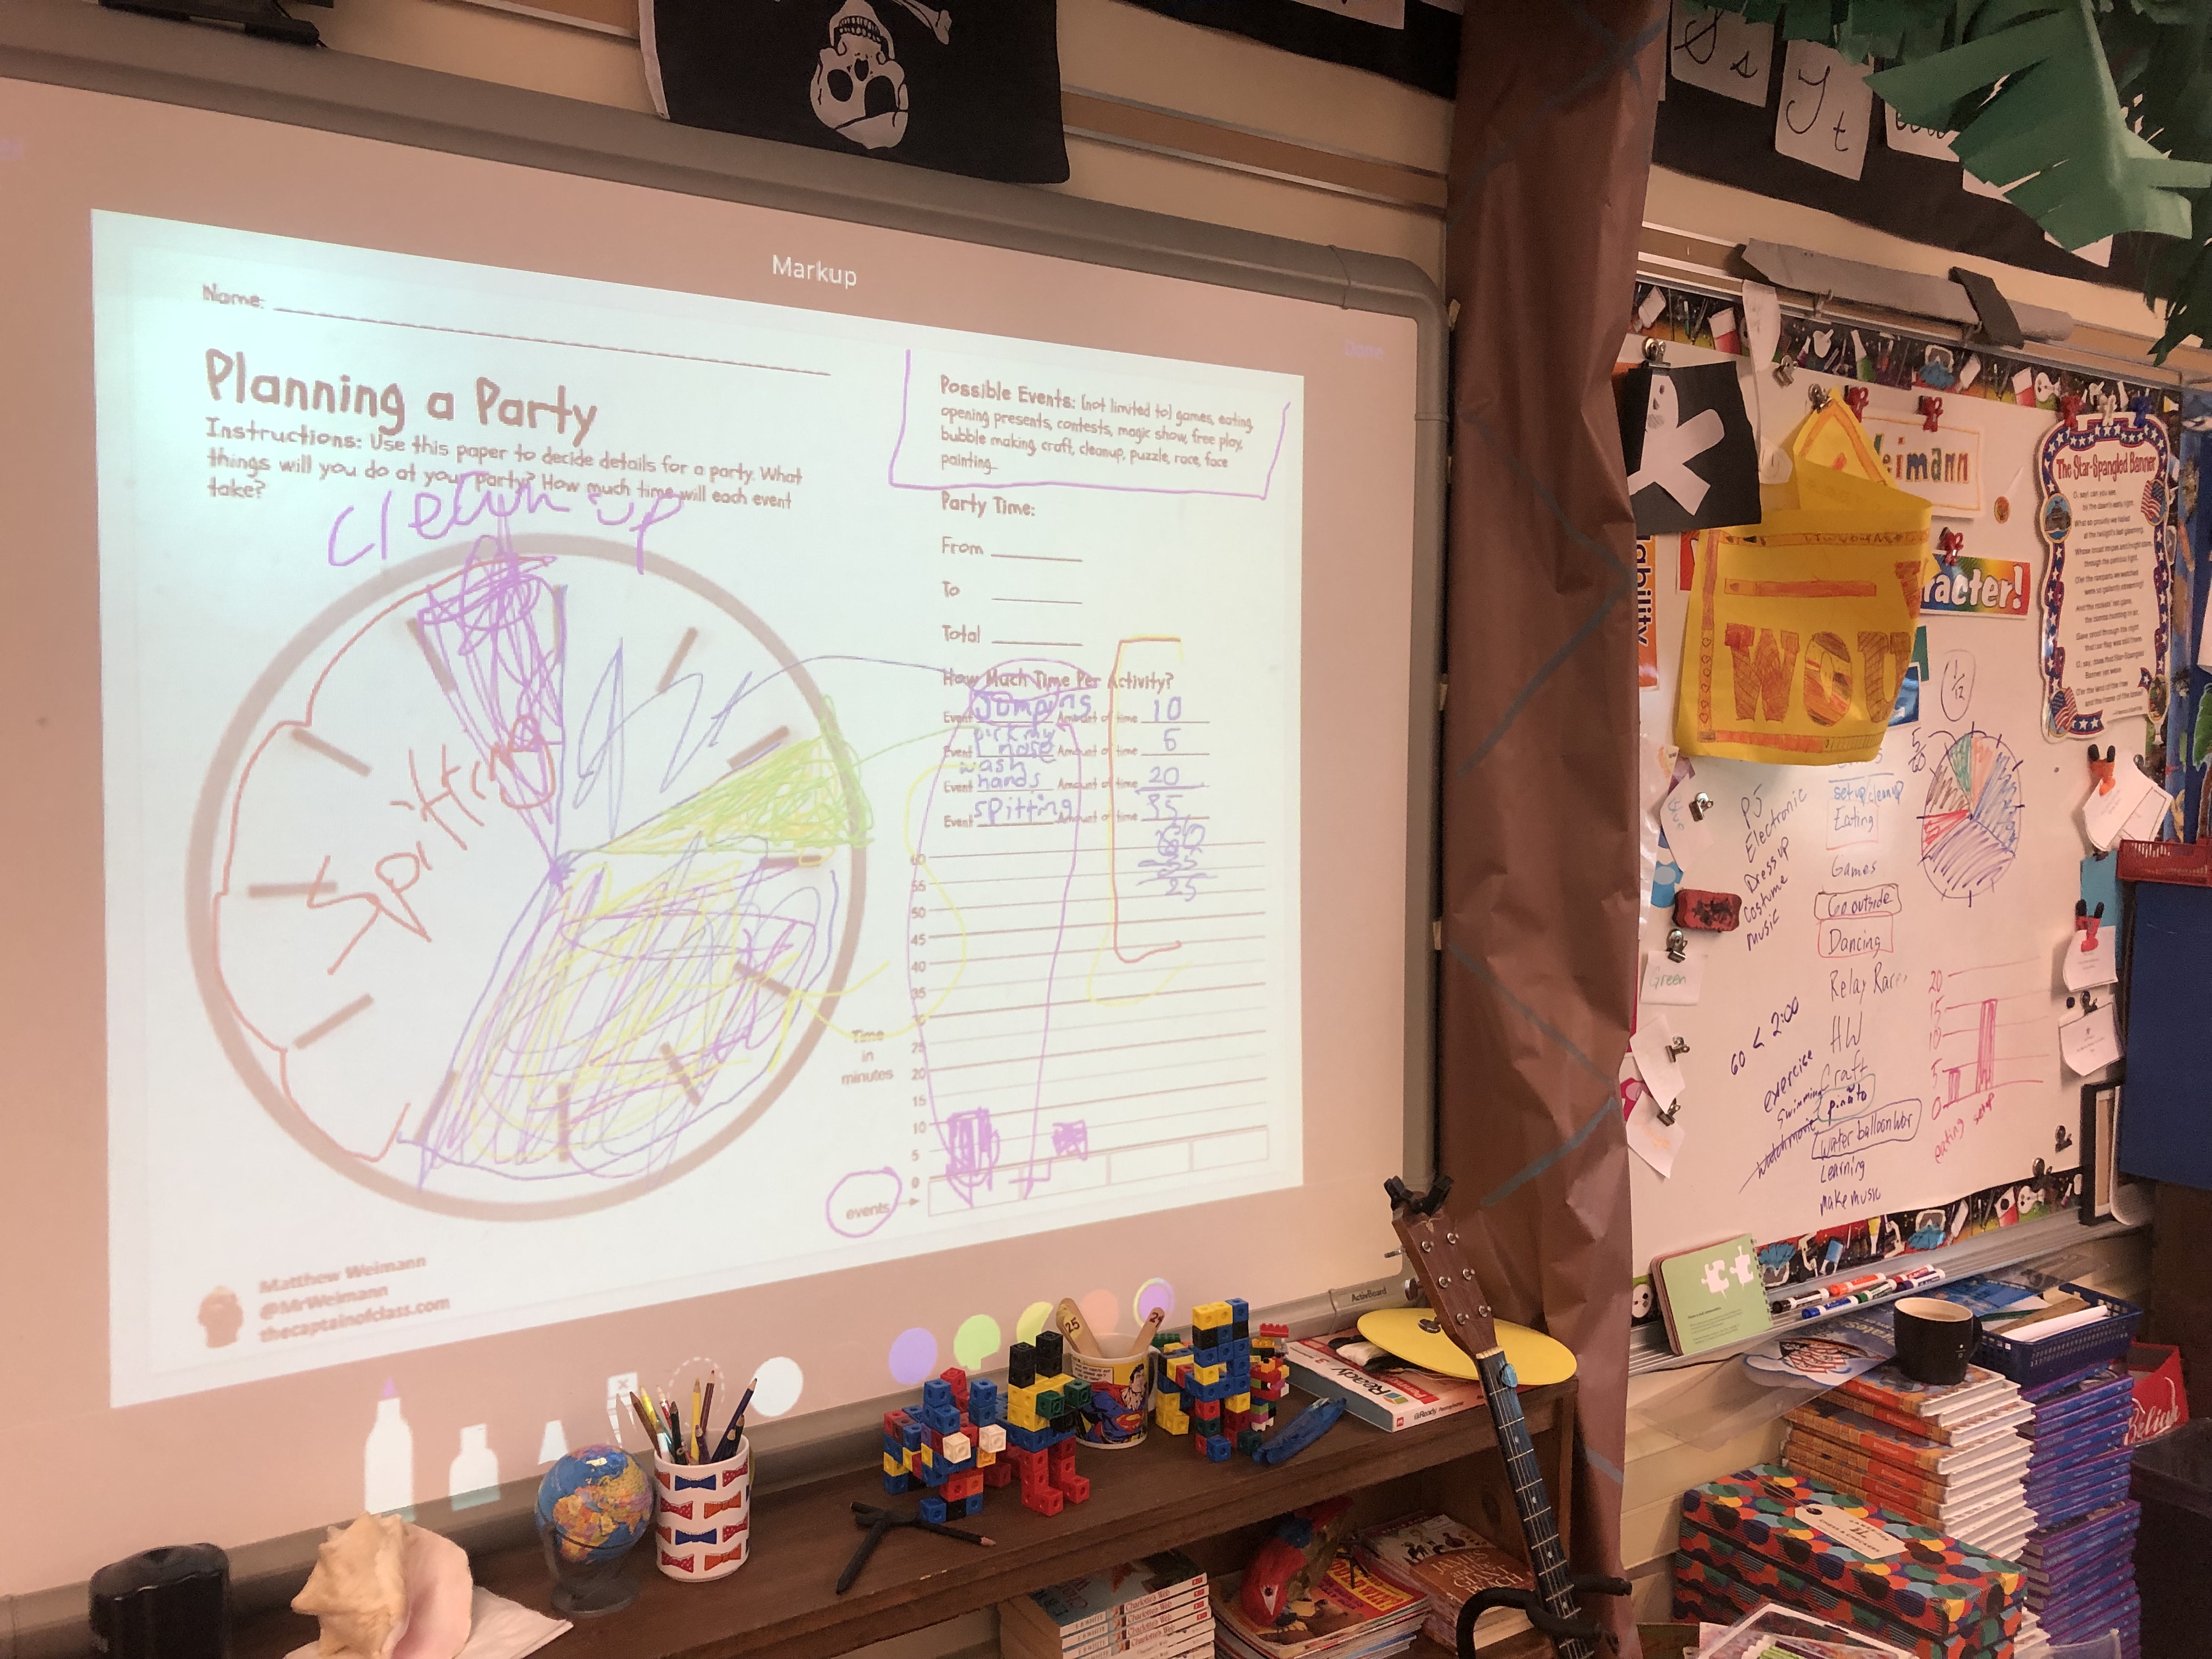
Finally, it was their turn. I showed the class the graphic organizer that I had made for them. They gasped when they saw that it was exactly like what we had just made. Because I presented it screen mirroring my iPad, I could quickly draw all over it. I showed them how they would plan events, fill in the pie graph, and make a bar graph. I told them that they weren’t allowed to use the same exact ideas that we had come up with together. They could have “eating”, but not the same amount of time. In other words, don’t copy, create. They were all cool with that. I stimulated this by writing crazy ideas on the graphic shown on the board: “Picking nose for 5 minutes, followed by washing hands for 20 minutes… because that was gross!” They loved it.

When everyone had their paper the room was abuzz with feaverish creativity. No one, not even my “I can’t think of anything to write” students, was stumped for ideas of things to do at a party, albeit “Math Party.” As students brought me their papers, they continued to ask, “Are we really going to do this?” All I did was raise my piraty eyebrows.

IMG_3461
Proud Work

Google slide with graphic organizer for convenient printing and reproduction. Please pirate this to use as much as you like:)Screen Shot 2019-03-29 at 6.00.50 AM

Burgess, Dave. (2012) Teach like a pirate :increase student engagement, boost your creativity, and transform your life as an educator San Diego, Calif. : Dave Burgess Consulting, Inc.,